It’s still not time to begin planting here in central Indiana. Our official frost-free date is May 15. For the last month adhering to the COVID-19 stay-in-place orders, I’ve had plenty of time to search garden/nursery websites to select exactly what I’d like to plant this year. I’ve found some amazing things!
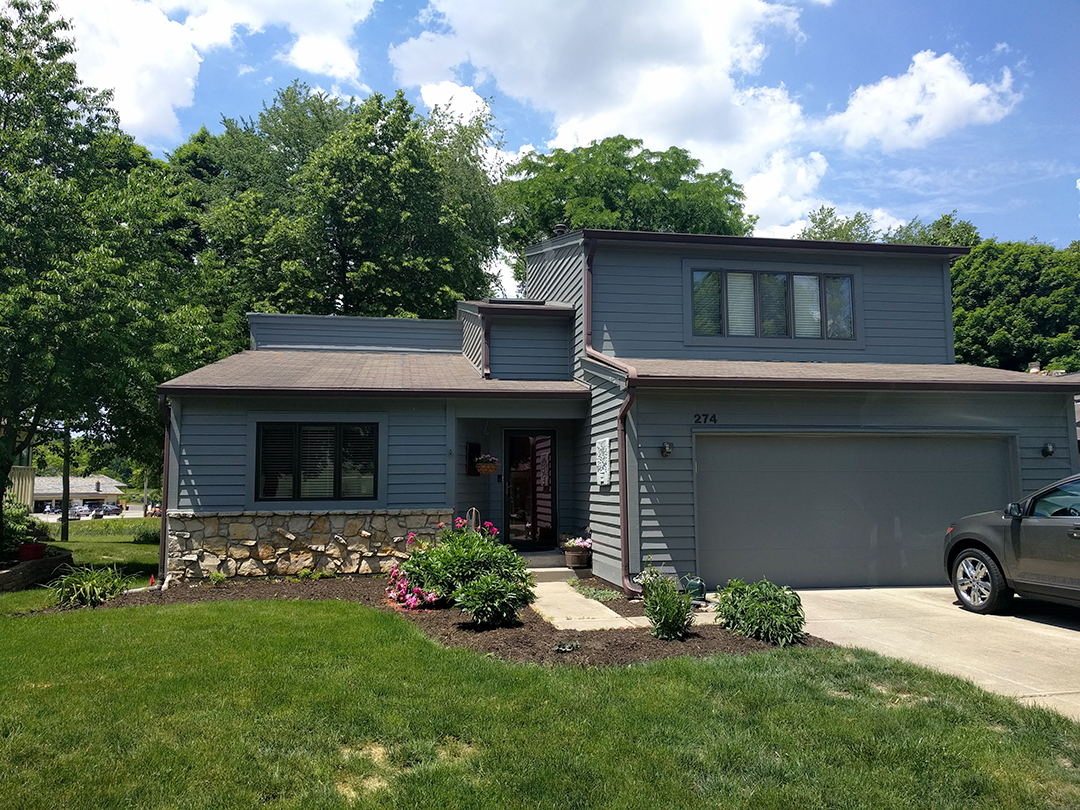
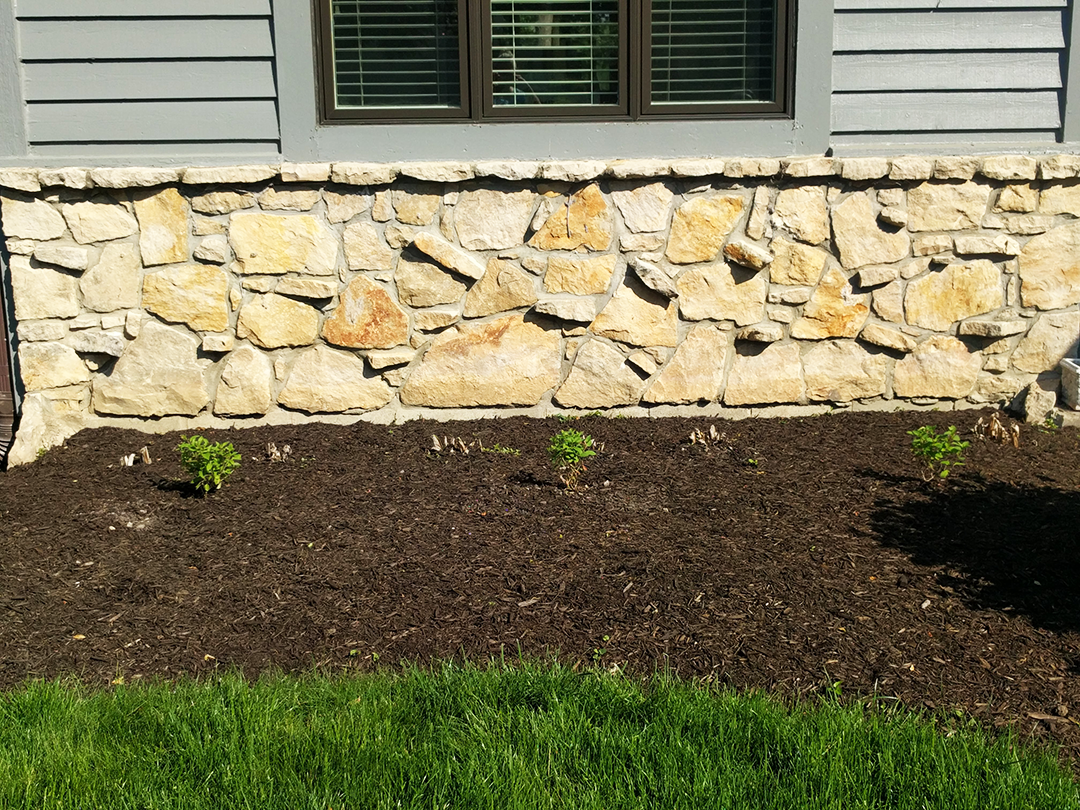
This is a picture of the front of my house, actually my condo, in 2015. I removed a small blooming crabapple from the left corner soon after I moved in. So you can see, I have lots of room for brand new beautiful flowers. I’m leaning toward using lots of perennials to keep down on flower bed maintenance, and plants that can take full sun and are drought tolerant.
You can barely see the very large peony just to the left of the sidewalk. It was a large mound covered with great big blooms. I love peonies, but their bloom time is so short and the stems and blooms bowed to the ground after a heavy spring rain. I hated to do it, but I removed it last fall. The happy part of the story is that I put the roots in a large planter, it survived the winter, and it’s beginning to sprout stems! Hooray!
Please watch this video about planting a cottage-style garden. Laura LeBoutillier is the owner of a video gardening blog, Garden Answer. She and her husband live in eastern Oregon on a huge homestead. Recently they purchased acreage next to their property that they will transform into a cutting flower garden. To say this girl has boundless energy and ambition would be an understatement. She’s always planting and always bringing new ideas. I’ve found Laura’s videos so friendly and helpful. She’s such an inspiration.
One day I was looking around her blog and found this video on planting a cottage-style garden. I was in love. Below is her video: “Tips on Planting a Cottage Garden.”
I like the idea of a cottage garden because it’s not supposed to be highly structured. That lends well to my tendency to fall in love with lots of different kinds of plants. I don’t need to plant an entire border of one plant. I can mix the border with a variety of annuals and perennials. Yep, this is going to work.
I don’t intend to use all of the plants that Laura did in her lovely garden. Like the allium – not sure about that one yet. But others really appealed to me. I’ve always loved the color combination of peach and lavender. To me, it’s soft, feminine, and pleasing. So, that’s the color palette I’m aspiring to. Here’s where I’m starting.
This is the third season for my Bobo® hydrangeas that I planted under my living room window. I’m loving hydrangeas and this variety is spectacular. You can see (above) they’re leafing out very nicely. Bobo® hydrangeas are dwarf shrubs but they have full-sized panicles that cover the branches from the ground to the top. They tolerate full sun, and have strong, sturdy branches that won’t flop over with wind and rain. They grow 36″ tall and spread 48″. I’m expecting good things for my Bobo’s this season. (Proven Winners)
Here’s another show stopper “The Lady Gardener” shrub rose from David Austin. I’ve always wanted David Austin roses. When I saw these in Laura’s cottage garden, I decided I couldn’t wait any longer. This particular rose has a strong fragrance, large full blooms, and is highly disease resistant. In addition, they’re a soft apricot color and a vigorous repeat bloomer. I’m planting these on the side of my bed along the sidewalk. They grow 4′ tall and 4′ wide. I ordered 3 bare root roses and they’ll fill in the sidewalk bed very nicely.
Illuminati Tower™ from Proven Winners is a dwarf mock orange with a narrow and upright habit. The smell from mock orange blooms is unforgettable but a normal mock orange bush would not fit into my garden. This one won’t take up too much space either – perfect for my garden. It grows 36″ high and has a 18-24″ spread. I have some sort of perennial blue salvia in the bed that blooms in summer. I’m planting Illuminati Tower™ among the salvia. That way there will be color from spring through the summer in that spot in the corner of my bed near the front door.
These are selections for lavender color interest. First is Cat’s Pajamas nepeta. Cat’s Pajamas gets only 12″ tall but spreads 18-20″. It’s a great choice for the border of my bed in a couple of places. It’s a prolific bloomer, but I may have to cut them back when it’s past its peak to encourage reblooming. It’s a small sacrifice for such a pretty plant.
My second lavender choice is Sweet Romance Lavender. Who doesn’t love the smell of lavender? To me, it’s such a clean and pleasing smell. So, I’m going to alternate Sweet Romance with Cat’s Pajamas to complete my border. Sweet Romance grows 12-18″ tall with an equal spread. It’s heat and drought tolerant. I can’t wait!
My final selection of perennials is this Siloam Peony Display daylily. It only grows 18″ tall, but it’s such a beautiful flower with peach-colored blooms – more like a peony than a daylily, according to the description. And it is a repeat bloomer if you remove the spent flower stalks before the plant begins to produce seed pods. This plant is so pretty!
I think that’s enough for now. I will bring some annuals into the cottage garden bed to fill in blank spaces until the perennials mature.
What are your plans for your flower beds this year? I’d love to hear about your inspiring garden news!
WOW! What a difference a week makes. All the flooring is installed. All the wall and island cabinets are in place. This picture is misleading. The wall cabinets are all the same color, Sherwin Williams Agreeable Gray.
I’ve received a lot of compliments on the flooring. It’s Cortec’s “Sherwood Rustic Pine.” It’s a laminate approved for installation in wet areas and is guaranteed not to swell if wet. It is beautiful! Here’s more info from the US Floors website about Cortec Plus HD™ Collection:
This collection employs Embossed In Register (E.I.R.) technology along with a 4 side painted micro bevel edge for a realistic visual unlike any other LVP or WPC product available today. The COREtec Plus HD™ Collection represents the latest innovation in WPC flooring as a superior alternative to glue-down LVP, locking LVP and Laminate flooring. The patented construction features an innovative extruded core made from recycled wood and bamboo dust, limestone and virgin PVC. COREtec Plus HD™ is 100% waterproof, can be installed in wet areas and will never swell when exposed to water. The product does not require acclimation and can be floated over most any existing floor surfaces or substrates without telegraphing that you see from other locking or glue-down LVP products. COREtec Plus HD is GREENGUARD GOLD Certified for Indoor Air Quality to help keep your home healthy and happy.
Yes, it is a beautiful floor! Not too dark. Not too light. This laminate is advertised as pet and kid friendly – theoretically no scratches. It has a gorgeous texture and simulates real wood flooring with an even distribution of color and contrast. I chose “Sherwood Rustic Pine” because it has a hint of rust. The color not only matches up well with my cabinet/island/wall color but will compliment my dining room furniture. (Ethan Allen Country French in Fruitwood finish #236.)
The flooring continues through the kitchen/dining room/living room area including a small under the steps closet, powder room and a small hallway to my laundry room threshold and door entry into the garage.
I also had the Cortec flooring installed over a set of steps that leads to the upstairs stairwell. Previously white carpet was placed in this area and up the stairway, not a clean look or happy transition. These small stairs, a passway between the kitchen and family rooms, are heavily trafficked, not only by humans but the four-legged kind as well. (I have a dog. You know what I mean.) The threshold was ugly. Even after carpet cleaning, it was only days before the threshold looked as awful as it did before. Look at the lovely step threshold! Another WOW! And much easier to keep clean.
To add some interest, I selected Sherwin Williams “Sandy Ridge” for the island cabinet color. I wanted some contrast from the wall cabinet. “Sandy Ridge” completes the look. Trash and recycle bins are in the cabinet on the far left. Next are cabinets for cutlery and frequently used dishes in drawers. Next, the dishwasher that will have a front panel matching the island cabinets. The 36″ standard sink cabinet and then a 24″ storage unit with rollout drawers in the bottom third. The island is 126 inches. The room allows for plenty of movement from the left and right of the island.
Here’s a look at the beaded board kitchen island from the dining room area.
Most of all, this entire area is bright. I have a southern exposure through the living room. There’s a window bank with a northern exposure through the kitchen window overlooking the backyard and golf course. The natural lighting, I believe, will be much welcomed. This space has become so open and big and compliments the really high vaulted ceilings in our home.
No, I won’t store my ironing board in front of the kitchen window. Ha, ha!
Closer and closer. Stay tuned for Mimi’s Kitchen Remodel Part 5.
Disclaimer: My opinions are my own. I am not affiliated with any sponsors or suppliers mentioned in this post.
I do admire folks who have the courage and vision for a total kitchen remodel. It’s no project for the weak of heart or wallet. Read: I have no courage. I have a weak heart. I found my wallet at Goodwill. Ugh!
And this is not just a kitchen remodel. It’s a transformation of my kitchen/dining room/living room configuration. Oh, did I mention we’re reconfiguring the laundry room? Yeah, I’m over the top.
Over 40 years of home ownership across several states, I have lived with kitchens designed by former owners. Of course, when I selected a house, the kitchen was the most important element. My selections were thoughtful. But, you know, there’s always something you wish you could change.
When we moved back home to Indiana in 2014, I enjoyed the kitchen in our condo, but it was serious time for an update. Not that the existing kitchen didn’t work for me. I wanted something different. I wanted our common areas to work for me, my family, and guests, especially my husband. Our kitchen was galley-style. Whenever I worked in the kitchen, Richard would come to visit, always standing in front of any drawer, appliance, sink I was in the process of using. I was constantly shooing him away, sometimes with little compassion.
What have I learned so far?
Find people you trust. This is a big deal. This is an expensive deal. The project will inconvenience everyone for many weeks.
I am blessed with some very special experienced professionals here in the Indy area helping me through the project. It can be an overwhelming undertaking without the right people on your team. I hired a kitchen designer to draw plans, Kate Horton, because I’m not an abstract thinker. Bought my cabinets from ADS in Whitestown from Bob Drollinger who is gentle and patient. Cabinets are freaking expensive – make sure you get the best quality you can afford.
My general contractor, Rick Parks, Rosewood Construction, LLC, is phenomenal. He transformed my master bath, so I have some history with Rick. He is experienced and patient. He listens and answers all my questions without coming across as a “know-it-all.” He gives good advice. He’s installing my cabinets, appliances, and flooring in addition to all the demo work, plumbing, and electricity. A one-stop-shop for me, which makes my project manageable with someone I trust to do the right thing.
Get the vibe. Trust your people instincts. If a contractor makes you feel uncomfortable, keep looking.
Noticed I mention “patience” a lot. I’m a newbie to all this remodel stuff, so patience is a quality I look for.
Have courage and ask for discounts. I’ve saved thousands of dollars simply asking “Is that the best you can do?” Even going so far as saying “I can find this cheaper online and I don’t pay for shipping or sales tax.” This is a big motivator. Big Box Stores aren’t always the solution – it may be convenient but not always the bargain you’d expect. Hiring an independent local contractor may be cheaper and you’re supporting businesses in your community.
Anxiety – Be prepared Did I make the right decisions? Are the cabinets properly configured? What about lighting – what is too much or not enough? The biggest concern of mine was to have proper flow through the kitchen/dining room for my very helpful accommodating family. I’m doing an open concept so the entire space will be kitchen/dining room/living room in one continuous design. My plan also includes room for Richard to sit at the island side of the kitchen to allow him to keep me company without getting in my way. YES! However, mine is an expensive transition – am I making the right decisions?
Self-doubt is inherent in an undertaking this size. Have faith. Be open to suggestions. Don’t be afraid to mix up the plan if you have second thoughts. Ask questions. Work with your professionals – good ones sincerely want you to be happy with the end product.
I’ve mulled over my transition since 2014. I’ve researched online and with consultants. With my sister and friends who are experienced remodelers. With my husband who ultimately has to live with my vision and won’t complain – he’s a good man.
Let’s begin at the beginning.
Here’s a blast from the 2014 past. This is the area we’re redesigning.
Holy cow! All that gold paint had to go! This side of the condo houses our kitchen, dining room, and living room. It’s one HUGE room, 35′ x 18′ at least, with tall vaulted ceilings. It’s one reason I fell in love with this property. The kitchen is on the other side of the half wall with a 24″x24″ passthrough above the kitchen sink. Well, okay. Let’s open up this space!
Here’s what my kitchen/dining room/living room looked like in 2014 after painting.
What a dramatic difference, eh? I choose Benjamin Moore’s “Revere Pewter,” because it is one color Candace Olson loves as a great neutral/greige. A little on the green-taupe side, I love this wall color.
Okay. I’ve got lots more pictures. Follow our progress with the links below.
I don’t crochet, knit or sew as much as I used to, but there’s something comforting sitting on the chaise of my big yellow family room sectional with some project in my hands.
When we bought our condo in Noblesville, I had no idea what color to paint the rooms, and all the rooms were going to be transfixed from garish bright gold wall paint already on the walls to a civilized taupe, and taupe green. (Benjamin Moore Revere Pewter and Sherwin Williams Chat Room). I figured they’d be easy colors to work around because they popular neutrals.
Now, two years before I bought the condo, my sister and I were shopping fabric outlet stores in Pennsylvania when I discovered this great drapery fabric at a Calico Corners outlet. I fell in love with the eclectic spatter pattern, and the colors. Kinda reminded me of Jackson Pollack – I had to buy it. Peach and turquoise, rusty-brown and yellow, I couldn’t resist. There was only a little over a yard of the fabric in the store. Ever the optimist, I searched online fabric outlets and was able to find an ample supply Fabric Guru, where they sell all types of high-end drapery fabric at good prices, and shipping is reasonable.
So, now I have my lovely drapery fabric, and get stalled when I can’t decide on a suitable window covering style. My family room is very long with a gas fireplace between a bank of windows. I have wooden blinds covering the windows now, but I still need padded cornices or full-length draperies. The room is transitional, not too modern and not too traditional. I know the fabric will bring the room together once I make a decision and get my act together. My sis found a perfect striped accent fabric to make pillows. Awesome!
Last year I was strolling through a yarn shop in Noblesville, and came across the colors I wanted for the family room throw. Cream, lemon yellow, dark turquoise, light turquoise, peachy orange, medium gray, and a rich dark brown.
The pattern for the throw is real simple:
Using one color, crochet two rows of double crochet.
The third row you begin a simple 3-double crochet shell stitch.
Begin the third row with one double crochet. Skip the next two stitches. In the third stitch, make 3-double crochets in the same single crochet. *Skip two single crochets, make 3-double crochets in the single crochet, skip two single crochets* and continue the pattern all the way across.
4th row, double crochet in the first stitch, *skip two double crochets, make 3-double crochets in the same stitch, skip 2 single crochets, and make 3-double crochets in the same stitch* across until you reach the end of the row.
Now, it’s time to switch colors. Choose color combinations are pleasing to you. I used seven different colors and used 3-100 gram balls of each color in Cascade Superwash DK weight, so the throw wouldn’t be too heavy, and it would wash beautifully
My throw is roughly 60″ long x 42″ wide. Probably too big to be called a throw, but it’s going to look great on my big yellow couch.
As a little extra something, something, I came across the Hopeful Honey website recently. Olivia is an avid knitter and crocheter. She has lots of great tips. What I really like best are her YTube tutorials on how to work specialty stitches. And she has some great free patterns for women, men, and children. Check her out!
Working on an infinity scarf next!
Follow Mimi!
We use cookies to ensure that we give you the best experience on our website
Close