I hope all of you enjoyed a fabulous Thanksgiving holiday! As promised, here’s is a recap of our menu, our results, and a turkey story – everyone has one, I’m sure.
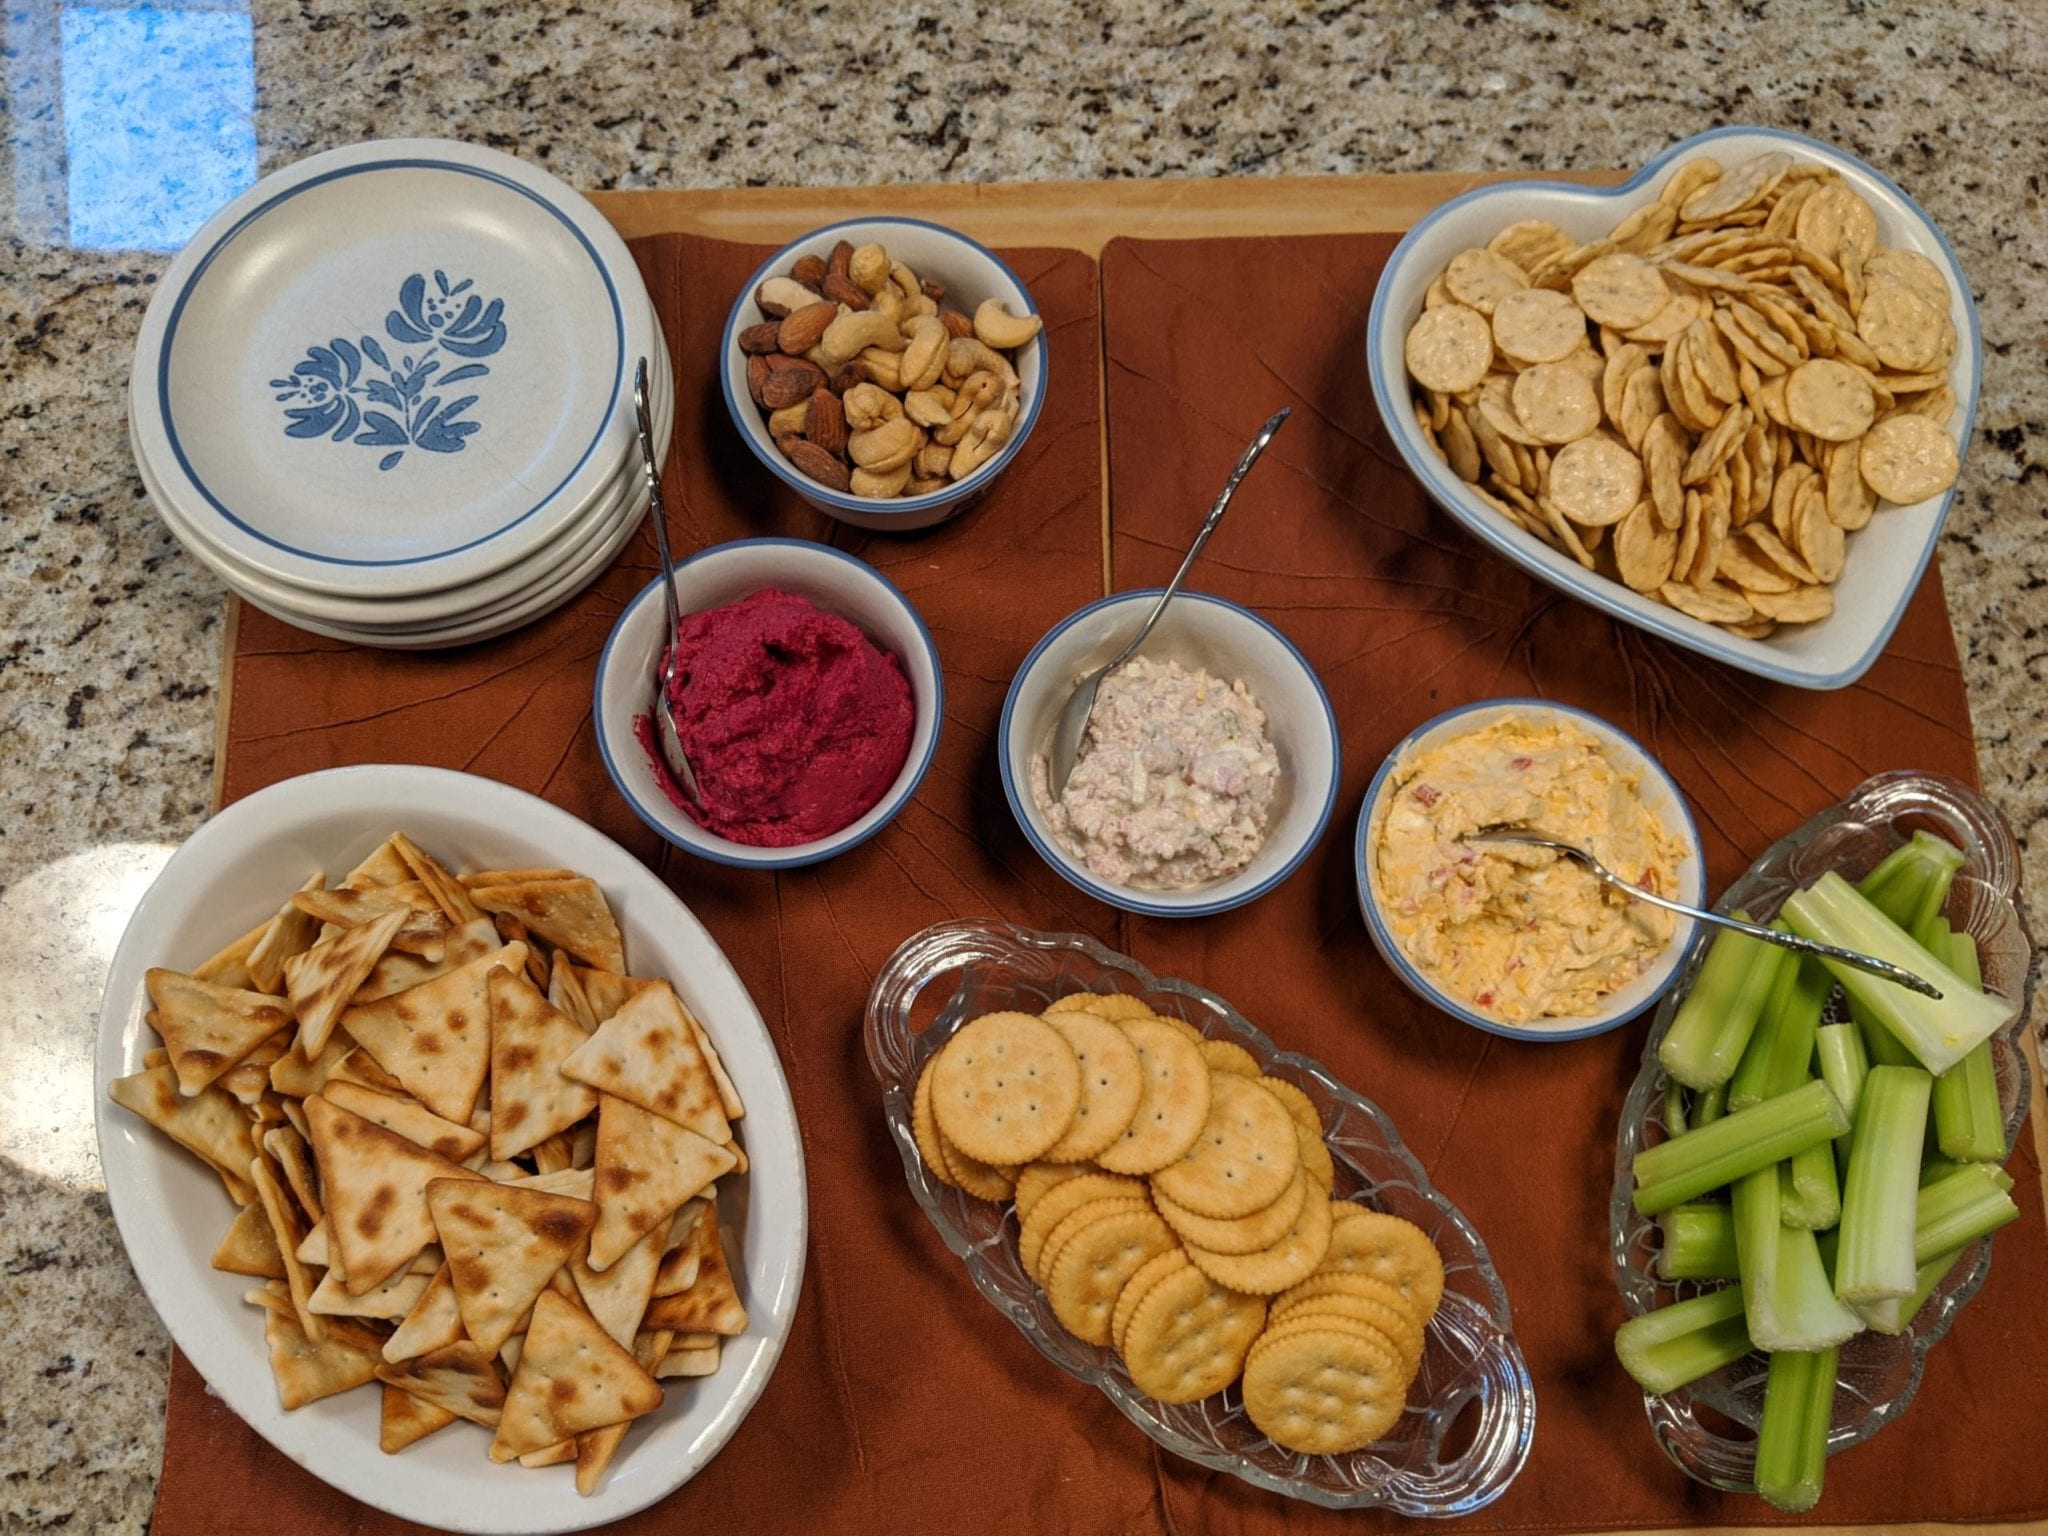
Here’s the appetizer board we put together to get everyone started. No matter how I promise and plan for a 4:00 dinner, something always comes up to delay our meal. It’s nice to have a few things to snack on before the meal is on the table and ready to serve. It’s not a lot. Just a little nosh to keep hungry guests at bay while I’m making gravy and piling food in serving dishes.
The star of the show this year was the Roasted Beet Hummus – a recipe I found at Half Baked Harvest (bowl upper left). Brock, my son-in-law, and I are the only beet lovers in this family, but everyone thought this hummus was outstanding. It’s bright to look at and brightly flavored. I mean, you barely know you’re eating beets. I didn’t follow the recipe to the letter, however. The grocery had small fresh beets in a bundle of three, so instead of two, I used three. I didn’t have almond butter on hand and the recipe calls for only a couple of tablespoonsful – not enough to justify the cost of almond butter. So, I threw in 1/4 cup of roasted pine nuts instead. Also, it calls for two cups of chickpeas. Well, two 15oz. cans of garbanzos drained and rinsed is about 2 1/2 cups so all of them went into the food processor. Tahini is a must for hummus recipes and I keep a small jar in my pantry. Either make a lot of hummus and use up the tahini or try this recipe for Crunchy Asian Noodle Salad or both!
The center bowl is filled with Ham Salad Spread, a recipe I’ve made for ages and is quickly assembled in a food processor with ham chunks, hard-boiled eggs, diced red onion, sweet pickle relish, and then mixed together with mayo – YUM! And the third bowl is filled with Pimento Cheese Spread from The Pioneer Woman.
All three spreads are perfect on crackers or slathered into the hollow of a piece of celery. We had pita chips, Ritz crackers, and these little rice crackers I found at Trader Joe’s. The rice crackers are perfect because they’re small – no heavy loading – light and very crispy. There’s a lot of them in a bag, too.
In all the years I’ve roasted turkeys, I’ve never had one that was completely frozen on Thanksgiving morning – NEVER – until Thursday last week. Yep, woke up, took the bird from the garage refrigerator, and the darn thing was a solid block. How did that happen?? Jessica and I put it in the refrigerator the Friday afternoon before. What on earth??
I started the cool water-bath thaw method until I read on the Butterball website that it would take nine hours to thaw. Oh NO! It’s Thanksgiving morning, for cryin’ out loud! I’m grateful my son, Joseph, was resting on the family room couch after working an overnight shift and overheard my panicked telephone call to my daughter. Jessica said Kroger had fresh turkeys for sale on Wednesday, so she suggested I start there. Joseph rallied and drove me to the grocery where we found fresh Butterballs for 69¢/pound. Hallelujah! There in the cooler was a 19-pounder with my name on it.
I was back in business. All I had to do was heat the oven, slather butter between the skin and flesh. salt & pepper, and off we went. I did stuff the bird’s cavity with a quartered orange, lemon, onion, and garlic cloves. The house smelled phenomenal, just like it should on Thanksgiving. And it was the moistest turkey I’ve ever roasted.
I’ve come to the conclusion that buying a fresh bird a day or two in advance is not such a bad idea. First of all, you don’t have a 20-lb bird taking up precious refrigerator real estate for days and days. And it’s a guarantee that the turkey, while cold, will be thawed and ready to roast Thanksgiving morning. Lesson learned.
What makes this cheesecake so special? Well, it’s delicious for one thing. It’s so easy and quick to put together, and is a guaranteed “no-brainer” recipe with a satisfying mouthfeel sure to please guests. It’s a great substitute for traditional pumpkin pie.
You can bake it the night before, cool to room temperature, and stash the cheesecake in the refrigerator the night before to chill.
Tieghan Gerard uses dairy-free almond cooking milk. There is no crust and only 1/4 cup of all-purpose flour in the batter which can be switched out with gluten-free flour. So it’s perfect to serve to those with dairy and/or gluten food allergies or sensitivities. If you don’t have to worry about that, you can substitute heavy cream or evaporated milk in equal amounts for the almond cooking milk.
Additions I didn’t mention in my 2019 Thanksgiving menu post:
Here in the Midwest, lots of families serve homemade egg noodles drenched in more turkey gravy as a side dish. This was my first year to try that. Why not? Noodles, mashed potatoes, stuffing, hot homemade rolls – what’s one more carbohydrate? And, yes, we did have the obligatory green vegetable – Brussel sprouts.
I made a cherry pie because my grandsons love cherry pie, and an apple crisp because a local produce market had the largest and most fragrant apples in their shop the day I visited. Yes, we had three desserts.
Any of these recipes would be excellent choices at Christmas, too. The beet hummus would be a cheerful and tasty addition to any appetizer or charcuterie board.
If you’re invited to a holiday party or open house and need a pitch-in item, try the pumpkin cheesecake. You can decorate the top with piped whipped cream. Or try what Teighan did and make little pie crust cookies dusted with cinnamon sugar as cute ornaments on the top.
Tips for a Less Stressful Holiday
Whatever your holiday celebrations – large, small, community configured – remember to have fun. Hosts burden themselves with unrealistic expectations for the “perfect” gathering. I give you permission. Free yourself. Do what you like. Do what you enjoy! After all, I am a Mimi with so much history. Yes, I am an older Mimi so, I’ve learned the hard way. Rely on your family and friends to bring up the rear. Learn to delegate.
Have Tips or Tricks to Share?
I’d love to learn about your Thanksgiving success stories! What tips and tricks do you use for a less hectic holiday?
It doesn’t get any easier than this. Lemon Pasta is inexpensive to make, easy and quick to prepare, and is a delicious lemony, cheesy pasta delight. Lemon Pasta is a perfect main dish or as a side dish served alongside any lightly grilled protein.
I discovered this recipe watching Hoda and Kathie Lee while I was getting a mani/pedi. Devine intervention. I love lemon, in whatever form it comes. Lemon has such a pleasing and uplifting scent. Any lemon carcasses are put through the garbage disposal for a lingering, fresh-smelling aroma. Take a look at a lemon-sour cherry coffee cake I love to bake: Macrina Bakery Lemon Sour Cherry Coffee Cake. Seriously delicious.
The ladies were cooking up dishes made with lemons and the Alberti twins, John & Tony. While downing shots of Limoncello between bites of pasta and Limoncello cake. Looked like a very happy show! Then, Huda and Kathie Lee always have a happy show.
Anyway, I can’t take credit for Lemon Pasta. John Alberti gets all the credit. (As well as the photo.) It’s such an easy and basic recipe. I’m certain every Italian nonna around the world has made something very similar, if not the exact recipe. Don’t leave out the fresh basil. In addition to lemon, I love the flavor and smell of basil – a refreshing and sensory herb. A girlfriend of mine sent me home with a hunk from her garden that I used here. Thanks, Cindy!
I prepared half the recipe for us served with a leftover salmon filet and a big green salad. No garlic bread, unless you love your carbs. There are plenty of carbs in the pasta. (I love carbs, but we need to watch our dietary intake. Garlic bread is now on our “I have to have now it or I’ll die” list.) Or it can be made with low-carb pasta or pasta made from quinoa or whole wheat. There are so many options available now.
Get out the olive oil, lemon juice and zest, basil, and linguine. Buon appetito!
It doesn't get any easier than this. Lemon Pasta is inexpensive to make, easy and quick to prepare, and is a delicious lemony, cheesy pasta delight. Lemon Pasta is a perfect main dish with a big green salad, or as a side dish served alongside any lightly grilled protein.
Author: John Alberti
Recipe type: Main
Cuisine: Italian
Serves: 4-6 servings
Ingredients
1 pound linguini
⅔ cup extra-virgin olive oil
½ cup freshly grated Parmigiano Reggiano cheese
½ cup freshly squeezed lemon juice
1 Tablespoon lemon zest
⅓ cup chopped fresh basil, plus more for garnish
Salt & Pepper as needed
Instructions
Bring a large pot of salted water to a boil. Cook linguini according to package directions to slightly less than "al dente."
While the pasta is cooking, whisk the olive oil, lemon juice, lemon zest, and basil in a large saute pan. Heat over medium heat.
With tongs, lift the cooked pasta out of the pot and into the saute pan with the lemon sauce. Use tongs to integrate the sauce and pasta. Remove the saute pan from the heat.
Add grated Parmigiano Reggiano. Lift with tongs until incorporated. Add the fresh basil, and toss again to incorporate.
Serve with extra grated Parmigiano Reggiano and fresh basil.
Notes
Lemon Pasta may be served as a main dish with a big green salad, or as a side dish for lightly grilled fish or meat. Substitute any pasta alternative for linguine: quinoa, bean, gluten-free, whole wheat. Cook according to package directions.
3.5.3251
Copyright, At Mimi’s Table 2013-2018, All Rights Reserved
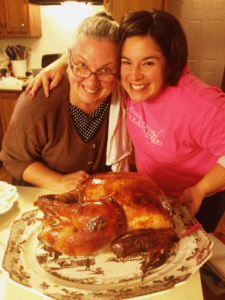
I have always prepared the Thanksgiving meal, even if it was cooked at my daughter’s house. Last year, I roasted the turkey at my home and carted it over to Jessica’s house. She prepared the side dishes.
This year, Jessica decided to stuff and roast the bird herself! She and I discussed techniques, but it was all her doing. Could not have been prouder of my girl! She used the same recipes we’ve created for 20 years or more. (Stuffing recipe is 50+ years old.) Hers was a much better turkey than I’ve roasted for a long time. Moist, beautifully browned and juicy.
For your dedication and bravery! For your outstanding skills! For a WONDERFUL BIRD! You are beautiful and bold!
I, your mother, present you with the 2017 Turkey Cup!
Congratulations, my darling. You deserve it!
What were Jessica’s tricks of the trade, you may ask?
She didn’t brine her turkey. (Egads) She bought a lovely 21-pound Butterball, which is self-basting. She used a Martha Stewart concoction of white wine and butter to baste her turkey during the first two hours of roasting. (3 sticks of butter melted in 1 bottle of Chardonnay or Sauvignon Blanc held warm on the stove burner as the basting continues.) Cheesecloth is drenched in the wine/butter mixture and the cloth is gently placed over the breast and drumsticks during the first two hours of roasting. Then the cheesecloth is removed. And in addition to her roasting – she tented the turkey breast and tops of the legs in between the first two hours to keep the skin from browning too quickly. Genius!
Jessica also put a piece of aluminum foil in the roasting pan underneath the turkey so the bird didn’t flop around during the steady rotation and basting in the pan. GENIUS!
And it was much easier to collect the drippings for making gravy. We ran warm turkey stock over the pan drippings to release the tasty brown bits and added it to the gravy pot. Phenomenal. GENIUS!
Awesome Thanksgiving meal. I’m looking forward to next year! Love you!
I adore any sort of pie. Sweet or savory, it makes no difference. And I love blueberries.
My mother made the best pie crust for 60 years. For a two-crust 9″ pie it was 2 cups flour, 2/3 Crisco, 2 teaspoons sugar, pinch of salt, and 4-6 Tablespoons ice water. That was it! I made her crust for years until I got my Cuisinart and read online that all butter was a better way to go.
Phooey! I over mixed in the food processor. Beside the fact that butter is more expensive, I didn’t care for the flavor of a butter crust. I know! Right? What’s wrong with me?
Lard makes everything better, especially pie crust. So I’ve settled on a new mix: 2 1/2 cups flour, 1/2 cup cold lard, 1/2 cup vegetable shortening, 1 Tablespoon sugar, pinch of salt, and 5-7 Tablespoons ice water.
My kids and grandchildren were coming over for dinner Sunday. I always make dessert for a Sunday meal, particularly because the boys were coming. I love to spoil them!
I decided a slab pie would do the trick! Sweeten us up and leftovers! I wasn’t in the mood to make pie crust, and I’d have to make a lot for such a big pie. Alas, I reverted to refrigerated store bought pie crust. And fresh blueberries – how simple and quick is that. Just rinse ’em off and they’re ready to be baked up into a scrumptious pie!
Here’s a tip!
If you decide to make this delicious slab pie or any slab pie, you’ll need two boxes of refrigerated pie crust. When you roll it out, place one circle on top of the other, and then roll it into a rectangle. And do the same for the top crust.
It was the perfect size. More than enough to drape over the sides of a jelly roll pan (15″x10″), and to crimp the edges.
A college roommate of mine bakes pies and desserts for her restaurant. She told me that store bought crusts are made with lard. Wow! That does make a difference. The finished crust is flaky and browns beautifully.
Admittedly, over the years I developed into a pie crust snob, believing homemade ones were the only way to go. After all, Mom did it all her adult life. I’ve had to rethink my attitude about refrigerated store bought pie crust. Think of it this way – I will bake more pies! Yes!!
Let’s Bake!
Preheat your oven to 400°F.
Roll the bottom crust and place it in a 15″x10″ jelly roll pan.
Put 2-3 pounds of fresh blueberries in a bowl. Add zest of one lemon – blueberries and lemon are remarkable. Mix and set aside.
In a small bowl, mix together 1/2 cup of sugar, 1 teaspoon cinnamon, 3 Tablespoons flour (or cornstarch or tapioca flour – I use tapioca to thicken fruit pies.) Mix and pour over the blueberries. Gently mix until all the berries are coated with the flour mixture.
Pour the berry mixture into the crust. Really, I could have used 3 pounds of berries and will next time.
Roll the top crust and place over the filling and edges of the pan. Crimp along the outside. And, using a sharp paring knife, cut vents along the sides of the top crust. And cut something cute in the middle -I designed an “M” for Mimi!
Brush the top with a beaten egg. I sprinkled demerara sugar on top. You can use regular sugar, but I like the color and texture of demerara on flaky pastry desserts. It also adds a little crunch.
Bake for 30-40 minutes, until the berry juices bubble and the crust is golden, brown, and delicious.
I mean, seriously, in 20 minutes my slab pie was in the oven. Remarkable!
Try your hand at one. Don’t like blueberries, use sour pie cherries or apples, make a lemon meringue slab pie or how about strawberry-rhubarb? Yum!
During the hot days of summer, we are all looking for a flavorful, healthy and quick meal. I frequently turn to fresh seafood as an alternative to traditional grilled burgers and dogs or dinner salad.
A family favorite and crowd pleaser, you can’t go wrong with are Mimi’s Fast & Easy Shrimp Fajitas.
Oh, so simple! Oh, so quick! Oh, so DELICIOUS!!
I serve the fajitas, whether they’re shrimp, chicken or beef, with warm flour tortillas along sides of Mexican Rice or Refried Beans, and a simple green salad. As an added bonus, this dish is gluten-free, if you use gluten-free flour or corn tortillas. If you’re filled with ambition, you should make or learn to make homemade flour tortillas.Takes the “quick” out of it, but still. Some store-bought brands can be very good, like El Milagro. But like everything homemade, they’re just better tasting. I did make my own every week for many years to serve at breakfast, lunch, and dinner. Awesome!
I think my Mexican-ex-mother-in-law would get a kick out the fact that I cook so much Mexican food – mainly inspired by her. My mom would make out-of-this-world tacos, but rarely ventured out of that comfort zone. When I married, I learned so much about Carmen’s Mexican cooking. She taught me a lot. She always made her own tortillas, and she was lickity-split! Amazing!
Let’s Cook!
I like to buy raw shrimp in the 20-25/pound range that have been shelled and deveined. It makes the process simple and quick. You can use frozen shrimp – it doesn’t take long to thaw. All you do is put the frozen shrimp in a bowl and fill it with cool tap water. In about 20 minutes, the shrimp are ready to use. I plan on 1/3 pound of shrimp per person. One pound will feed three gracious eaters or two voracious ones.
Sometimes even cleaned and shelled shrimp can leave behind bits and pieces of the black vein running down the middle. I always run the tip of a paring knife down along the track to make sure the black stuff is gone. According to seafood sources, you don’t have to. But why wouldn’t you? It looks awful. And it’s good to run your fingers through the water to check for any pieces of shells wandering aimlessly around.
Rinse the resultant shrimp well in cold water, drain well, and layer on a baking sheet lined with a double thickness of paper towels. Place a paper towel on top, and pat dry. It’s good to have the shrimp as dry as possible so they’ll sear well in a hot skillet.
Now, spray the tops lightly with cooking spray. Season lightly with salt and pepper. If you want to add some spice, it’s a good time to sprinkle with any or all of your favorite Mexican spices: ground cumin, chili powder, cayenne pepper. Whatever you prefer. Set aside while you prep the vegetables.
For one pound of shrimp, I use one medium onion cut in half and then into strips. One red bell pepper, cored, seeded and cut into strips. One large jalapeno pepper, cored, seeded, and finely diced. And one clove of garlic, minced.
The next step goes quickly. Have a serving plate or serving bowl at the ready for the vegetables as they come off the heat.
Heat a griddle over or a large skillet to medium-high heat. A cast iron griddle or skillet would be ideal, but not imperative. I use a 12″ iron skillet when I’m cooking one pound of shrimp, and a larger griddle over two burners when I cook larger quantities.
Add two tablespoons of olive or neutral cooking oil to the skillet and spread it around to cover the bottom. Add the sliced onions, sprinkle lightly with salt and pepper, and cook quickly, stir-fry style, until the edges begin to brown and the onions begin to wilt. Quick cooking will help the onions keep their shape and stay crunchy.
Add the red peppers, jalapeno, and garlic to the skillet. Again, quickly stir-fry the vegetables until the peppers are heated through and the garlic becomes fragrant.
Put the cooked vegetables in your serving bowl or plate. (I use a flat oval 3-quart Pyrex dish.) Set aside and keep warm. Don’t cover with foil or plastic wrap, because the veggies should keep their bite. Covering them will steam them, and the vegetables will be mushy. Still delicious, but you know. I usually put them in an unheated oven or in the microwave.
In the same skillet over medium-high heat, layer the shrimp in a single layer, seasoned side down.
Cook for 2-3 minutes until the shrimp just begin to turn pink and a little carmelization is happening around the edges.
One-by-one, flip the shrimp to cook on the other side – 1-2 minutes max. The shrimp should be cooked through, but tender. Overcooking will make them tough. Sprinkle with the juice of half a lemon.
Spoon the shrimp over the cooked vegetables.
And there you have it!
Fresh, fragrant, juicy, steamy, delicious! And QUICK!
Here are some condiment
suggestions for the fajitas:

 In all the years I’ve roasted turkeys, I’ve never had one that was completely frozen on Thanksgiving morning – NEVER – until Thursday last week. Yep, woke up, took the bird from the garage refrigerator, and the darn thing was a solid block. How did that happen?? Jessica and I put it in the refrigerator the Friday afternoon before. What on earth??

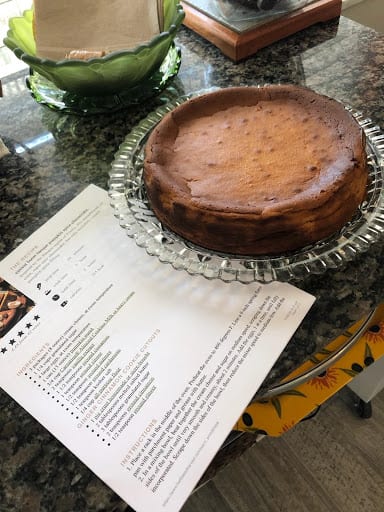 This cheesecake was another lovely surprise. Burnt Basque Pumpkin Spice Cheesecake, a scrumptious recipe from Half Baked Harvest.


 Garlic bread is now on our “I have to have now it or I’ll die” list.) Or it can be made with low-carb pasta or pasta made from quinoa or whole wheat. There are so many options available now.


