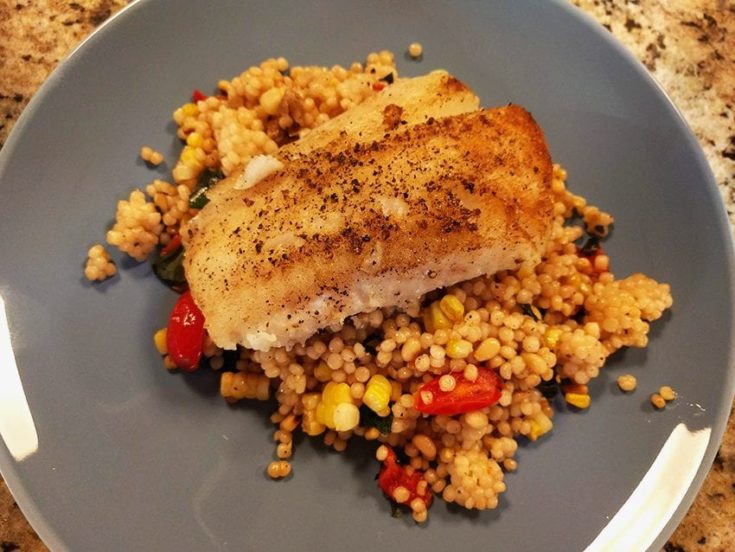
Bursting with fresh flavors from a summer garden, Pan-Seared Cod Filet with tomatoes, corn, and basil-infused Israeli couscous will become a fabulous, flavorful favorite in your quick fix menu rotation.
Fresh seafood, like these cod filets, is quick and easy to prepare. Almost any thick, white, flaky fish filet will cook in the blink of an eye. I’ve found cod filets to be very budget-friendly. Flavorful and meaty, this cod filet is the centerpiece of the dish, nestled on top of a bed of Israeli couscous mixed with a variety of fresh and healthy summer vegetables and herbs. Lots of clean flavors.
Have you ever used Israeli couscous? It is substantially larger than regular couscous. I love its chewy, pearly mouth feel. In fact, some packers actually call it “pearl” couscous. Israeli couscous cooks quicker than rice, about 10 minutes from start to finish. I like to cook mine in chicken stock, but water or beef stock would work, too.
Israeli Couscous, Giant Couscous, Pearl Couscous
Israeli couscous came onto the culinary scene in the 1950s. It’s actually pasta – don’t mistake it for quinoa – made with semolina and water. Israeli couscous was introduced by then Prime Minister David Ben Gurion to feed the influx of immigrants coming to Israel. It comes in regular form and you can find whole-wheat versions as well or tri-colored where tomato and peas lend color to the finished product. And couscous can be served cold or at room temperature, like in a salad, or warm just like any starchy side. Master Class Articles “What Is Israeli Couscous?”
I use Israeli couscous in another recipe Shrimp and Scallop Stew with Israeli Pilaf. A great recipe from Martha Stewart’s kitchen. I like to use Bob’s Red Mill brand that comes as traditional and tri-color. But any commercially available Israeli couscous will do. Common Mediterranean couscous looks almost like polenta or coarsely ground cornmeal, so you’ll easily notice the difference.
A Tip for Searing Fish Filets
I always, always blot any sort of seafood folded in between layers of paper toweling. You want the seafood patted as dry as possible in order to get it ready for a nice sear. If you don’t, there’s too much water in the fish and the filets will steam rather than brown. I do this with shrimp or scallops, too, whether the seafood is fresh or frozen. This step is especially important if you want to dredge, bread, and fry seafood, or else the coating won’t stick to the meat and the dredge or batter will fall away as it’s fried and there goes your beautiful breading burning at the bottom of the fryer. The goal here is for a well-prepared fish that will have a nice brown crust, but a moist flaky inside whether it’s seared or fried – just the way you want it. So, how hot should the pan be? I’ve found somewhere between medium and medium-high is best – not too hot. I like to warm my cast iron skillet for 5 minutes or so to make sure the skillet is properly pre-heated.
An Ode to Basil
I love, unabashedly love, basil – probably not an ode, but it’s the best I’ve got. Every summer I grow a big potful on my front porch. I run my fingers through the leaves just to come away with one of the best culinary smells of summer. Some like to use oregano or rosemary or thyme – my go-to is always basil. I prefer the distinctive almost anise-like taste and smell – fresh or dried – to just about any other herb. Personally, I think thyme is over-rated. Parsley is just so, well, bland. I can’t imagine making any pesto with parsley – not my thing. Of course, basil in spaghetti sauce is a must. And my mother used to roast a rump roast in an oven-baking baking bag simply seasoned with salt, pepper, and dried basil mixed with a can of tomato soup – out-of-this-world gravy to pour over mashed potatoes! Basil simply makes me happy.
I just got a motherload of fresh pine nuts delivered to me by my friend, Cindy, from Nut-tos in West Seneca, NY.? Nut-tos is a beloved roasted nut distributor in the Buffalo area. You know what I’ve been dreaming about – PESTO!
Three basil plants in a 14″ pot. I moved the plant to a semi-sunny area of my garden in August, and out of the stressful heat of the late summer sunshine. My plant really likes its new location – big healthy leaves of goodness.
So, while I’m high on basil, let’s look at why it’s such a healthy herb. Basil is a powerful antioxidant. It’s a good source of magnesium which promotes good blood flow, is high in Vitamin A for good eyesight, and has been shown to be a good anti-inflammatory. As part of an aromatherapy routine, basil is beneficial to relieve tension, melancholy, depression and mental fatigue. Gee, no wonder I’m so head-over-heels in love with basil. Maybe it’s what my body craves – along with chocolate, wine, and anything in a pie crust.
Yield: 4
Pan-Seared Cod Filet with Tomato, Corn and Basil Couscous
Bursting with fresh flavors from a summer garden, Pan-Seared Cod Filet with Tomatoes, Corn, and Basil-infused Israeli couscous will become a fabulous, flavorful favorite in your quick fix summer-time menu rotation. Delicious and so easy and quick to prepare!
Prep Time10 minutes
Cook Time25 minutes
Total Time35 minutes
Ingredients
2 lbs thick cod filets, fresh or frozen and thawed, cut into 4 equat portions
2 Tablespoons olive oil
2 cups Israeli couscous
21/2 cups of chicken stock or water
1 pint cherry tomatoes, cut in half
3-4 ears of fresh corn, steamed and cut from the cob; or 2 cups frozen corn
1/2 - 1 cup fresh basil, shredded into pieces or julienned
1/2 cup toasted pine nuts or toasted slivered almonds
Salt & Pepper
Instructions
Line a baking sheet with paper toweling. Place the fish on top, and use more paper toweling to pat dry the fish surface. Spray the filets lightly with cooking spray. Sprinkle with salt & pepper. Turn the fish over and repeat.
Start the couscous. In a 3-quart pot, add chicken stock or water, and couscous. Over medium-high heat, bring to a boil, then immeiately reduce to a simmer. Cover and simmer for 10 minutes. Once done, fluff with a fork, cover, and set aside.
In a 12" cast iron skillet, heat the olive oil over medium-high heat. Place the filets in the hot skillet. Sear for 5 minutes per side. Be sure not to crowd the skillet - you may have to cook in 2 batches. You want to sear the fish, not steam it. Each side should form a nice lightly-browned crust. Remove cooked filets to a plate, cover lightly with aluminum foil, and set aside.
Add pine nuts or almonds to the hot skillet. Pan toast, stirring frequently, until the nuts are lightly browned. Remove to a plate and set aside.
In the same skillet, reduce heat to medium or medium-low add the couscous, tomatoes, corn, and nuts. Toss gently until everything is well combined. Add basil and toss. Check seasoning.
To Assemble the Dish: Place one cup of the warm couscous mixture in the middle of a plate. Top with one cod filet. Sprinkle the fish with fresh lemon juice. Serve.
Notes
Cod filets come in all shapes and sizes. Prefer the thicker filet sections for this recipe. The flatter parts of the filet are excellent for making fish & chips. Toasted garlic bread would be a great side or any tossed salad.
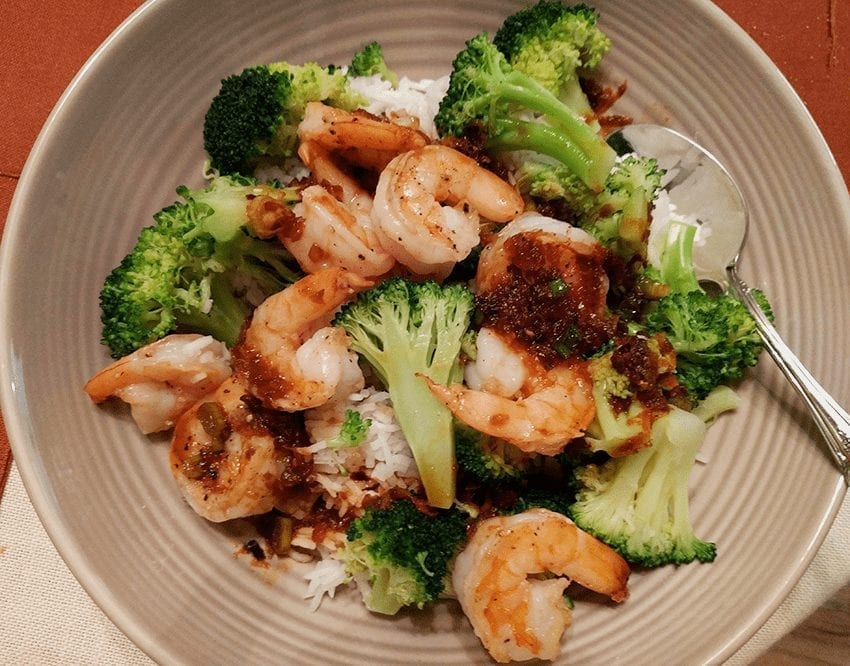
Orange Shrimp with Broccoli and Garlic is one of my favorite types of dishes. Crushed red pepper, orange zest, and garlic lend the simple sauce a bright delicious bite. And it’s so quick and easy! Orange Shrimp any time of the year but is a fabulous dish when your schedule is tight and fast food is not an option. You know, like during the holidays!
I always have a pound or two of raw shrimp (21-25 count) in the freezer. It’s handy for lots of quick meals like Shrimp Tacosor Shrimp Scampior Shrimp and Grits. Frozen shrimp don’t take long to defrost, either. Measure out what you need for your recipe. I use a scale for an accurate amount. Then I put them in a colander in the sink and run cool water over them until the shrimp are ready. I also use raw shrimp rather than cooked frozen ones, because raw shrimp will absorb all the lovely flavors either as they’re marinated or as you cook them. Garlic and lemon are two of my favorites, but you could use coriander, red pepper flakes, cumin or curry. Seriously delicious!
Here are a couple of things to remember when cooking raw shrimp:
Rinse shrimp after the shells and tails are removed. Remove the black vein at the top. Most frozen packed shrimp come deveined, but it’s a good idea to check anyway.
Once rinsed, place shrimp on a baking sheet lined with paper toweling. Use another layer to pat dry the top. Shrimp should be dried off to get a proper sear.
Don’t overcook your shrimp! It’s easy to do. Place shrimp in a hot pan with a little olive oil. As soon as they become translucent, turn them over to cook the other side. Really, 2-3 minutes per side is more than enough. You want a nice crunchy bite, not a rubbery one. It’s a texture thing.
Yield: 4
Orange Shrimp with Broccoli and Garlic
Quick and light, Orange Shrimp with Broccoli and Garlic is perfect for an easy and informal dinner with a little citrus and spice. Yummy!
Ingredients
1 1/2 pound shrimp (21-25 count) peeled, deveined, and rinsed under cool water
3-4 cups fresh broccoli, separated into florets
2-3 Tablespoons olive oil
1-2 garlic cloves, peeled and minced
1 cup orange juice, freshly squeezed
2 Tablespoons soy sauce
1 1/2 Tablespoon granulated sugar
Zest of one orange
1/2 - 1 teaspoon crushed red pepper flakes, depending on how much spice you want, or leave it out
1 teaspoon cornstarch
Sliced green onion for garnish
Sesame seeds for garnish
3 cups Jasmine rice, cooked according to package directions
Instructions
Line a sheet pan with a couple of layers of paper toweling. Place shrimp on the toweling in a single layer. Take another sheet of paper toweling and pat the shrimp dry. Sprinkle with salt and pepper. Set aside
Heat a large skillet over medium-high heat. Add 1 Tablespoon olive oil into the skillet. Add broccoli florets for 3-5 minutes until broccoli is tender. Remove broccoli from the skillet into a bowl or plate and set aside.
Use the same skillet and heat over medium-high heat. Add 1 Tablespoon olive oil. Add minced garlic and let sizzle for 30 seconds or until garlic becomes fragrant. Add red pepper flakes, if using. Place shrimp in the skillet in a single layer. (You may have to cook in 2 batches.)
As soon as the shrimp becomes translucent, flip over the cook the other side. Total cooking time is 2-3 minutes per side, at most. Remove cooked shrimp and garlic, pepper flakes to bowl/plate with the broccoli.
Return the skillet to the stove. Add orange juice, sugar, and soy sauce. Bring to a boil and reduce until slightly thickened.
Mix 1 teaspoon cornstarch with 2 teaspoons cold water. Add to skillet and continue to cook for 1-2 minutes until the sauce becomes shiny. Add orange zest.
Pour finished sauce over shrimp and broccoli. Garnish with sliced green onions and sprinkle with sesame seeds. Serve over cooked hot rice.
A Little Trip Through Southeastern Indiana in search of grits
A few weeks ago Richard and I rambled around southeastern Indiana through Batesville, Oldenburg, Metamora, and Rushville.
Oldenburg, also known as the “Village of Spires,” was settled in 1817 and is one of the oldest communities in the state. It’s a charming little town with a strong German immigrant history. All the streets signs are written in English and German. The city-center is beautifully groomed. Residents keep their yards immaculate; a clear demonstration of community pride. There are some truly spectacular churches in this tiny town of fewer than 600 people.
Then we traveled on State Road 229 to another historic landmark, Metamora, settled in 1838. Metamora is home to the Whitewater Canal State Historic Site. The Duck Creek Aqueduct is believed to be the only wooden covered bridge aqueduct still in operation in the United States. Metamora hosts a working grist mill, where is I bought the grits for Mimi’s Shrimp and Cheesy Grits. It is a nice little part of rural Indiana. The drive along SR 229 was awesome. I wanted to share our little adventure with you. A very cool trip.
All of this has little to do with the recipe that follows. Sometimes you just have to know where your food comes from. Anyway, the Metamora miller told us he’d ground the grits earlier that morning. Wow! I was sold. They sell white and yellow cornmeal, and white corn grits, too. I prefer yellow, so that’s what I bought. Below is a short video about the Metamora Grist Mill from the Indiana State Museum in case you’re interested. What impressed me was all the machinery needed to mill dried corn. A complex series of belts that power the millstones, and a waterwheel to supply power. It’s not a speedy process which made me appreciate my little bag of yellow grits all the more.
Let’s talk about food!
I’ve blogged about my new found food love, grits. Growing up in Northern Indiana and around few southern cooks, the sound of them simply did not appeal to me. Once or twice while traveling south of the Mason-Dixon Line, I tried some at breakfast. Ugh – no thanks – pasty white looking with no flavor.
I broadened my pallet a year or so ago when I walked on the wildside and paired a recipe for cheesy grits with a leftover pot roast for dinner one night.
Grits are not polenta. Grits are not cornmeal mush. Grits are in a beloved class of their own. Creamy, buttery, cheesy, sweet or savory; whatever you wish. And grits are gluten-free! But it’s the butter, cream, and cheese that will kill you. Well, you only live once. Right?
Once the grits are done, this recipe goes pretty quick. And I would recommend cooking the grits and keep them warm before cooking the shrimp. I used very simple ingredients to prepare the shrimp. Butter, 2-3 cloves of minced garlic, lemon, and fresh chopped parsley.
I lined a half baking sheet pan with paper toweling. Shelled and deveined one pound of raw shrimp (21-25 count). Rinsed the shrimp in a collander and placed them on a paper towel lined baking sheet. Top with another sheet of paper toweling and gently pat the shrimp dry. You want the shrimp at room temperature and as dry as possible so they saute quickly and become lightly browned in a hot skillet. If the shrimp is not patted dry, it will steam, and that’s not what you want for a perfect shrimpy bite.
Heat a 12″ skillet to medium-high heat. (I use a cast iron skillet.) Spray the shrimp with cooking spray and season with salt and pepper. If you like a little heat, you can sprinkle some crushed red dried pepper over the shrimp. Once in the skillet, cook shrimp 1-2 minutes per side. Just enough heat so they’re pink and beginning to slightly curl. Remove shrimp to a plate and loosley cover with foil. Lower the temperature to medium. I usually take my skillet completely off the heat and let it cool a bit before putting back on the burner, so the olive oil and butter don’t brown because the skillet is too hot.
Put the skillet on burner over medium heat. Add 2 Tablespoons olive oil and 1 Tablespoon butter. Add minced garlic and saute 30 seconds to a minute until you can smell the garlic. Add 1/2 cup dry white wine and juice of one lemon. Allow the sauce to simmer until slightly reduced. Add one more tablsepoon of butter and remove the skillet from the heat.
Ladle the grits into four individual serving bowls. Top with shrimp. Spoon sauce over the shrimp and sprinkle with lightly chopped fresh Italian parsley. Have some freshly grated Parmesan cheese ready, too, in case you like a little extra cheesy flavor. And maybe some hot sauce – tobasco? I know. Do Parm and tobasco go together? Why not??
Oh, my mouth is watering! Shall we cook up a batch?
Full bodied, creamy, cheesy with the just the perfect garlicky, shrimpy bite.
Author: Mimi
Recipe type: Main Dish
Cuisine: American
Serves: 4 servings
Ingredients
For the Grits:
¾ cup grits You can substitute instant grits, but the texture will be different. Regular grits have a better tooth, I think. And regular grits don't take that much longer to prepare, based on my experience for this recipe.
1 Tablespoons unsalted butter
1 cup chicken broth
1 cup half-n-half or whole milk
1 cup water
¼ - ½ cup freshly grated Parmesan cheese
Salt and Pepper to taste
For the Shrimp:
1 pound raw shrimp, 21-25 count, peeled and deveined, rinsed and patted dry
2 Tablespoons olive oil
1 Tablespoon unsalted butter
2-3 cloves garlic, minced
½ cup dry white wine
½-1 lemon, juiced
2 Tablespoons fresh Italian parsley, roughly chopped
Instructions
For the Grits:
In a heavy saucepan, add chicken broth, half-n-half, and water. Bring liquid to a boil over medium-high heat. As the liquid begins to boil, slowly whisk in grits, 1 teaspoon salt, and ½ teaspoon black pepper. Reduce heat to medium-low. Cook and stir occasionally until grits are thickened. Remove grits from heat and add Parmesan cheese and 1 Tablespoon butter. Stir to incorporate. Put a lid on the pan to keep warm while preparing shrimp.
For the Shrimp:
Peel and devein shrimp. Using a colander, rinse under cool running water. Remove shrimp to a baking sheet lined with paper toweling. Cover with a second sheet of paper toweling. Pat dry.
Set shrimp aside while preparing grits.
In a 3-quart heavy saucepan, bring chicken stock, half-n-half, and water to a gentle boil. Stir in the grits. Or follow cooking directions for the grits if you use instant grits.
Reduce heat to medium-low. Cook stirring occasionally until thickened.
Remove from heat. Add Parmesan cheese and 1 Tablespoon unsalted butter.
Check for seasoning adding salt and/or pepper to taste.
Put a lid on the saucepan and keep grits warm off heat while preparing shrimp.
Spray shrimp with cooking spray. Season with salt & pepper. May sprinkle with dried crushed red pepper for additional heat, if desired.
Heat a 12" cast iron skillet over medium-high heat. Put 1 Tablespoon olive oil and 1 Tablespoon butter into the skillet. When the oil is hot, add shrimp in a single layer. Don't overcrowd the shrimp - you may have to cook shrimp in 2 batches.
Cook shrimp 1-2 minutes per side until they're slightly pink and beginning to curl and lightly brown. Remove shrimp to a plate.
In the skillet, add 1 Tablespoon butter. Add minced garlic and saute for approximately one minute until you can smell it.
Add white wine and lemon juice. Simmer the sauce until slightly thickened.
To Serve:
Divide grits between 4 large individual bowls.
Top with cooked shrimp. Spoon garlic/lemon sauce over shrimp. Sprinkle with roughly chopped fresh Italian parsley.
Notes
Serve with extra grated Parmesan cheese and/or a few dollops of Tobasco. Yum!
Simply put: This is one of the most delicious taco recipes ever! Jessica and I made this for “Cinco de Mayo.” Marinated and grilled shrimp offers up the perfect shrimpy bite. And I mean PERFECT! These shrimp tacos are an amazing combination of flavors and textures. They’re refreshing, too. Do I sound excited? Oh, my mouth is watering!
And a Negra Modelo. Doesn’t get any better. Truly! My son-in-law introduced me to Negra Modelo a long time ago when he and my daughter went to a late lunch. So good and flavorful – it’s the perfect beverage with good Mexican food.
When Richard and I vacationed in Mexico a few years ago, I ordered Negra Modelo. The beer was delivered in a tumbler-sized glass filled with ice. Lime juice freshly squeezed over the ice, and a healthy portion or lime juice. The Modelo was served alongside to pour over the ice and lime juice. Oh, so refreshing!
The cooked shrimp are placed in warmed corn tortillas, doubled, so two tortillas for each ta top. Then a layer of finely shredded cabbage for a nice crunch topped with this amazing sauce from Indian chef Aarti Sequeira at the Food Network. I didn’t have banana peppers, but if you like a tangy bite with a little heat, I’d put a few of those on, too, before digging in.
In fact, this is Arati’s Fish Taco recipe. I substituted shrimp and added the guac. I’ve made this dish with fish, too, and it’s equally delicious. Thanks, Arati!
Zachy Endorsed
If you try your hand at Shrimp Tacos, I’d love to know what you think!
These Shrimp Tacos are a delicious bite of heaven. Quick and satisfying. Serve with a chilled Negra Modelo for a perfect meal.
Author: Arati Sequeira, Food Network
Cuisine: Mexican
Serves: 3-4 servings
Ingredients
For The Shrimp
2 lbs raw large shrimp (21-25/pound count), peeled and deveined
¼ cup extra-virgin olive oil
2 teaspoons ground coriander
2 teaspoons ancho chile powder
Pinch cinnamon
Kosher salt and freshly ground black pepper
For The Sauce
½ cup mayonnaise
1 clove garlic, minced
2 teaspoons ground cumin
1 teaspoon ancho chili powder
1 lime, juiced, plus extra if necessary
Kosher salt and pepper
At Service
24-6" corn tortillas, wrapped in foil and warmed in the oven at 225 degrees for 10-15 minutes
Finely shredded cabbage or angel hair coleslaw mix
Pickled banana peppers
1-2 fresh limes cut into wedges
Instructions
Rinse shrimp in a colander under cool running water. Line a baking sheet with a double thickness of paper towels. Put the shrimp on top and cover with another layer of double paper toweling. Pat dry.
In a large bowl, mix the marinade ingredients. Add shrimp and toss until it's well coated. Cover with plastic wrap and set aside for 30 minutes.
In a small bowl, mix the sauce ingredients. Cover with plastic wrap and chill in the refrigerator to let the flavors blend.
If you're serving homemade guacamole, now's the time to put that together. Keep in the refrigerator until ready to serve.
Divide tortillas into two stacks. Wrap tortillas with aluminum foil and set inside a 225F degree oven to warm.
On the stove, heat a grill pan over medium-high heat. Begin to grill the shrimp in batches making sure not to overcrowd the pan. Grill for two minutes on each side, or until the shrimp turn pink. Be sure not to overcook the shrimp, because they will become tough.
As the shrimp cook, remove them to a bowl covered with aluminum foil.
To Serve
Set out warm tortillas, cooked shrimp, shredded cabbage, guacamole, sauce, and banana peppers buffet-style. Let everyone assemble their own tacos with whatever they like.
Notes
Shrimp Tacos may be served with refried beans, Mexican rice, or a salad. I've never cooked seafood on an outdoor grill, so I can't comment, but they certainly could be grilled. Enjoy!
During the hot days of summer, we are all looking for a flavorful, healthy and quick meal. I frequently turn to fresh seafood as an alternative to traditional grilled burgers and dogs or dinner salad.
A family favorite and crowd pleaser, you can’t go wrong with are Mimi’s Fast & Easy Shrimp Fajitas.
Oh, so simple! Oh, so quick! Oh, so DELICIOUS!!
I serve the fajitas, whether they’re shrimp, chicken or beef, with warm flour tortillas along sides of Mexican Rice or Refried Beans, and a simple green salad. As an added bonus, this dish is gluten-free, if you use gluten-free flour or corn tortillas. If you’re filled with ambition, you should make or learn to make homemade flour tortillas.Takes the “quick” out of it, but still. Some store-bought brands can be very good, like El Milagro. But like everything homemade, they’re just better tasting. I did make my own every week for many years to serve at breakfast, lunch, and dinner. Awesome!
I think my Mexican-ex-mother-in-law would get a kick out the fact that I cook so much Mexican food – mainly inspired by her. My mom would make out-of-this-world tacos, but rarely ventured out of that comfort zone. When I married, I learned so much about Carmen’s Mexican cooking. She taught me a lot. She always made her own tortillas, and she was lickity-split! Amazing!
Let’s Cook!
I like to buy raw shrimp in the 20-25/pound range that have been shelled and deveined. It makes the process simple and quick. You can use frozen shrimp – it doesn’t take long to thaw. All you do is put the frozen shrimp in a bowl and fill it with cool tap water. In about 20 minutes, the shrimp are ready to use. I plan on 1/3 pound of shrimp per person. One pound will feed three gracious eaters or two voracious ones.
Sometimes even cleaned and shelled shrimp can leave behind bits and pieces of the black vein running down the middle. I always run the tip of a paring knife down along the track to make sure the black stuff is gone. According to seafood sources, you don’t have to. But why wouldn’t you? It looks awful. And it’s good to run your fingers through the water to check for any pieces of shells wandering aimlessly around.
Rinse the resultant shrimp well in cold water, drain well, and layer on a baking sheet lined with a double thickness of paper towels. Place a paper towel on top, and pat dry. It’s good to have the shrimp as dry as possible so they’ll sear well in a hot skillet.
Now, spray the tops lightly with cooking spray. Season lightly with salt and pepper. If you want to add some spice, it’s a good time to sprinkle with any or all of your favorite Mexican spices: ground cumin, chili powder, cayenne pepper. Whatever you prefer. Set aside while you prep the vegetables.
For one pound of shrimp, I use one medium onion cut in half and then into strips. One red bell pepper, cored, seeded and cut into strips. One large jalapeno pepper, cored, seeded, and finely diced. And one clove of garlic, minced.
The next step goes quickly. Have a serving plate or serving bowl at the ready for the vegetables as they come off the heat.
Heat a griddle over or a large skillet to medium-high heat. A cast iron griddle or skillet would be ideal, but not imperative. I use a 12″ iron skillet when I’m cooking one pound of shrimp, and a larger griddle over two burners when I cook larger quantities.
Add two tablespoons of olive or neutral cooking oil to the skillet and spread it around to cover the bottom. Add the sliced onions, sprinkle lightly with salt and pepper, and cook quickly, stir-fry style, until the edges begin to brown and the onions begin to wilt. Quick cooking will help the onions keep their shape and stay crunchy.
Add the red peppers, jalapeno, and garlic to the skillet. Again, quickly stir-fry the vegetables until the peppers are heated through and the garlic becomes fragrant.
Put the cooked vegetables in your serving bowl or plate. (I use a flat oval 3-quart Pyrex dish.) Set aside and keep warm. Don’t cover with foil or plastic wrap, because the veggies should keep their bite. Covering them will steam them, and the vegetables will be mushy. Still delicious, but you know. I usually put them in an unheated oven or in the microwave.
In the same skillet over medium-high heat, layer the shrimp in a single layer, seasoned side down.
Cook for 2-3 minutes until the shrimp just begin to turn pink and a little carmelization is happening around the edges.
One-by-one, flip the shrimp to cook on the other side – 1-2 minutes max. The shrimp should be cooked through, but tender. Overcooking will make them tough. Sprinkle with the juice of half a lemon.
Spoon the shrimp over the cooked vegetables.
And there you have it!
Fresh, fragrant, juicy, steamy, delicious! And QUICK!
Here are some condiment
suggestions for the fajitas:


 Israeli Couscous, Giant Couscous, Pearl Couscous
 A Tip for Searing Fish Filets
 away with one of the best culinary smells of summer. Some like to use oregano or rosemary or thyme – my go-to is always basil. I prefer the distinctive almost anise-like taste and smell – fresh or dried – to just about any other herb. Personally, I think thyme is over-rated. Parsley is just so, well, bland. I can’t imagine making any pesto with parsley – not my thing. Of course, basil in spaghetti sauce is a must. And my mother used to roast a rump roast in an oven-baking baking bag simply seasoned with salt, pepper, and dried basil mixed with a can of tomato soup – out-of-this-world gravy to pour over mashed potatoes! Basil simply makes me happy.
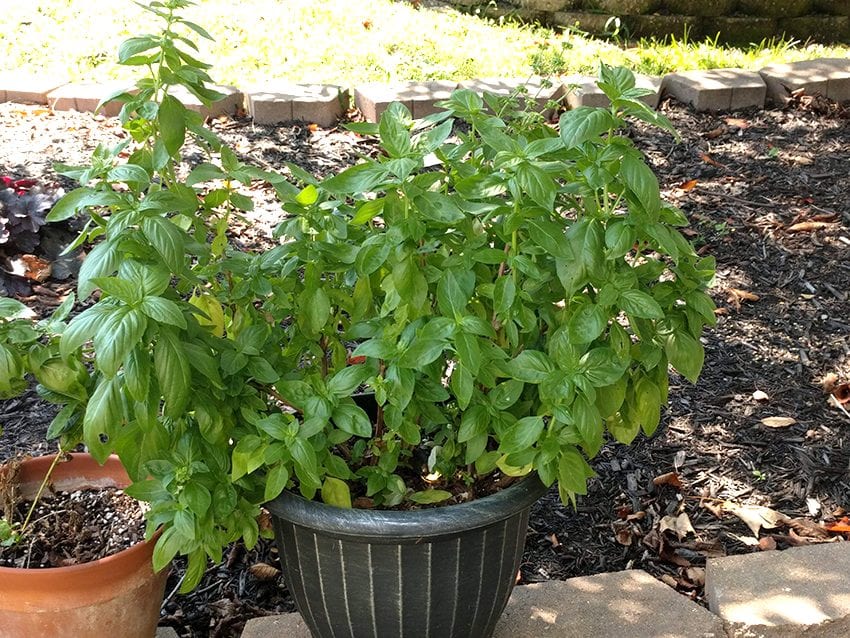


 Then we traveled on State Road 229 to another historic landmark, Metamora, settled in 1838. Metamora is home to the Whitewater Canal State Historic Site. The Duck Creek Aqueduct is believed to be the only wooden covered bridge aqueduct still in operation in the United States. Metamora hosts a working grist mill, where is I bought the grits for Mimi’s Shrimp and Cheesy Grits. It is a nice little part of rural Indiana. The drive along SR 229 was awesome. I wanted to share our little adventure with you. A very cool trip.
 I’ve blogged about my new found food love, grits. Growing up in Northern Indiana and around few southern cooks, the sound of them simply did not appeal to me. Once or twice while traveling south of the Mason-Dixon Line, I tried some at breakfast. Ugh – no thanks – pasty white looking with no flavor.


