This is a side dish with a perfect bite. Savory basmati rice, orzo, and pignoli (pine nuts) married with onion, peas, and Parmesan cheese. Rice Pilaf with Pignoli, Peas, and Cheese is a homogenous bite of savory, crunchy, cheesy, and fresh.
You can serve this side with almost anything: pork, chicken, fish; proteins on the lighter side, I would advise. This side is a most welcome variation from traditional rice or potatoes or noodles. I can’t emphasize enough the phenomenal addition of pine nuts. Walnuts, pecans, especially slivered almonds are respectful substitutes. Whatever you decide, don’t exclude toasted nutmeats. I have not made this recipe with brown basmati or another brown rice, because the cooking time may be off.
Rice Cooking Tip: Don’t over boil the rice. The initial heat should be to boiling without the lid, and then immediately to a gentle simmer with the lid on for 12-15 minutes. I don’t know what your stove considers a “gentle simmer.” You must understand your equipment: gas or electric or induction. I love you, but you should figure it out. Otherwise, everything with perfect rice is bad, very bad.
When cooking any type of rice, once the cooking time has expired, take the pot off the heat, fluff the rice with a fork, put the lid back on, and let the rice sit for 10 minutes before serving. If the rice is undercooked, letting it rest cures a multitude of sins.
I put a pat of butter, a Tablespoon, into the cooking liquid as the rice comes to a boil, regardless of the type of rice. You will not imagine the different flavor ordinary rice takes on with a simple bit of fat.
This is a side dish with a perfect bite. Savory basmati rice, orzo, and pignoli (pine nuts) married with onion, peas, and Parmesan cheese. Rice Pilaf with Pignoli, Peas, and Cheese is a homogenous bite of savory, crunchy, cheesy, and fresh.
Author: Mimi
Recipe type: Side dish
Cuisine: American
Serves: 4 servings
Ingredients
2 Tablespoons olive oil
½ cup sweet yellow onion, sliced in strips
1 teaspoon garlic, minced
¾ cup basmati rice, uncooked
½ cup orzo, uncooked
2 cups chicken broth
½ teaspoon salt
Additions:
¼ cup pignoli (pinenuts), toasted, substitute slivered raw almonds, or raw walnuts, pecans, also toasted
½ cup frozen peas
¼ - ½ cup Parmesan cheese, grated
Instructions
I like to use my favorite Guardian Ware pot for this or you may use any 2.5 - 3-quart heavy bottomed pot with a lid.
Heat olive oil over medium-low heat. Add onion and saute until golden, about 5 minutes. Stir occasionally so the onion browns but not burns.
Add garlic. Cook for less than 1 minute, or until you can smell the garlic fragrance.
Add rice and orzo. Cook for 2 minutes, making sure all the grains are coated in oil.
Add broth and salt.
Heat until boiling. Immediately reduce heat to medium-low.
Cook for 12-15 minutes, until all the liquid, is absorbed.
Remove the pan from heat. Let sit covered for 10 minutes.
Add pignoli, cheese, and peas. Stir lightly until combined. Cover and let steep for an additional 10 minutes.
Notes
Before serving, feel free to add a couple Tablespoons chopped fresh Italian parsley or fresh chopped basil, if that's your flavor choice.
However, the star of the show in today’s post is the side dish in the upper right hand corner of the plate: Carmen’s Mexican Rice.
I’ve written frequently about my ex-mother-in-law, Carmen, and how she influenced my Mexican cooking skills and palate. One side I learned very early in the process was Mexican Rice.
It’s a staple of most south-of-the-border meals, breakfast, lunch and dinner. Served with beans of any sort, rice and beans is a complete protein. In fact, rice and beans is a fabulous vegetarian/gluten-free option. You’ll find recipes for beans and rice all over southern and Latino cooking sites on the web. Such an amazing and healthy combination.
Anyway, I digress.
Many years ago, a younger Mimi, husband, and new baby visited Carmen’s homestead in Grand Island, Nebraska. Her mother still lived in the same house where the family was raised. Imagine the curiosity aroused when a “gringa” showed up and actually volunteered to help with dinner preparations!
I remember uncles, aunties, and Grandma Garcia (the matriarch) watching over my shoulder as I confidently whipped up a batch of rice to serve for the evening meal. Nods of approval and Spanish spoken praises were received and well-appreciated. Maybe their beloved Anthony hadn’t done so bad after all!
Nevertheless, Mexican Rice is so easy to put together. Carmen’s recipe included onions as the only vegetable. Peas, carrots, green beans were not in the mix. And Mexican Rice is inexpensive. Paired with beans, flour tortillas, grated cheese and a side salad, this dish is very frugal.
Let’s Cook!
This is my favorite rice cooking vessel. It’s an old Guardian Ware aluminum pot that belonged to one of my grandmothers. Both used Guardian Ware, and I was the lucky recipient of this one.
I like it because it’s sturdy. The walls are thick. The lid fits well and retains heat nicely. Every pot of rice I conjure up comes out perfect no matter the recipe.
If you don’t have one of these handy, rice is successfully cooked in an enameled cast iron pot or a heavy pot will a tight fitting lid.
Before you begin, measure out your ingredients:
1 3/4 cups of low-sodium chicken stock or water mixed with 1/4 cup tomato sauce
1 cup long grain white rice
1 medium onion, cut in half and then into chunks
1-2 teaspoons Mexican oregano
1/2 teaspoon garlic salt
Over medium-high heat, add 1-2 Tablespoons vegetable oil or olive oil. (I like olive oil.)
Once the oil is hot, add the rice. Begin to stir so all the rice is coated with oil.
Continue to cook until some of the rice is translucent and other kernels are lightly browned.
Add the chopped onion to the rice. Cook for a minute or two until the onions begin to wilt and become lightly browned.
Add the chicken stock or water and tomato sauce. Careful – the liquid may steam and spatter.
Add the oregano and garlic salt. Stir to distribute everything. Bring to a gentle boil. Reduce temperature to a simmer and cover.
Let the rice simmer for 13 minutes. Once it’s done, immediately remove from the heat and set aside to let the rice finish cooking. You can put the pot in a slow oven (185°F) to finish cooking for 15-20 minutes to keep it warm before serving.
You can lift the lid and fluff up the rice, but I usually don’t. My daughter tells me the “money bite” is the rice, onions, and oregano that settles to the top.
Now, If I’d had my act together, I would have remembered to take a picture when the rice was finished. Must have been hungry this day and in a rush to get dinner on the table. Ooops . . .
My young family would eat leftover rice, refried beans, tamales, and warm tortillas for breakfast. Ah, the good old days when I didn’t have to worry about all those carbs and calories!
Before I dive into this post, I must tell you about this fabulous sheet cake pan I found at TJ Maxx. It’s a high-sided Nordic Ware half-sheet pan fitted with a plastic lid. I just love it!
This aluminum baking pan is just the right size to bake my recipe for Giant Cornbread for a Crowd. It’s the perfect size for a Texas chocolate sheet cake, or any sheet cake for that matter. And the handy snap-on, high-domed, sturdy, translucent lid makes the pan perfect for transport.
I’ve had great luck finding lidded Nordic Ware baking pans at TJ Maxx at very reasonable prices. I have another that’s a quarter-sheet pan, and recently found that Nordic Ware makes a variety of sheet pans and muffin pans with the same lovely snap-on lids. (I have no affiliation with Nordic Ware or TJ Maxx – just love these pans and the store where I bought them.I’ve also found them online at Bed, Bath & Beyond and Amazon.)
Dimensions are 18″ x 13″ x 2″. The domed lid adds another inch or so. There’s plenty of room for highly frosted and decorated cakes.
What do I do with this lovely baking pan? All kinds of sheet cakes, obviously. But it really came in handy when my daughter hosted her youngest son’s 3rd birthday party. She invited a crowd of twenty or so, children and adults, and made pots of regular chili and white bean chili. Jessica asked me to bring cornbread.
My first thought went to muffins. But I didn’t want to fill all the muffin cups. And what if some guests wanted two or more muffins? I wasn’t into making three muffin pans. I opted to bake a Giant Cornbread for this crowd! So simple! So frugal! So delicious!
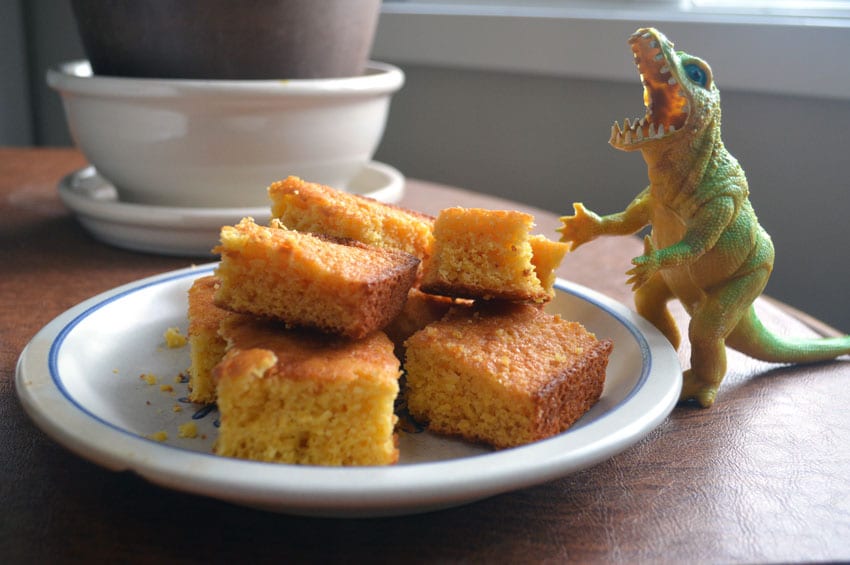
Now, for all you cornbread purists out there: This is a sweet cornbread made with yellow cornmeal, sugar AND honey. Not a southern savory cornbread. I wanted the finished product to appeal to a gaggle of hungry toddlers. The result was everything you’d expect from a good cornbread. It was crispy outside, moist inside, and sweet with the perfect crumb.
Next time you need a bread side for a crowd, whip up a batch!
For one thing, quinoa is a complete protein source. It is gluten-free. Quinoa is a good source of fiber (One-half cup of quinoa has 14 grams of protein and 6 grams of fiber.). This mighty super-grain can help offset the risk of developing Type 2 diabetes, and has a wide range of anti-inflammatory nutrients. Quinoa is not a cereal grass like wheat, oats, barley, or rye, but is a member of the same food family that contains spinach, Swiss chard, and beets. One cup of cooked quinoa has a total of 222 calories, with approximately 39 grams of carbs and 4 grams of fat. WOW!
Quinoa is one of the healthiest and most nutritious foods on the planet! It may even become an “out-of-this-world” crop. NASA scientists think quinoa is suitable to be grown in outer space.
Quinoa comes in a variety of colors: red, black, white, or mixed (shown above) to compliment almost any main dish, or on its own mixed with other side dish ingredients or salads. Heck, this salad can be gobbled up on its own!
Any way you look at it, quinoa is one super food health conscious cooks should include in their pantries. For me, it has the texture of couscous, which I like. Now that my husband and I are trying to follow a heart-healthy diet, I’m sure we’ll discover fantastic uses for this incredible, edible pseudo-grain.
Let’s make some up for lunch!
Roasted Broccoli Quinoa Salad with Pine Nuts & Tomatoes
As a stand-alone salad or a side dish, Roasted Broccoli Quinoa Salad with Pine Nuts and Tomatoes is a healthy alternative to traditional dishes.
Recipe type: Salad, Side Dish
Cuisine: American
Serves: 3-6 servings
Ingredients
1 cup quinoa, uncooked
1 large or 2 small heads of broccoli, cut into florets or use frozen chopped broccoli thawed and well drained
6 ounces sweet grape tomatoes, cut in half
¼ cup + 1Tablespoon olive oil, divided
1-2 Tablespoons dijon mustard
2-3 Tablespoons honey
Juice of ½ lemon
1 clove garlic, minced
¼ cup pine nuts, roasted
Salt & Pepper to taste
Instructions
Preheat oven to 425F degrees. Line a baking sheet with aluminum foil or parchment paper. Toss the broccoli florets with 1 Tablespoon olive oil. Place broccoli on the baking sheet. Sprinkle with salt and pepper. Roast for 20-30 minutes, until broccoli is tender and golden.
Cook quinoa according to package directions. Set aside.
To make the dressing, combine dijon, honey, lemon, garlic, and ¼ cup of olive oil in a small bowl. Stir to combine. Set aside.
In a large bowl, combine the cooked quinoa, broccoli florets, roasted pine nuts, and tomatoes.
Serve the salad warm, cold, or at room temperature.
Notes
I would use the quinoa as a base and substitute lots ingredients and change up the dressing. Add sliced black olives, tomatoes, chopped red onion, and a handful of crumbled feta cheese for a Greek-inspired option. Or corn kernels, tomatoes, chopped red onion, and crumbled cooked bacon for a more American flavor. Diced avocado, tomatoes, chopped red onion, chopped cilantro, and shredded cheddar cheese, along with a honey-lime vinegarette?
And trade the honey-vinegarette for low-fat Italian dressing - Yum!
What are lentils anyway? How are French lentils different from others? And they’re so cute, too. Little round orange, yellow, and green legumes ready to burst forth with nutritious, yummy, creamy goodness. Lentils are filled with fiber and nutrients. In salads, soups, stews, or as a side dish in this recipe, lentils are a healthy, flavorful, and can be used as an alternative to standard side dishes. So, how can lentils be bad?
I’ll tell you:
It would be wrong of me not to disclose that these little darlings, once consumed, may have you bursting forth with an undesired social embarrassment: flatulence, bloating, gas, toots, and downright fits of farting. There, I’ve said it.
Do lentils get a bad rap?? Yes, they do. I went to the source: Cook’s Thesaurusfor some answers for you:
Lentils are low in fat and high in protein and fiber, and they have the added advantage of cooking quickly. Lentils have a mild, often earthy flavor, and they’re best if cooked with assertive flavorings. The best, most delicate lentils are the peppery French green lentils. These hold their shape well, but take longer to cook than other lentils. The milderbrown lentils also hold their shape after cooking, but can easily turn mushy if overcooked. Indian markets also carry a wide variety of split lentils, called dal. Before cooking, always rinse lentils and pick out stones and other debris. Unlike dried beans and peas, there’s no need to soak them. Lentils cook more slowly if they’re combined with salt or acidic ingredients, so add these last. Bigger or older lentils take longer to cook. Store dried lentils for up to a year in a cool, dry place.
So, how can you feed your friends and family a delicious and nutritious meal without reaching for air freshener? Buy the right lentils.
Cooks Thesaurusrecommends steering clear of dull yellow lentils called channa dal or gram dal – notorious offenders.
Rather, they recommend French green lentils, also called Puy lentils or lentilles du Puy. The French variety is prized for keeping their shape after cooking, so they’re ideal for salads and as side dishes. These petite beauties are sold under the “Bob’s Red Mill” label. I found mine in the bulk food aisle at Jungle Jim’s Grocery in Cincinnati. Seriously, they can probably be found at almost any grocery or health food grocery.
Let’s make some Delicious and Nutritious Salmon and French Lentils!
Delicious and Nutritious Salmon and French Lentils
Ina Garten uses French Puy lentils. I imagine the ones actually grown in volcanic soil in France, which is this legume’s origin. And it was her recipe that inspired me to substitute lentils for traditional side dishes, like rice, noodles, or potatoes. I couldn’t resist her recipe for Salmon with Lentils.
So easy, inexpensive, and extremely flavorful. My husband raved about the way the salmon was cooked – seared in a hot skillet and finished in the oven – crispy skin, the flesh on the rare side, which is the way Richard likes it.
bon appétit
Delicious AND Nutritious - Salmon and French Lentils
Seriiously flavorful, the crispy salmon skin and rare flesh is perfectly accompanied by Ina's French lentils simmered in vegetables.
Author: Ina Garten - Barefoot Contessa
Recipe type: Main Dish
Cuisine: French
Serves: 4
Ingredients
½ pound French green lentils
¼ cup olive oil
2 cups yellow onions, chopped
2 cups leeks, white and light green parts only, chopped
1 teaspoon fresh thyme or ½ teaspoon dried thyme
2 teaspoons Kohser salt
¾ teaspoon black pepper
1 Tablespoon garlic, minced
1½ cups celery, chopped
1½ cups carrots, chopped
1½ cups chicken stock
2 Tablespoons tomato paste
2 Tablespoons red wine vinegar
4 - 8oz salmon filets, skin on
Instructions
Place lentils in a heatproof bowl, and cover with boiling water. Let set for 15 minutes. Drain and reserve.
Heat olive oil in a large skillet. Add onions, leeks, thyme, salt, and pepper. Cook over medium heat for 10 minutes, until onions are translucent. Add garlic, and continue cooking for 2 minutes. Add the drained lentils, carrots, celery, chicken stock, and tomato paste. Cover and simmer over low heat for 20 minutes. Add vinegar and season with salt and pepper to taste.
Preheat oven to 450 degrees F. Heat a dry pan or iron skillet over high heat for 4 minutes. Rub both sides of salmon fillets with oiive oil. Sprinkle with salt and pepper. When the pan is very hot, place the salmon, flesh side down, and cook without moving for 2 minutes. Turn the fillets, and place in the oven for 5-7 minutes.
Spoon a mount of lentils on each plate. Place the salmon fillet on top. Serve hot.
Notes
Ina Garten removes the skin from the fish. I left mine on, because we like crispy fish skin. I substituted freshly squeezed lemon juice for the red wine vinegar in the lentils, and squeezed fresh lemon juice on the fillets after they came out of the oven.


 I’ll tell you: