One day as I was looking over the produce section of the grocery and I found a 16-oz bag of riced cauliflower for 99 cents. Soup immediately came to mind but chowder sounded better. Truth be told, a reduced price bag of riced cauliflower doesn’t look that great – a little aged around the edges. But the perfect ingredient for chowder. The only indulgence here is bacon and cheese. Remember, you’re giving up starchy, carbohydrate-laden potatoes called for in traditional chowders.
I’ve always been a big cauliflower fan. Fresh and cut up for a crudité, it’s crunchy and filling. Riced, it’s also a good fresh ingredient in salads. My mother made it often because she usually found huge heads on sale at the grocery. She never incorporated cauliflower into other recipes, though. We ate it steamed with a healthy portion of Velvetta cream sauce. We all loved it and Mom was happy to see her picky children gobble it up.
Cauliflower is enjoying current culinary stardom. Look at the “VegNews” article titled “9 Unbelievably Awesome Uses for Cauliflower.” There’s the fashionable cauliflower crust pizza which everyone I’m around is raving about. Heck, they even use cauliflower in mac ‘n cheese and chocolate cake. And why not? Cauliflower is low-fat, loaded with fiber, high in antioxidants, and a fabulous low-carb alternative for grains and legumes. Take a look at this recipe from Caio, Caio, Bambina: Cauliflower Cake with Pecorino and Basil.
Having said all that . . .
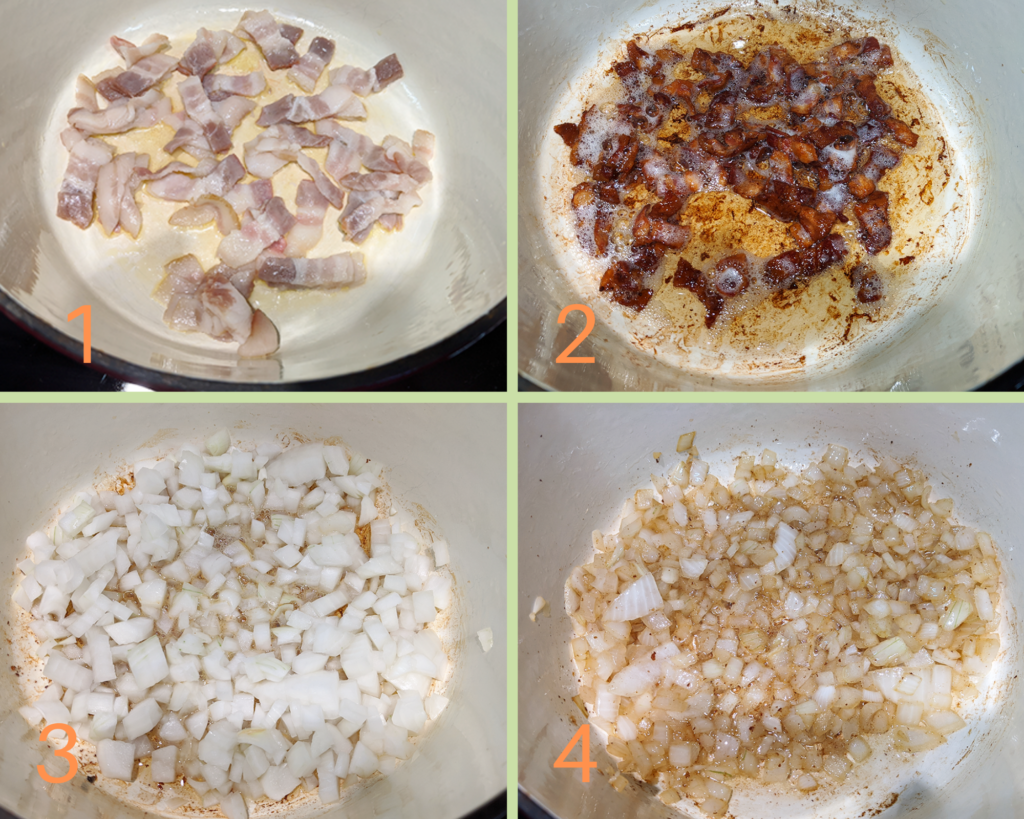
(1-2) Heat a dutch oven over medium heat. Add 1 Tablespoon olive oil. Cut 3-4 strips of bacon into lardons and brown. All those brown bits at the bottom will add amazing flavor to your chowder. Remove bacon onto a paper-towel-lined plate to drain and set aside. (3) Drain off some of the bacon fat. Return to stove and add 1 large onion, diced. (4) Cook until the onion is softened.
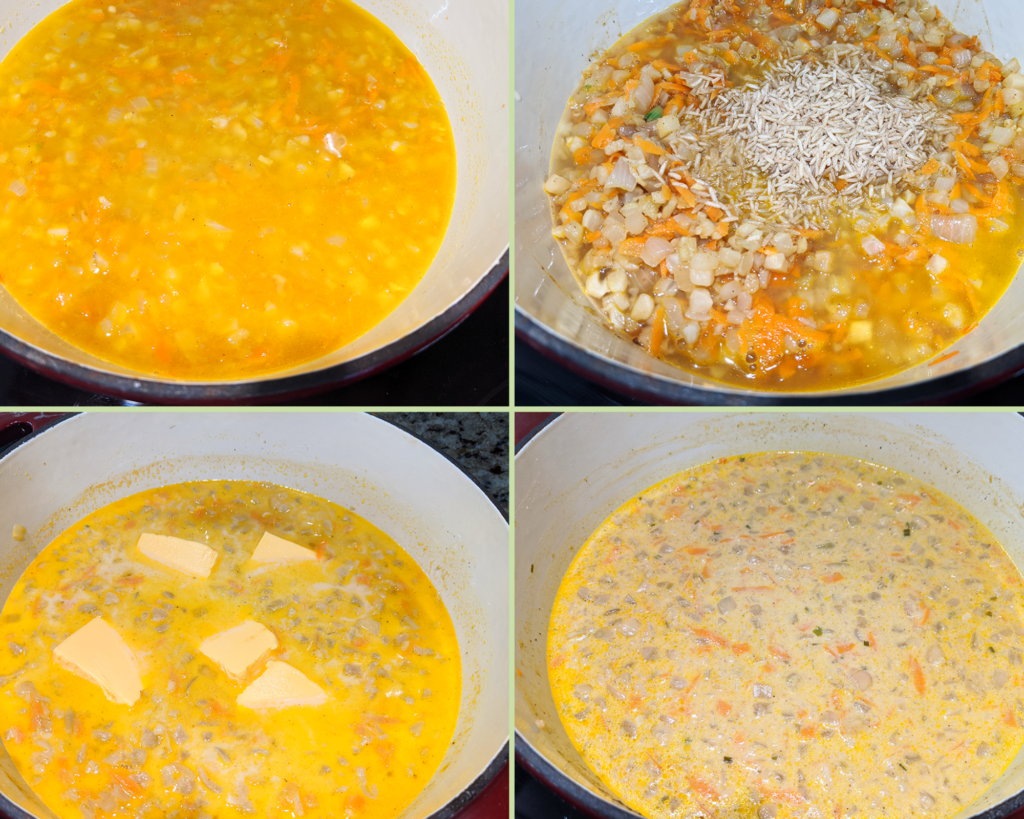
1) Add 4 cups of low-sodium chicken stock.
(2) Add 1/4 cup of brown rice. Stir to combine. Cover with a lid, reduce heat to simmer. Continue to cook for 30 minutes or until the rice is cooked through.
(3) Add 2-4 oz of processed cheese, like Velveeta, cut into chunks.
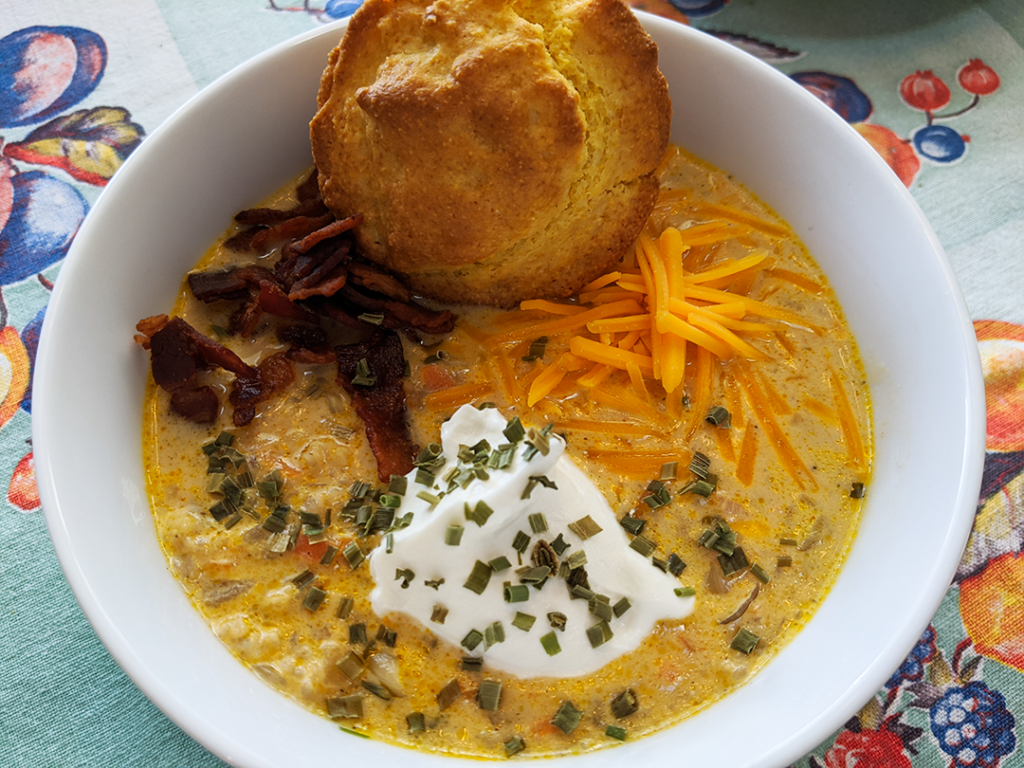
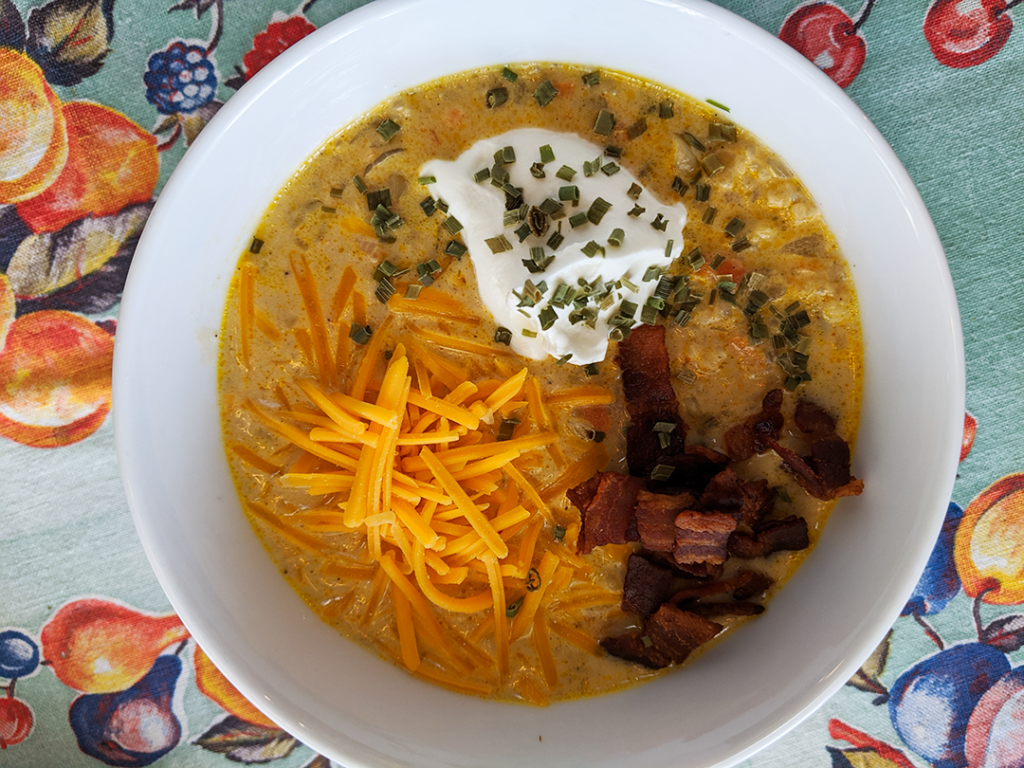
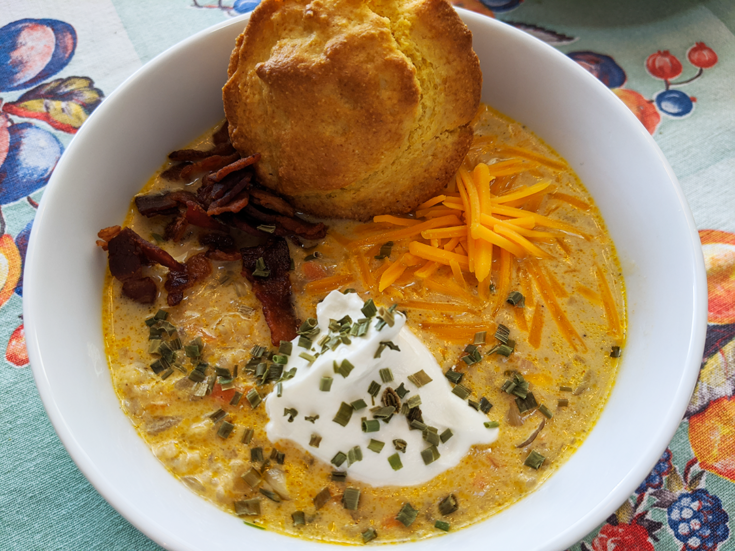
(4) Stir until all cheese is melted. Add more chicken stock or water if the chowder is too thick. Check for seasoning. Garnish with shredded cheddar cheese, sour cream, chopped chives, and reserved bacon bits. I served mine with fresh, hot corn muffins and honey.
If you try this recipe, would you post a photo on my Instagram page? At Mimi’s Table. Thanks!
Yield: 6 servings
Cauliflower Cheese Bacon Chowder
A bag of riced cauliflower is transformed into a delicious, healthy bowl of steamy chowder without the potatoes. Treat yourself to a bowl garnished with shredded cheese, a dollop of sour cream, and crispy bacon bits.
Prep Time20 minutes
Cook Time30 minutes
Total Time50 minutes
Ingredients
3-4 strips bacon, cut into lardons
1 Tablespoon olive oil
1 - 160z bag of riced cauliflower
1 large onion, diced
2 carrots, shredded
4 cups low-sodium chicken broth
1/4 - 1/2 cup brown rice
2-4 oz processed cheese, like Velveeta, cut into chunks
1/2 cup half 'n half or heavy cream, optional
Shredded cheddar cheese, low-fat sour cream, chopped fresh chives, crispy bacon - all for garnish
Instructions
Over medium heat, add one Tablespoon olive oil to a heavy-bottom pot or dutch oven. Add the bacon lardons. Stir occasionally and cook until the bacon has rendered its fat and is brown and crispy. Remove bacon to a plate lined with a paper towel to drain. Remove all but 1 Tablespoon bacon drippings.
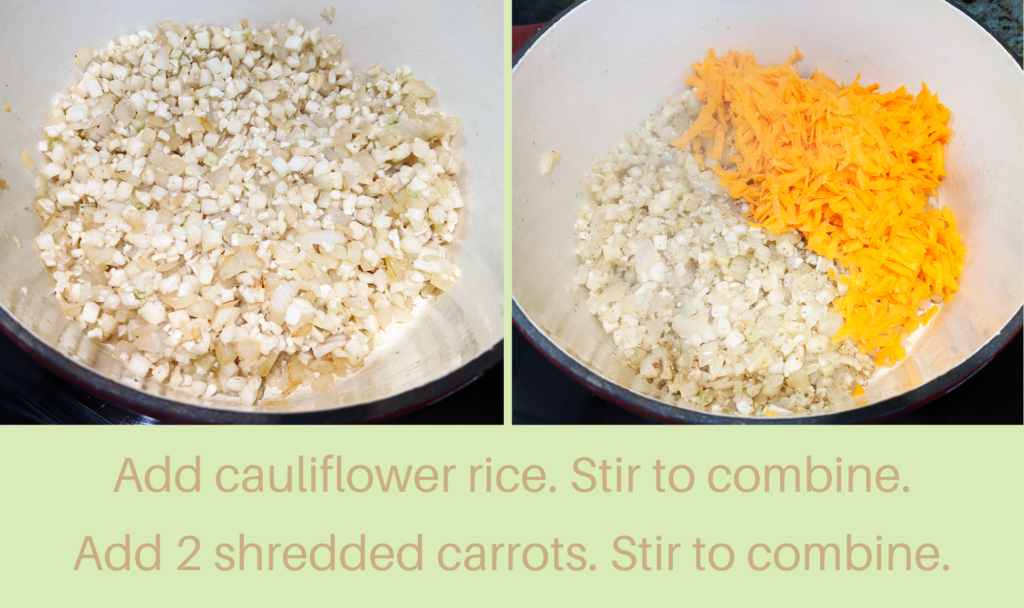
Add chopped onions. Stir and cook until onions are softened. Add cauliflower. Stir and continue to cook for 5 minutes. Add shredded carrot. Stir and cook for 5 minutes.
Add chicken stock and brown rice. Stir until combined. Reduce heat to medium-low. Cover the pot and simmer for 30 minutes or until the rice is cooked through.
Remove lid. Add processed cheese chunks and half 'n half, if using. Stir until cheese is melted and the chowder is heated through.
Ladle into bowls. Garnish with shredded cheese, sour cream, chopped chives, and crispy bacon.
Notes
This recipe is almost like baked potato soup without using potatoes. Serve with hot corn muffins.
Cinco de Mayo is just around the corner and I wanted to share this fabulous recipe for Cheesy Enchiladas in Mole. This is Jeff Mauro’s recipe, Ultimate Cheesy Enchiladas, from the Food Network with just a couple of changes. The sauce is not a true Mexican mole, like mole rojo, but it comes pretty close. I’d use this sauce in a heartbeat for any mole dish. The ingredients are easy to put together. I reconstituted powdered mole in this recipe: Turkey Enchiladas in Mole. But this sauce is so easy to make and comes together so quickly that I decided homemade was the way to go.
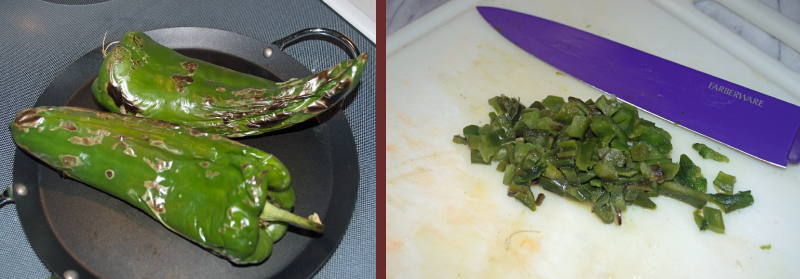
I decided to char a couple of mild long green chiles, like the ones used for Chile Rellenos, peeled off the skin, removed the seeds, and chopped them into a medium dice. I like the combination of cheese and chiles – who doesn’t like queso dip, right?- and thought chiles would add another layer of flavor.
Let’s talk about cheese.
Obviously, cheese is an important part of this dish. I decided to use Oaxaca cheese because I love it. Oaxaca is a mild-flavored, buttery cheese that melts like a dream. You can find Oaxaca cheese in any Mexican grocery and it is becoming common in most grocery stores, too. I find Oaxaca is cheaper at Mexican stores. Mauro also suggested Chihuahua which would be a good one, too. He added Monterey Jack and cheddar to his filling so the enchiladas are filled with lots of cheesy goodness. I’d recommend that you avoid substituting mozzarella for Oaxaca. Mozzarella melts beautifully, too, but lacks the richness of Oaxaca. Just sayin’.
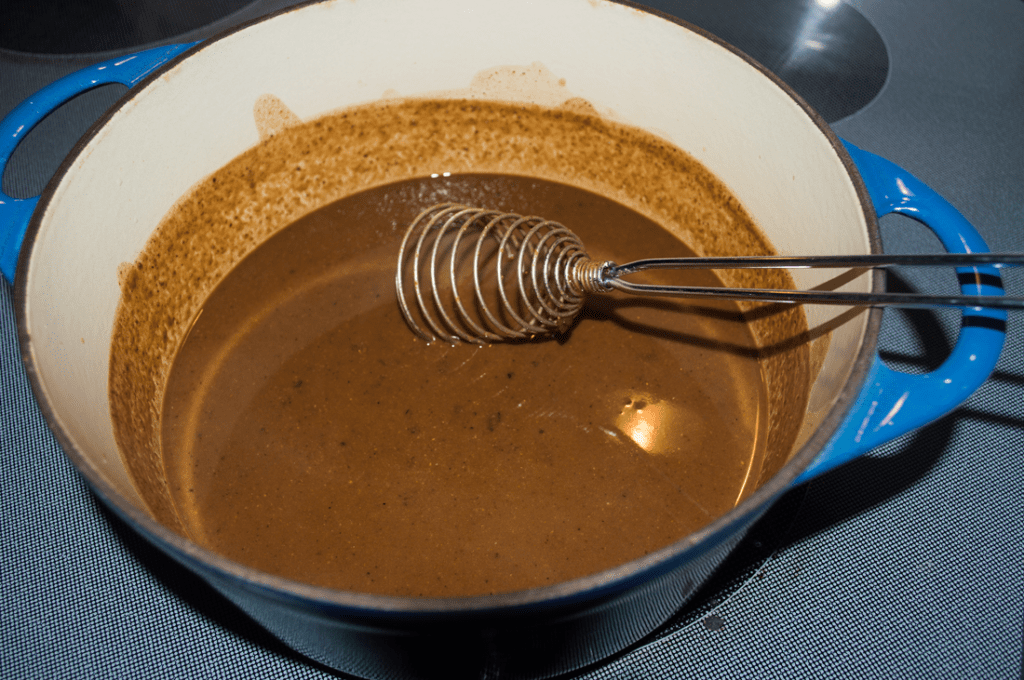
Add oil to a pot over medium heat. Add flour and whisk together to make a roux. Add ancho chile powder, chipotle chile powder, cocoa, Mexican oregano, garlic powder, and cumin. Whisk together until the mixture begins to thicken and the spices are fragrant – 5 minutes tops. Add chicken stock, whisk until smooth, and cook until the sauce is slightly thickened. Add vinegar and check seasonings. Take off the cooktop and set aside. See, the mole comes together in no time at all.
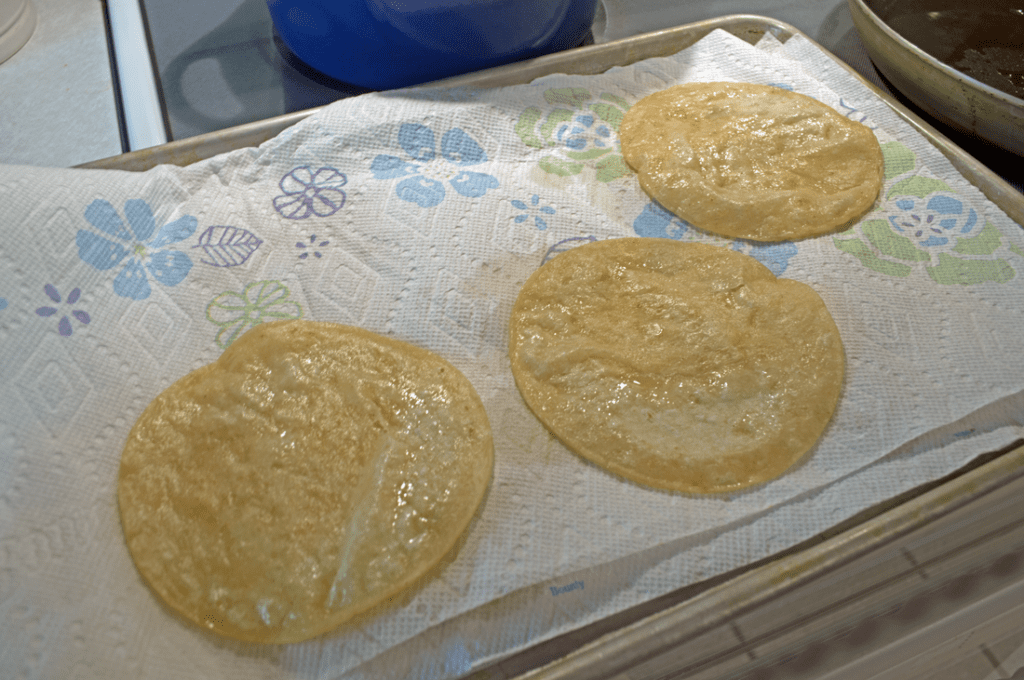
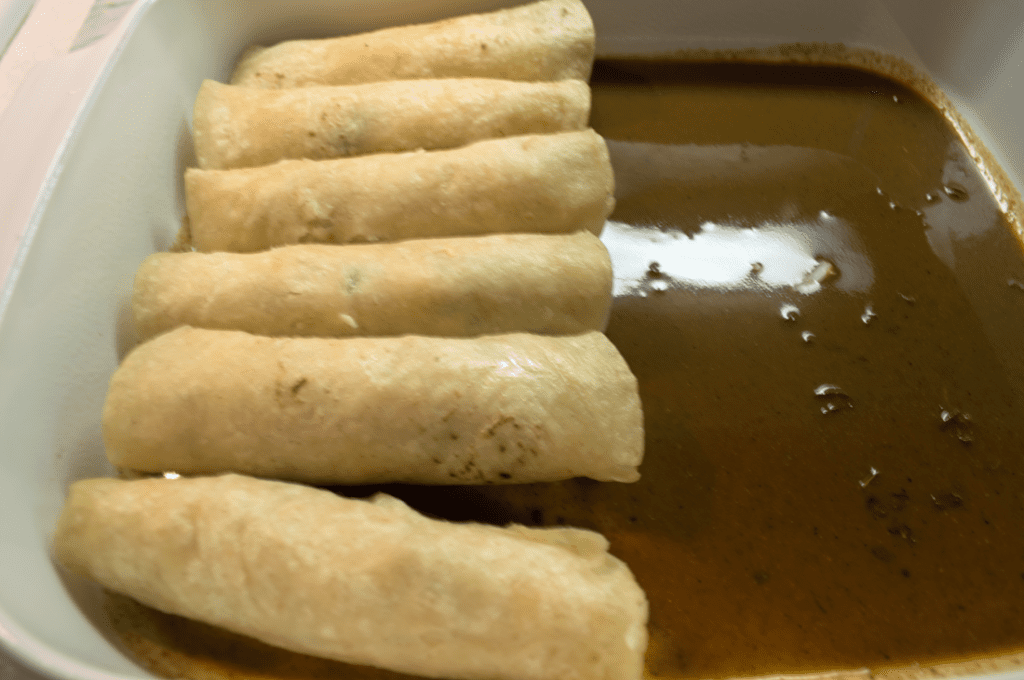
Now it’s time to soften the tortillas. This step is quick and makes it easier to fill and roll the tortillas into enchiladas. Pour 1/2 cup oil over medium heat. Drop the tortillas one at a time into the hot oil. After 5 seconds, using tongs, flip the tortilla over to cook on the other side – 5 seconds. Remove the cooked tortilla to a baking sheet lined with paper toweling. I like to keep the tortillas separated using paper toweling between the layers. That way they drain well and don’t stick together.
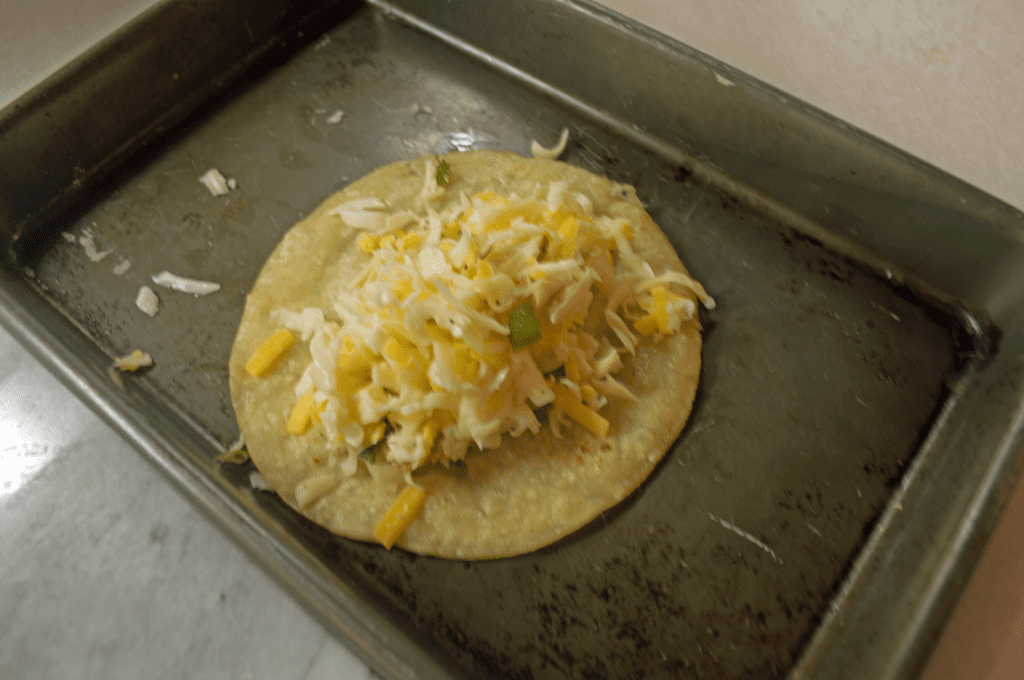
In a large bowl, mix together the cheeses – Oaxaca, Monterey Jack, and sharp cheddar. Add the diced green chiles if using. Stir until everything is combined. Set aside.
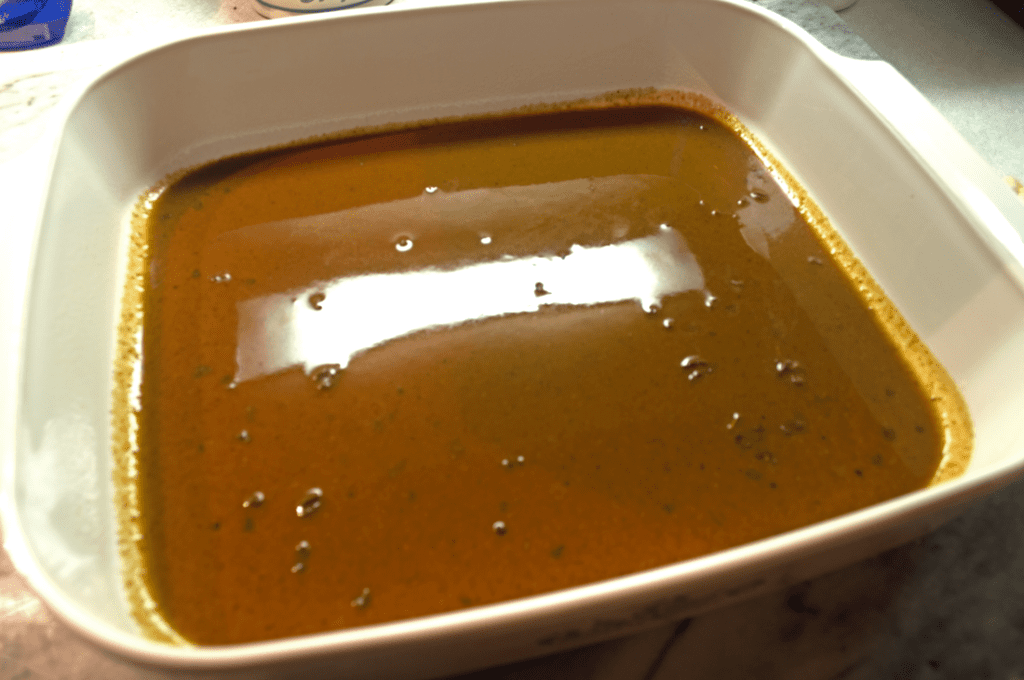
Ladle some of your lovely sauce to the bottom of a 9″x13″ pan.
Let’s Roll!
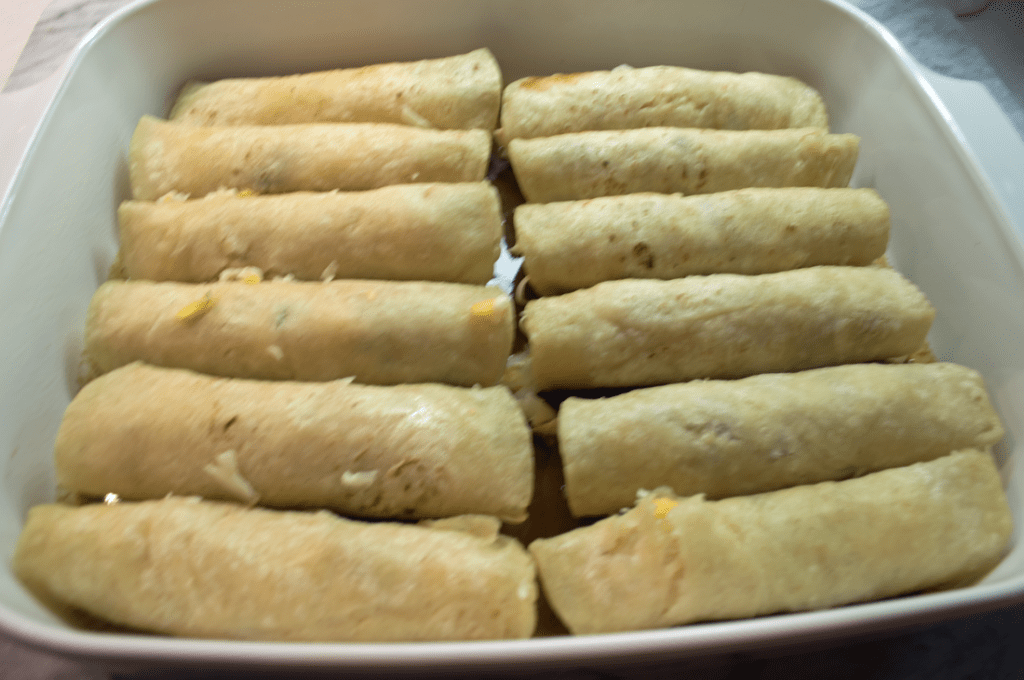
Preheat oven to 375°F. I use a quarter-sheet pan to roll whatever enchiladas I decide to make. Doing so keeps the process neat. This method is especially handy if you’re using flour tortillas dipped into a sauce to soften before rolling. Place 1/4 cup of the cheese filling on top of the tortilla. Roll into a nice tight little bundle and add the enchilada, seam side down, into the baking dish.
Fill your baking dish in two rows of six enchiladas per row.
You’ll have leftover cheese filling. That’s what you want.
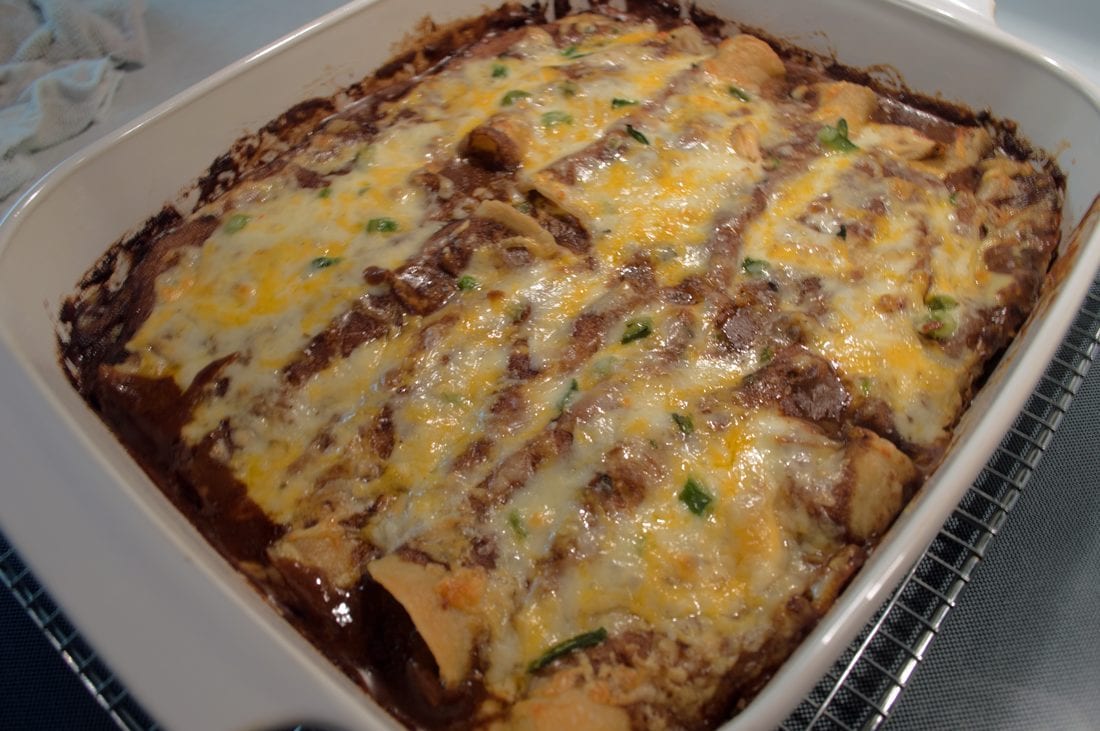
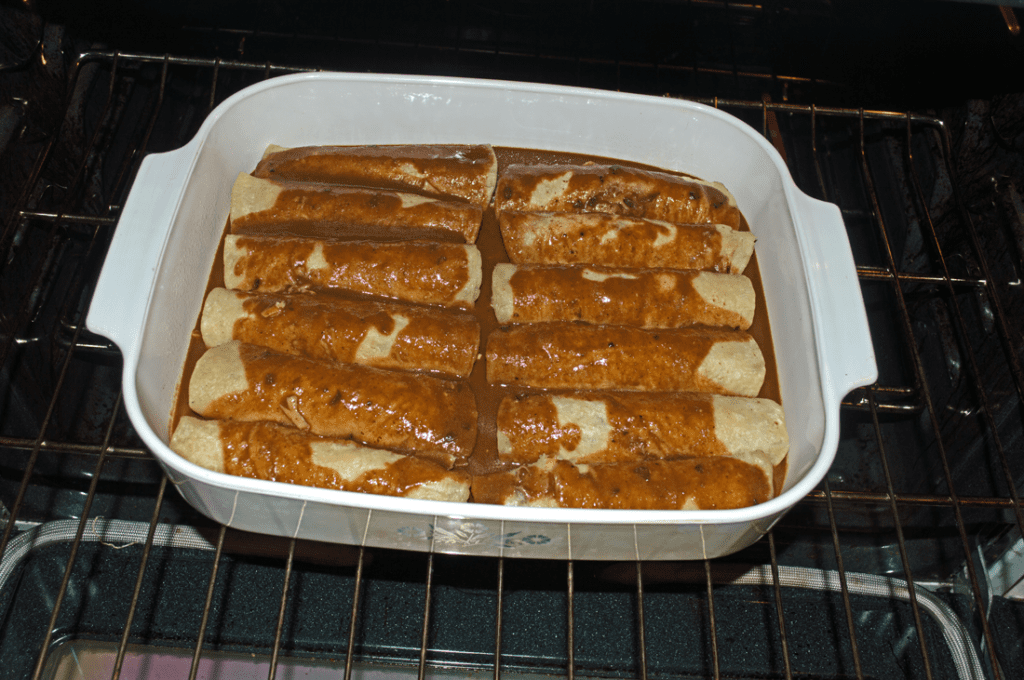
Pour the remaining mole sauce over the top of the enchiladas. Bake for 20 minutes or until they’re hot and bubbly. Sprinkle remaining cheese mixture over the enchiladas. Continue to bake for 10 minutes or until the cheese is melted.
Remove from the oven to a cooling rack. Let your enchiladas rest for 10 minutes before serving.
Yield: 6 servings
Cheesy Enchiladas in Mole
Cinco de Mayo is just around the corner. Those who love Mexican food should try this delicious recipe stuffed with cheesy goodness to celebrate the holiday. The sauce is not a true Mexican mole, like mole rojo, but it comes pretty close. I'd use this sauce in a heartbeat for any mole dish. The ingredients are easy to put together.
Prep Time30 minutes
Cook Time30 minutes
Additional Time10 minutes
Total Time1 hour10 minutes
Ingredients
3/4 cup vegetable oil
3 Tablespoons all-purpose flour
2 Tablespoons ancho chile powder
1 Tablespoon chipotle chile powder
2 teaspoons Mexican oregano
2 teaspoons cocoa powder
1 teaspoon ground cumin
2 cups low-sodium chicken stock
1 Tablespoon apple cider vinegar
12 corn tortillas
16 oz. Oaxaca or Chihuahua cheese, shredded
4 oz. sharp Cheddar cheese, shredded
4 oz. Monterey Jack cheese, shredded
2 long green chiles, roasted, peeled, and cut into medium dice OR 1 can diced green chiles
Instructions
Make the mole sauce.
In a medium-sized pot, heat 1/4 cup vegetable oil over medium heat. Add flour and whisk together to form a roux. Add ancho chile, chipotle chile, cocoa, oregano, garlic powder, and cumin. Continue to whisk for 2-4 minutes until the spices become fragrant. Add chicken stock. Continue to whisk and cook until smooth and the mixture begins to slightly thicken - 2-3 minutes. Add vinegar. Stir and check for seasoning adding salt and pepper to taste if needed. Set aside.
Make the filling.
If you're using fresh chiles, roast them over an open flame or in a dry skillet over medium-high heat until the skin is blistered. Remove chiles and place in a plastic bag. Close and allow the chiles to steam for 10 minutes. Take the chiles out and with a sharp knife peel off the skin. Cut open the chile. Remove the stem and seeds. Chop chile into medium dice. OR add a can of diced green chiles. Add chiles to cheese and toss to distribute ingredients. Set aside.
Soften the tortillas.
In a 10-12" skillet, heat 1/2 cup vegetable oil over medium heat. When the oil is hot, quickly fry each tortilla no more than 5 seconds per side. The object here is to soften the tortillas so they're easy to roll. Remove cooked tortillas to a sheet pan lined with paper towels using extra paper towels between layers.
Assemble the enchiladas.
Heat oven to 375F degrees. In a 13"x9" baking pan, ladle 1/2 cup of the mole sauce in the bottom of the pan. Tilt the pan to coat evenly. Set aside.
Using a plate or sheet pan, add 1/4 cup cheese mixture to one tortilla. Roll into a tight enchilada and place seam side down in the baking pan. Repeat for the remainder forming 2 rows of six enchiladas.
Pour remaining mole sauce evenly over the top. Bake for 15 minutes until the enchiladas are heated and the sauce is bubbly. Add remaining cheese filling and return to oven for 10 minutes until the cheese is melted and bubbly.
Remove to a cooling rack and rest for 10 minutes before serving.
Notes
Use any garnish you enjoy with Mexican food. I like shredded lettuce and diced tomatoes. Sour cream would be good or pickled jalapenos and fresh cilantro.
Jeff Mauro at Food Network is the author of this recipe.
My mother, Shirley, was a pie master. She could mix up crust for a double-crust pie in a matter of seconds. It was always the same recipe: 2 cups all-purpose flour mixed with 1 teaspoon salt and 2 tablespoons granulated sugar (sugar if she was making a sweet pie); 2/3 cup Crisco; and 3-4 tablespoons ice-cold water. Her’s was always perfect. Perfectly flavored, perfectly crimped, and perfectly browned. Mom didn’t make savory pies often, but this recipe was one of our favorites.
Three reasons why you should bake up this delicious ground beef pot pie and keep it in your recipe box:
This isn’t a store-bought frozen one heated up in the oven. It’s one you make and bake with all the love I know you put into every dish.
Shirley’s Ground Beef Pot Pie is quick and soooo easy to prepare and is inexpensive to make.
Everyone LOVES pot pies!
What makes this pot pie so easy?
Except for the browned ground beef, you can make this entirely with pre-made ingredients.
All pot pies need a crust. I like to buy pre-made pie crusts from the grocery because I lack my mother’s skill. I store them in the freezer until I want to make any sort of pie. Of course, you can make your own crust – good for you! But having pre-made ones at the ready is a real time-saver. I find boxes of double pre-made pie crusts in the grocery refrigerator section for $1.79 – that’s a pretty economical time-saver and perfect for savory or sweet pie applications. Or you might try building the crust out of phyllo sheets like this Chicken Pot Pie in Phyllo Crust.
For this pot pie recipe, I cubed fresh carrots and potatoes and completed the filling with frozen peas. But you can substitute frozen carrots and peas – you know the combo bags sold in grocery store freezer sections. And cubed frozen hash brown potatoes – another staple in my freezer. And for a real simple prep, you can use frozen chopped onions for those days you just don’t feel like chopping an onion. I periodically have those days.
I am not a big fan of canned vegetables. Frozen is the way to go for me if I’m not using fresh veggies.
Frozen vegetables taste fresher and maintain a crunch, although not as perfect as fresh vegetables but better than canned. I know canned vegetables are less expensive than frozen. Please consider this – when you drain off the canning fluid from canned vegetables, what are you left with? A 15oz can of vegetables yields less than a 12oz package of frozen vegetables. And then there’s the added salt in canned vegetables that I try to avoid at all costs for health reasons.
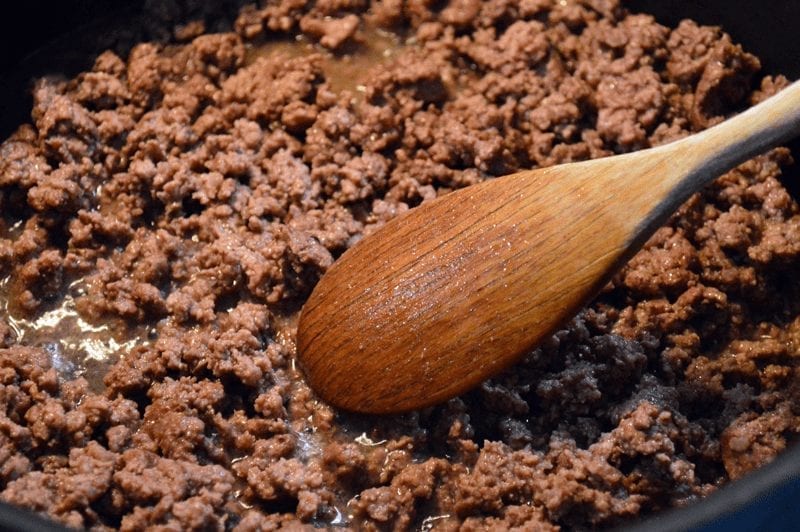
Add one Tablespoon olive oil in a 12″ skillet over medium-high heat. Brown 1½ – 2 pounds of ground beef or ground turkey. Once the meat is browned, drain off the fat in a colander and set aside.
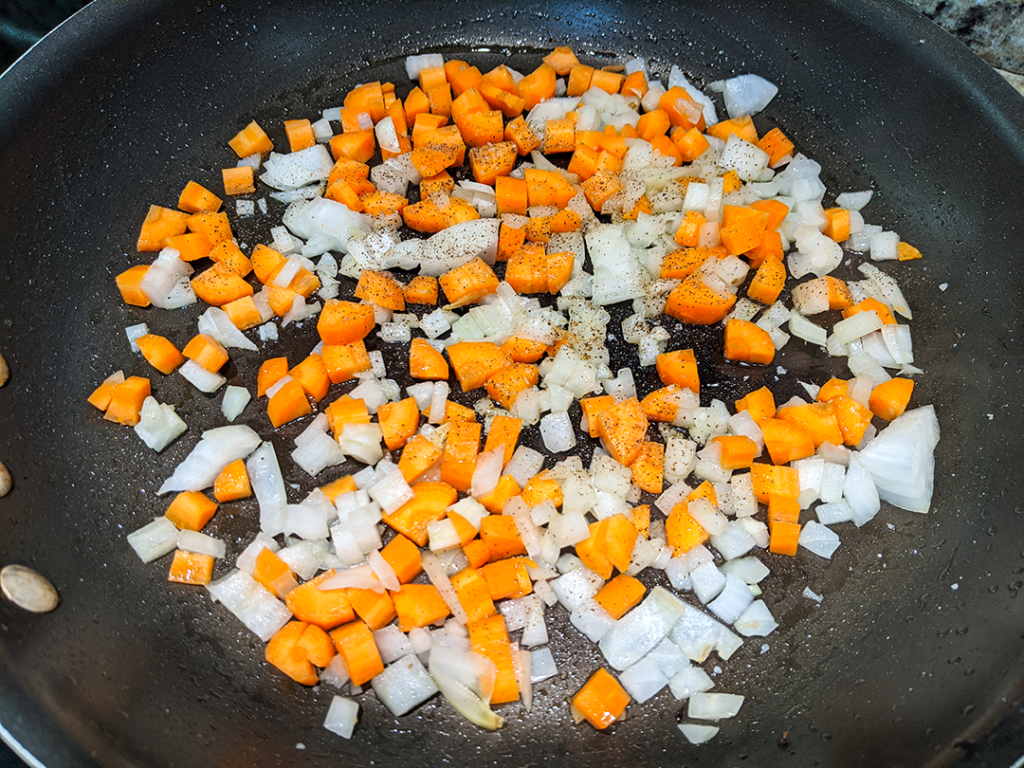
Return the skillet to the cooktop. Add one tablespoon olive oil and heat over medium-high heat. Add chopped onion and diced carrots, stir, and quickly saute until the onions become translucent.
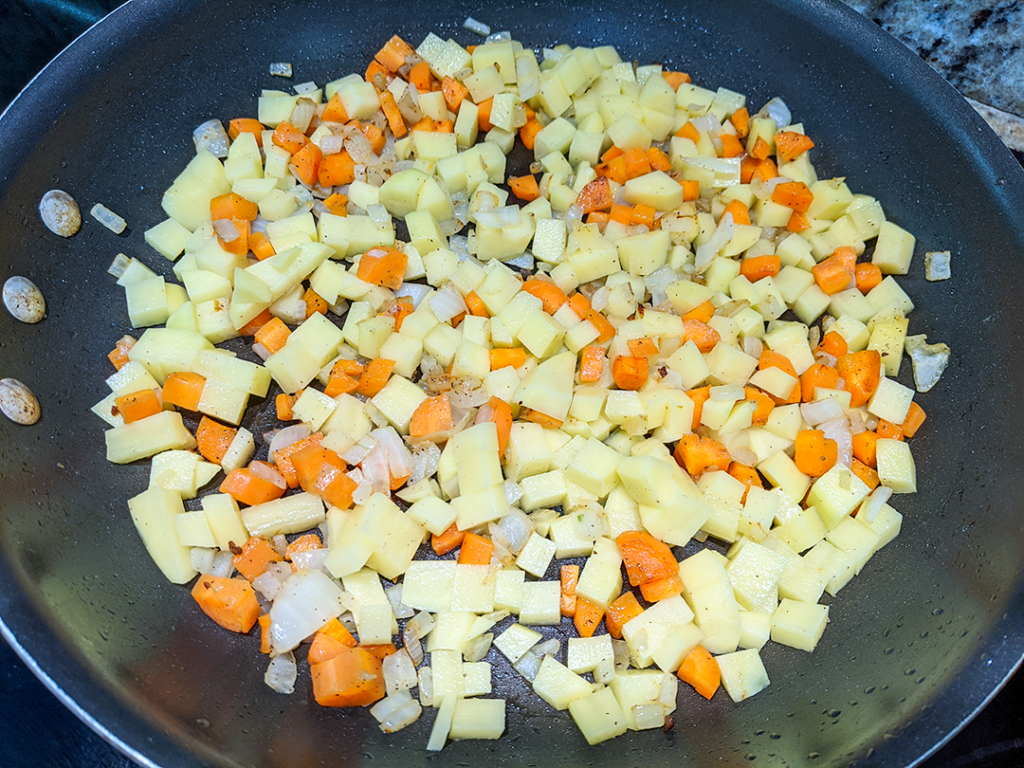
Add diced potatoes and minced garlic. Stir and cook for one minute. Add 3/4 cup of beef stock. Stir scraping up the brown bits at the bottom of the skillet.
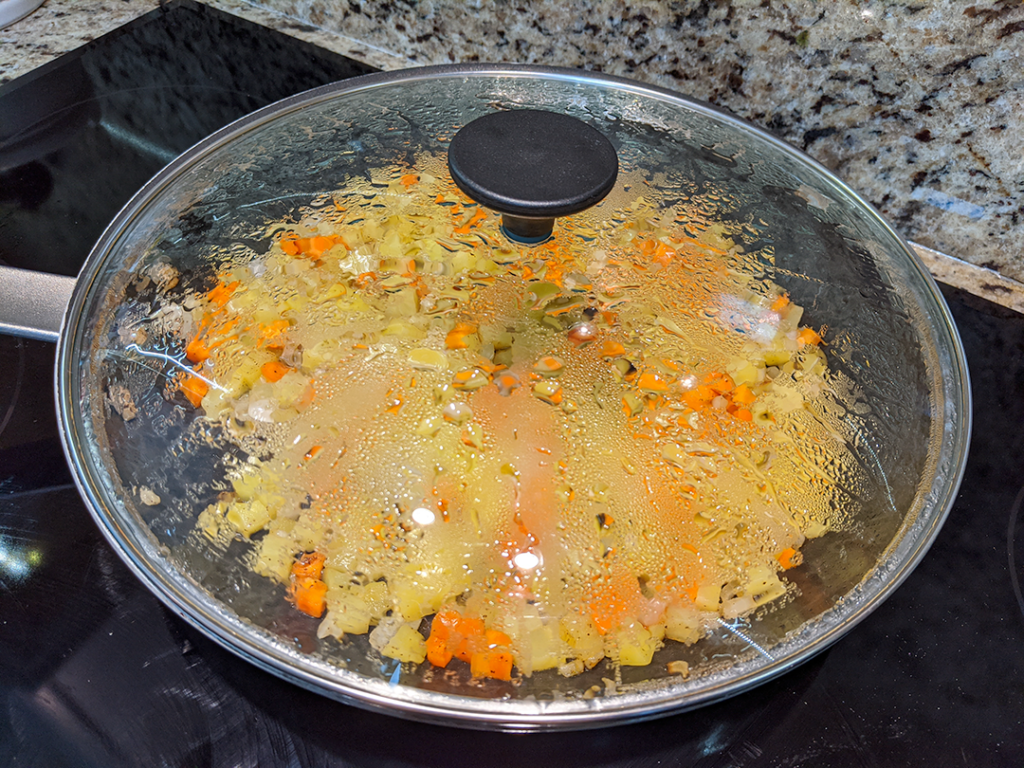
Turn the heat down to medium-low. Put a lid on the skillet and steam the vegetables for 10 minutes.
While the veggies are steaming, it’s time to get the pie crust ready. If you’re using packaged, it’s just a matter of bringing the crusts to room temperature. Even though pre-made crusts are 9″ in diameter, I like to roll mine out to make them a bit larger and thinner. If you’ve decided to make your own crust, you should follow your recipe and refrigerate for 30 minutes before rolling. I’d make the crust before starting the recipe so your crust has time to rest.
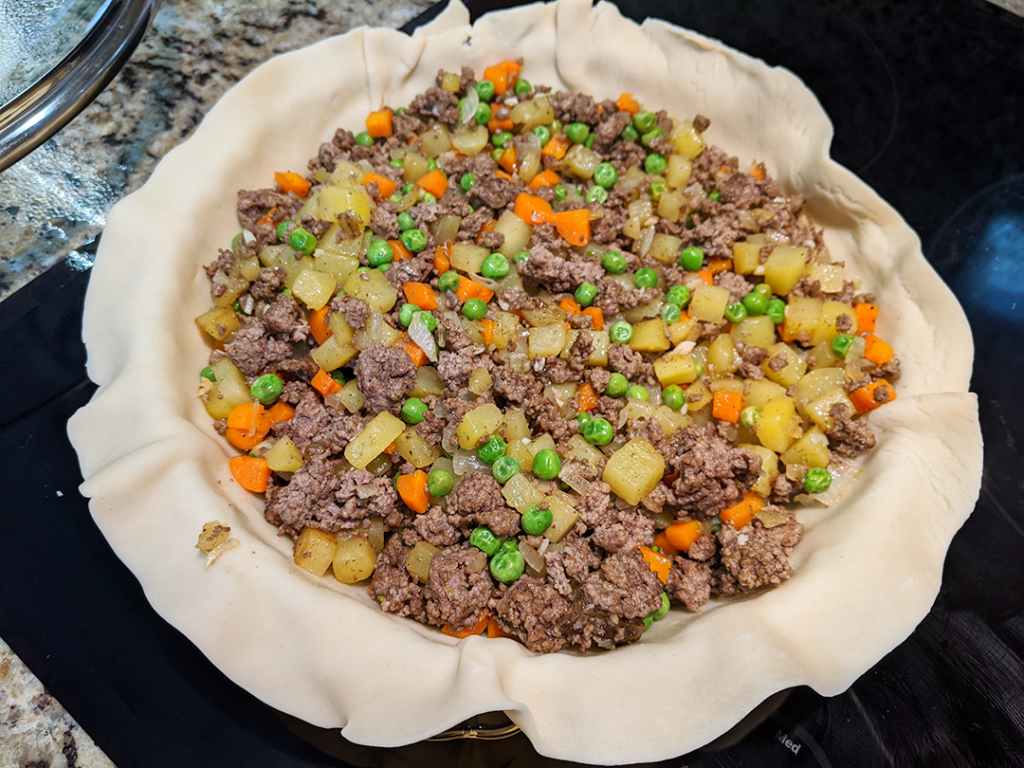
Fit pie crust into a 9″ deep-dish pie pan. Return to the cooktop, remove the lid from the skillet, and add the cooked ground beef and frozen peas. Stir until combined and spoon the ground beef filling into the crust. Roll out a crust for the top and put it on top of the filling.
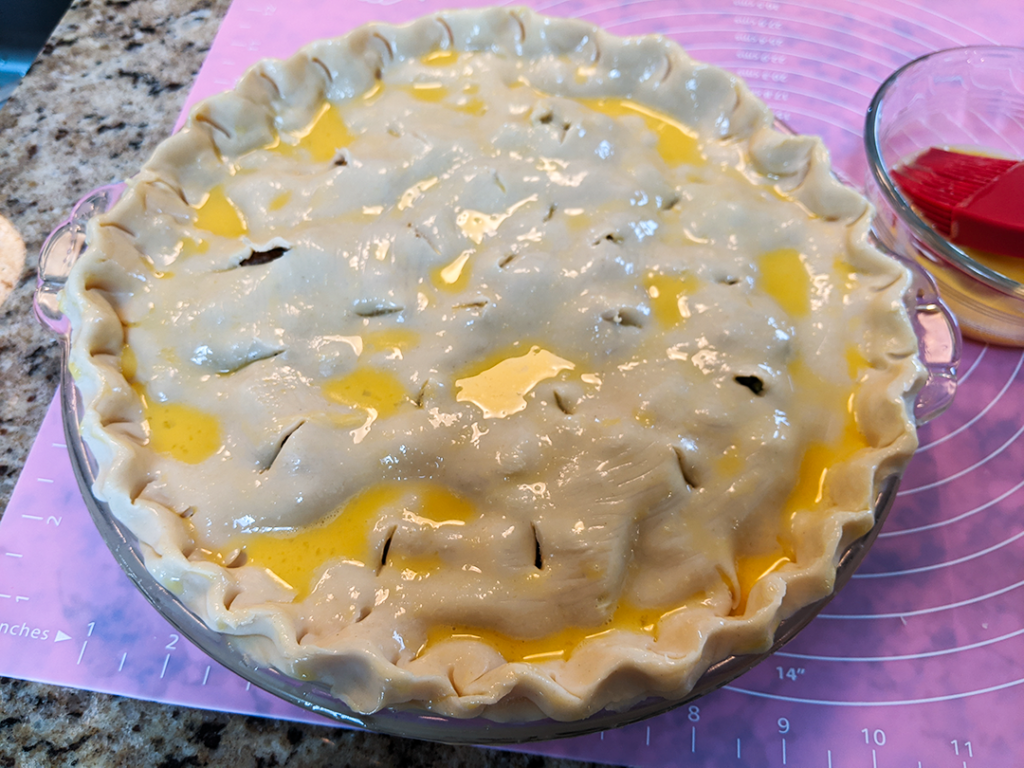
Next, crimp the edges to seal both crust layers and cut slits over the top crust. Mix one egg with one tablespoon water and whisk with a fork to make an egg wash. Brush the egg wash over the top of the pie. At this point, you can sprinkle the top of your pie with flaky salt and/or coarsely ground black pepper.
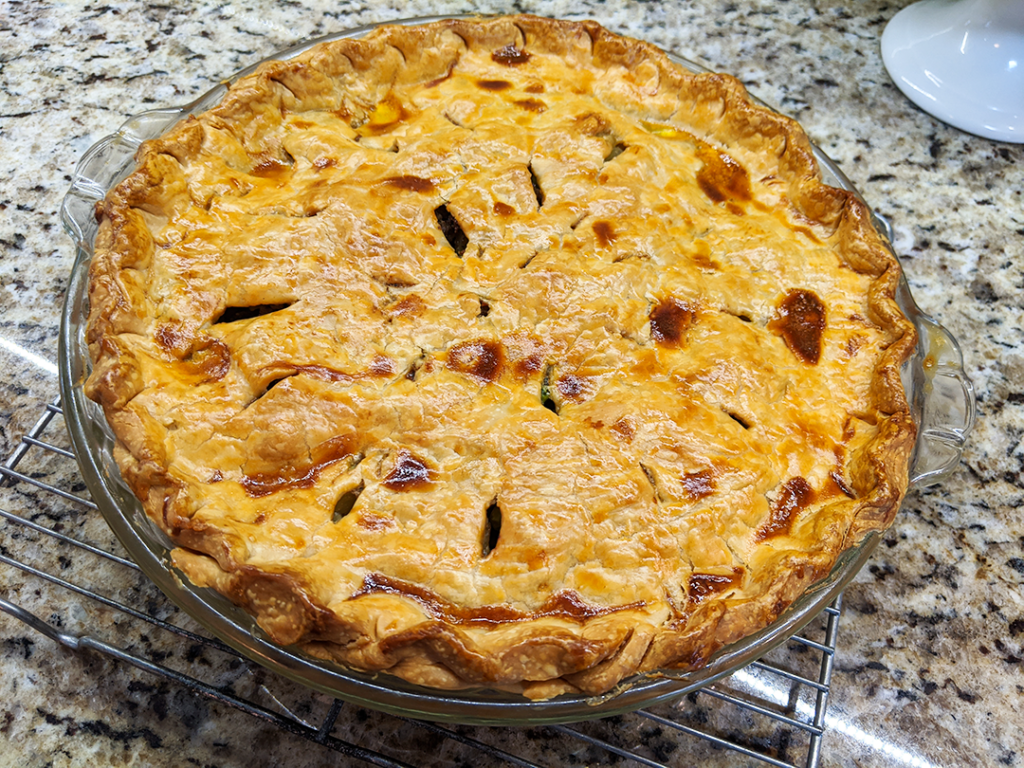
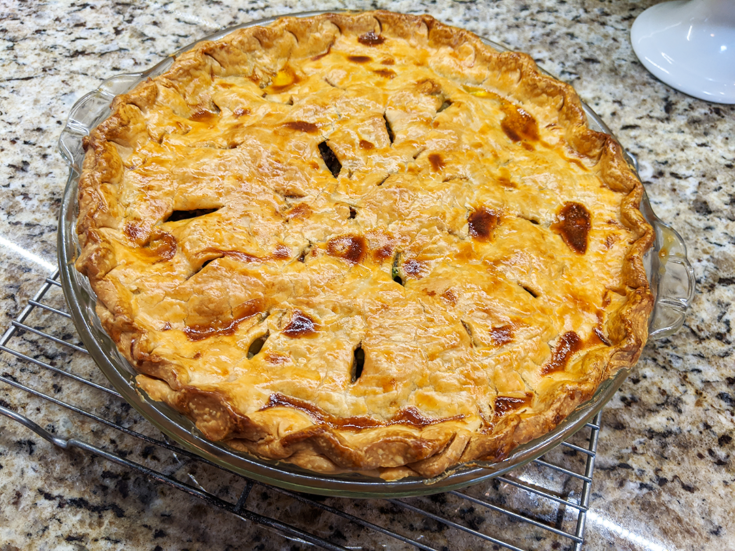
Pop your pot pie into a pre-heated 425°F oven. Bake for 30 minutes or until the crust is flaky and nicely browned. Remove to a cooling rack and allow to rest for 10 minutes before serving.
While the pie is resting, you can whip together a quick and simple brown gravy to ladle over the hot pot pie slices.
In the same skillet you used to prepare the vegetables and over medium heat melt 2 tablespoons butter. Add 2 tablespoons all-purpose flour. Whisk until combined which forms a roux.
Add 2 cups of warmed beef broth. Whisk until combined.
Continue to cook and lightly whisk for a few minutes until the sauce begins to thicken. Check the seasoning – add salt and pepper if needed. You may want to add dried herbs to the sauce to kick the flavor up a notch.
And there you have it! A nice green salad or a bowl of fresh fruit would go well with your extremely flaky and delicious beef pot pie.
Please Note: There is no binder in the meat pie filling. Part of this is because adding more liquid to the filling can make the bottom crust soggy. I like the ground beef pot pie to be dryer with a flaky crust. That’s why I suggested making a side beef gravy. However, you might add one cup of shredded cheese just before spooning the filling into the pie crust. You can even make the pot pie Southwestern by adding a can of drained chopped chilies and shredded Monterey Jack cheese to the filling, too, served with a lovely salsa with shredded lettuce, sour cream and/or guacamole. It’s really up to you.
Yield: 6
Shirley's Ground Beef Pot Pie
My mother, Shirley, was a pie master. She could mix up crust for a double-crust pie in a matter of seconds. It was always the same recipe: 2 cups all-purpose flour mixed with 1 teaspoon salt and 2 tablespoons granulated sugar (sugar if she was making a sweet pie); 2/3 cup Crisco; and 3-4 tablespoons ice-cold water. Her's was always perfect. Perfectly flavored, perfectly crimped, and perfectly browned. Mom didn't make savory pies often, but this recipe was one of our favorites.
Prep Time20 minutes
Cook Time30 minutes
Total Time50 minutes
Ingredients
1 1/2 - 2 pounds ground beef (80-20 or leaner) OR ground turkey
1 medium onion, diced OR 1/2 bag frozen chopped onions
2 large russet potatoes, diced OR 2 cups frozen diced hash brown potatoes
3 carrots, diced
1 cup frozen peas
OR 1-12oz bag of frozen peas and carrots
2 cloves garlic, minced
3/4 cup low sodium beef broth
Olive oil
Salt & Pepper
Crust for one 9" double-crust pie
1 egg
1 Tablespoon water
Instructions
Preheat oven to 425F degrees.
In 12" skillet, brown ground meat until pinkness is gone. Drain ground meat in a colander and set aside.
Return skillet to the cooktop. Over medium-high heat, add 1 Tablespoon olive oil. Add onions and carrots. Stir and saute until onions are translucent.
Add potatoes and garlic. Stir and cook for 1-2 minutes.
Add broth to skillet. Reduce heat to medium-low. Cover with a lid. Steam vegetables for 10 minutes.
Remove lid and add frozen peas and cooked ground meat. Stir to combine Turn off heat and set skillet aside.
Fit a 9" deep-dish pie pan with one pie crust. Spoon in the meat filling.
Place the second pie crust over the top. Crimp the edges to seal both crusts. Using a sharp knife, cut slits into the crust.
Make egg wash with one egg and 1 Tablespoon water. Brush the top crust with egg wash.
Bake for 30 minutes or until the pie is nicely golden brown.
Remove pie to a cooling rack and let rest for 10 minutes before serving.
Notes
You can make a simple beef sauce to serve. In the same skillet used to cook the vegetables over medium heat, melt 2 Tablespoons butter. Add 2 Tablespoons all-purpose flour. Mix to form a roux. Add 2 cups warmed beef broth. Stir and continue to cook until the sauce begins to thicken. Check for seasoning - add salt and/or pepper if needed. You can also add dried herbs to the sauce to kick up the flavor.
Please see additional notes in the body of my post for other suggestions.
I watched Ree Drummond, aka “The Pioneer Woman,” make this recipe “Steakhouse Pasta” on the Food Network Channel. Quite literally, my mouth was watering. I strayed from Ree’s recipe a wee bit based on ingredients I had on hand.
Rather than skirt steak, I had a package of chuck steak in the fridge waiting to be transformed. The steaks were only $3.69/pound at the grocery and Richard loves chuck steaks although I rarely buy them. In the “Wayback Days”, my dad used to buy chuck steak not for a family meal, but for his cherished buddy, Harry, his dog. Harry was spoiled and happy.
I also added some fresh mushrooms and used frozen chopped spinach instead of fresh. Ree’s recipe calls for crumbled blue cheese. I opted for freshly grated Parmesan and cream cheese. The Pioneer Woman was shooting for a steakhouse-like pasta dish, thus the blue cheese, spinach, and horseradish – all steakhouse classics. And she uses pappardelle, which is a wide pasta – wider than fettuccine. I had linguine on hand so that’s what I used.
I must say that this was an easy and delicious dish. Plenty of creamy, cheesy sauce punched with a flavorful variety of veggies for the pasta. And the grilled steak that goes with it is perfect, even if it was chuck steak which turned out to be flavorful and tender. No wonder Harry was so happy!
Let’s Make Some, Shall We?
First thing, fill a large pot with water, cover, and bring to a boil. This is for the pasta. Be sure to save 1-2 cups of the pasta water after cooking to use for the sauce. Prepare the pasta while you’re cooking the sauce. If you’re using frozen spinach, thaw it in the microwave for 45 seconds, drain it, and squeeze it dry using paper towels.
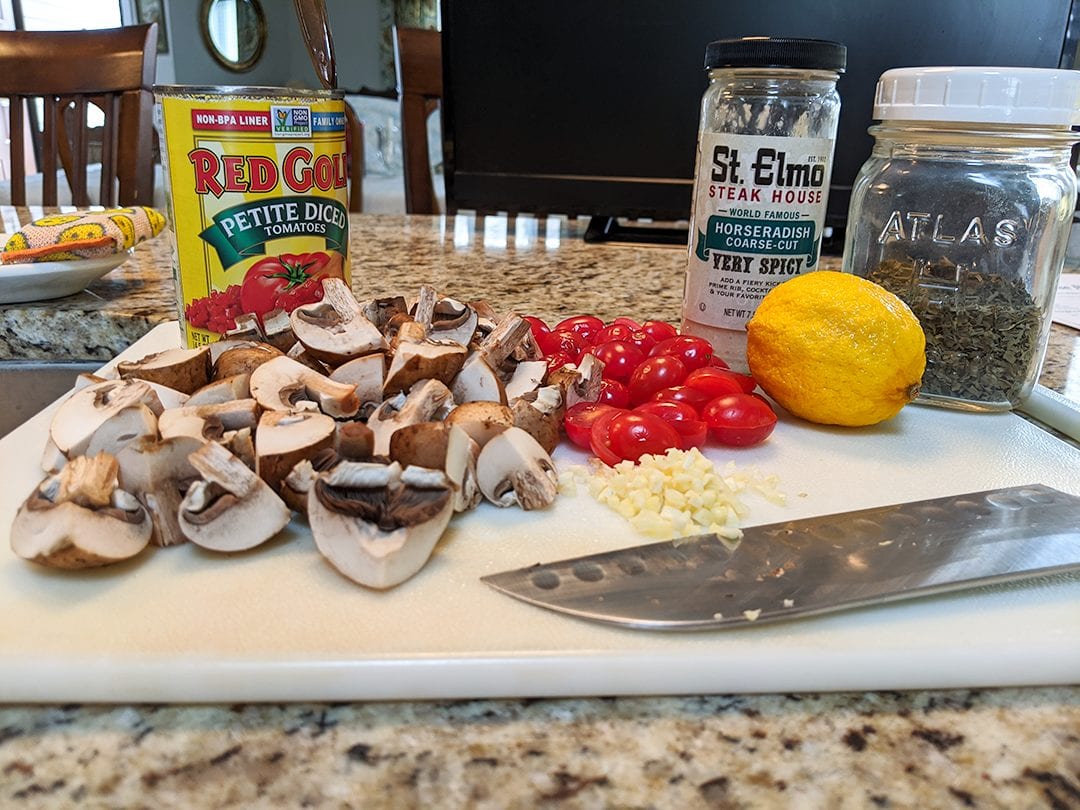
Here are all my lovely assembled ingredients for the sauce except the heavy cream and half-n-half. I had a partial container of cherry tomatoes in the fridge, so I halved them and threw them in with the canned tomatoes. I quartered baby portobello mushrooms – I use portobellos because I think they have more flavor than white buttons. Notice there are no onions used in this sauce. However, I wouldn’t judge you if you threw in 1/2 a diced or sliced onion.
I love horseradish and its addition gives the sauce a nice kick without an overpowering flavor. The horseradish I use is from St. Elmo’s Steak House, an Indianapolis institution. St. Elmo’s is famous for their shrimp cocktail served with a memorable eye-watering, sinus-clearing, breath-stopping cocktail sauce. Their sauce is HEAVY with freshly grated horseradish they prepare every day. It’s legendary. St. Elmo’s sells their cocktail sauce and horseradish commercially and it’s now easy to find in grocery stores. Theirs is the only horseradish I use. There’s little horseradish in this recipe – don’t be afraid. If you hate horseradish, leave it out.
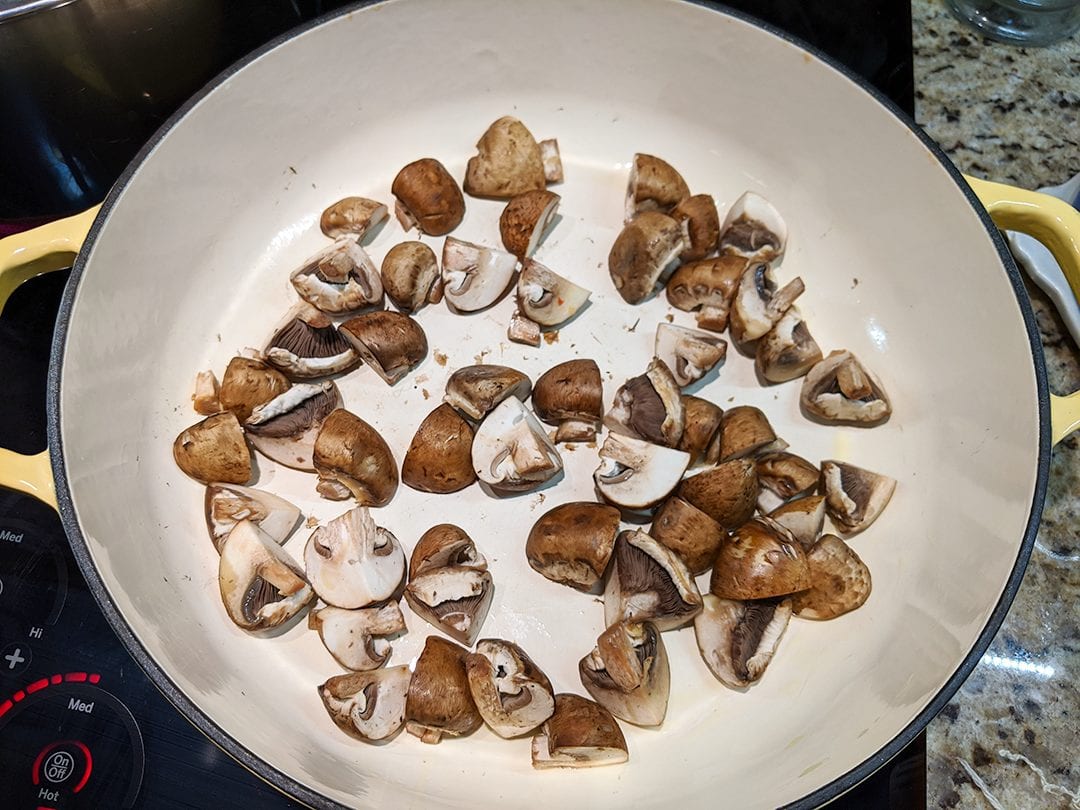
Next, in a 12″ heavy-bottomed skillet over medium heat add one Tablespoon olive oil and the mushrooms. Stir the mushrooms around for 5 minutes or so until they begin to soften and brown. I don’t use lots of oil when I brown mushrooms. I like to heat them up so they release their liquid and the liquid reduces a bit. I think it adds a little umami to a dish. Mushrooms are perfect to add subtle flavor.
Add the minced garlic to the mushrooms and stir for one minute or less until the garlic becomes fragrant.
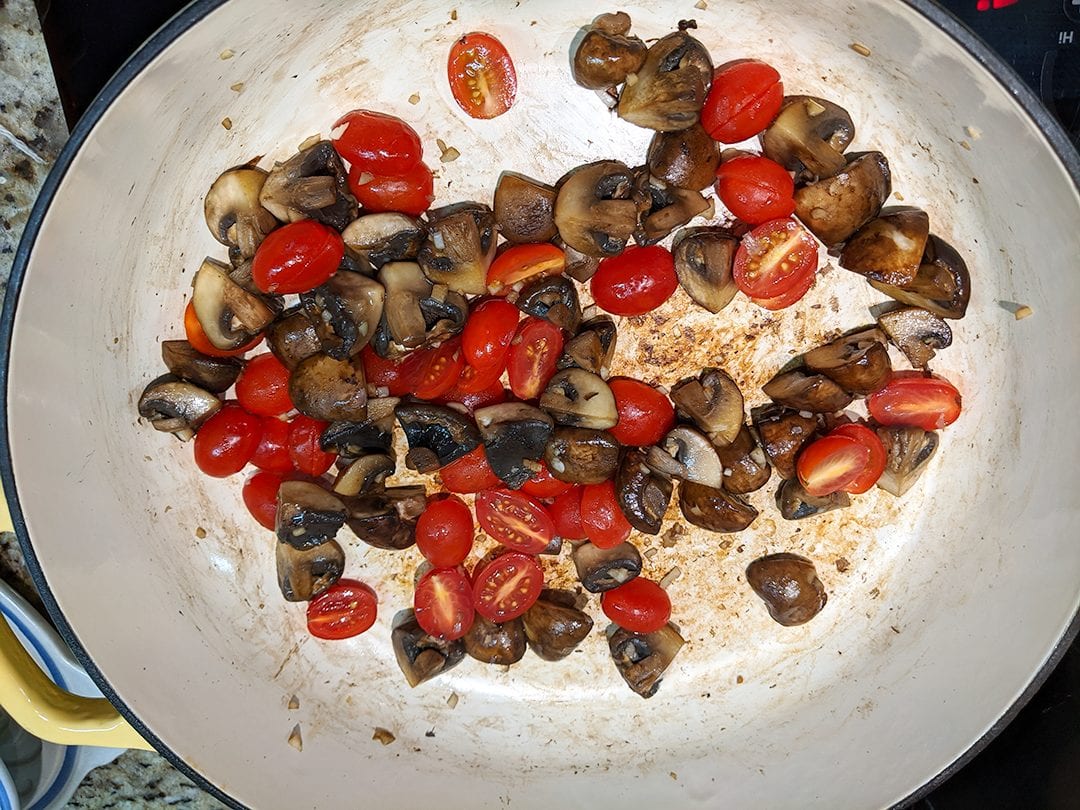
See how the mushrooms cooked down and left flavorful browned bits at the bottom of the skillet? Lovely. Add the halved cherry tomatoes, if using. Stir and cook until the tomatoes just begin to wilt. Then stir in 1/2 cup of white wine or chicken stock. Bring to a gentle simmer and continue to cook until the liquid is reduced by half. Quick – 2-3 minutes.
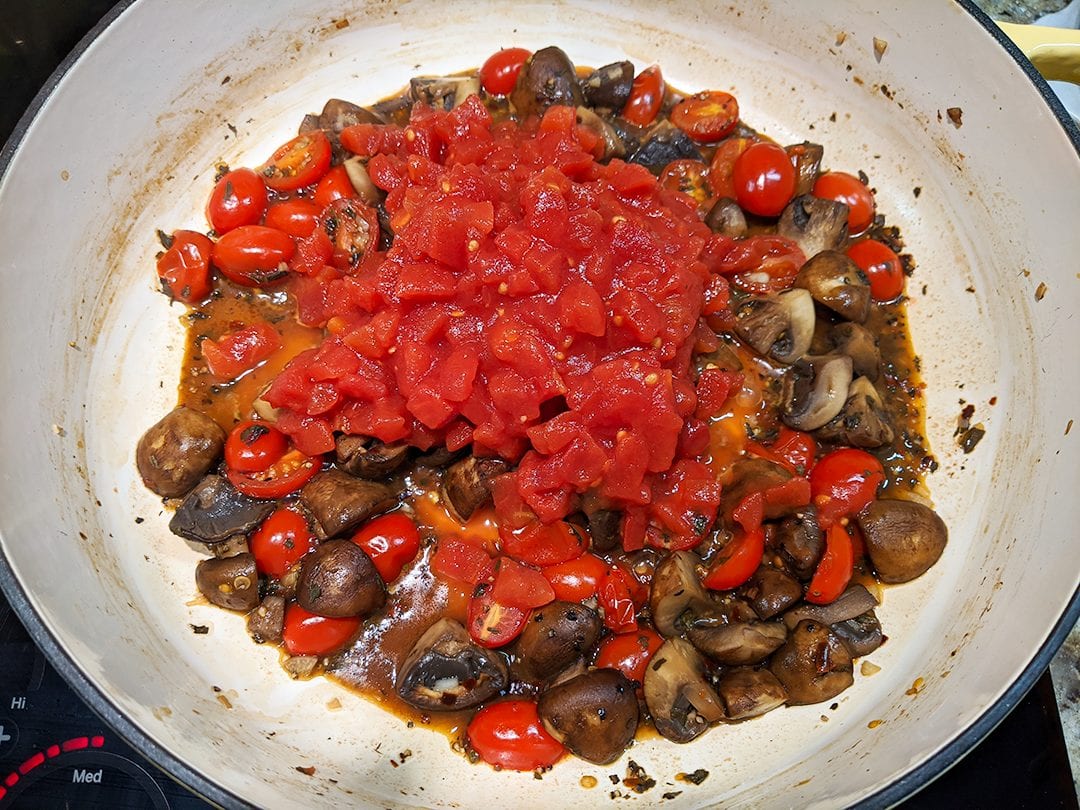
Add canned petite diced tomatoes with their liquid along with 1/2 Tablespoon dried basil, 1/2 teaspoon granulated sugar, and 1/4 teaspoon crushed red pepper. Bring to a gentle simmer and continue to cook for 10 minutes or so stirring every once in a while.
While the sauce is cooking, it’s time to get the steak ready for the grill. My chuck steak was thin enough, 1/2″, that I cooked it quickly on our gas grill, but you can easily use a grill pan or large skillet on top of the stove. Sprinkle the meat with a little salt and pepper on both sides. When your grill or skillet is hot, sear the meat for 3-4 minutes on both sides for medium-rare. When done, remove from heat to a plate and loosely cover with foil until you’re ready to serve.
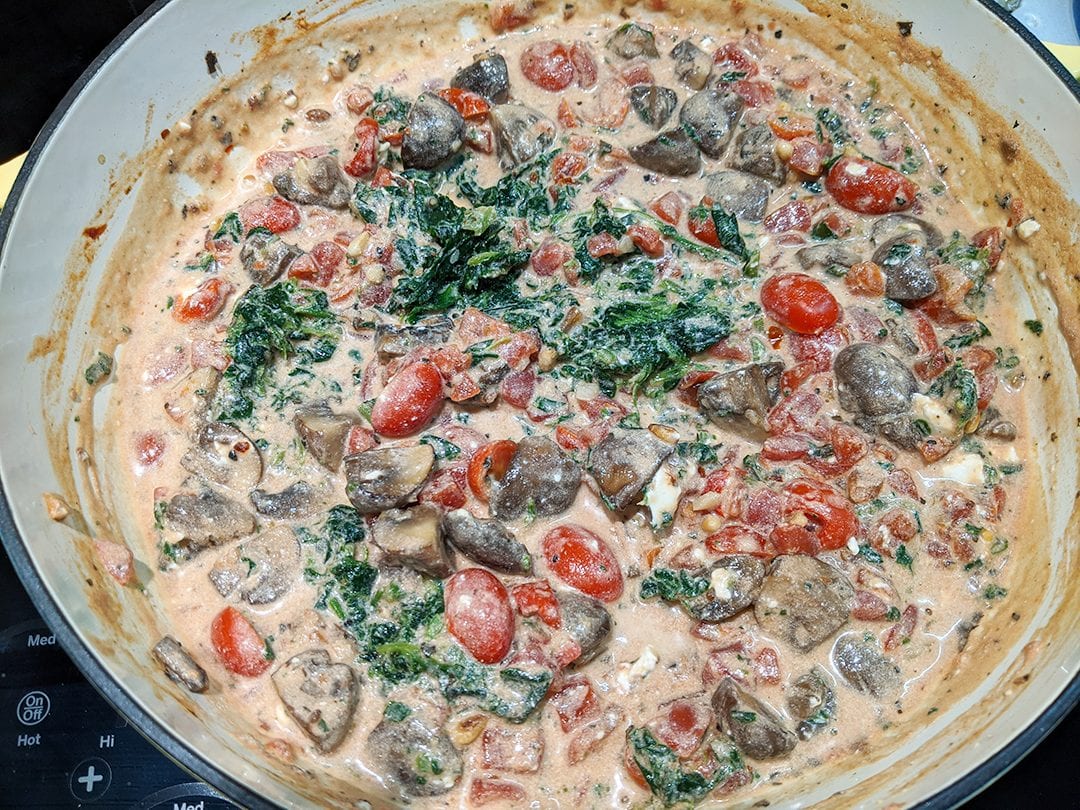
Here’s the finished beautiful sauce and how to make it:
Reduce the heat to low under the tomato and mushroom mixture.
Add 1/2 cup of heavy cream and 1/2 cup of half-n-half. If you don’t have heavy cream, use all half-n-half. Stir until it’s all incorporated.
Stir in 2-3 oz of cream cheese. Stir until the cheese has melted into the mixture.
Add 1 Tablespoon horseradish, if using. Stir.
Add 3/4 cup of freshly grated Parmesan cheese. Stir until it’s all incorporated.
Add 3 cups of fresh spinach OR run a knife through the thawed and dried frozen spinach to break up the clumps. Stir until incorporated
I had 1/4 cup or so of roasted pine nuts hanging around on the kitchen counter, so they went into the sauce, too.
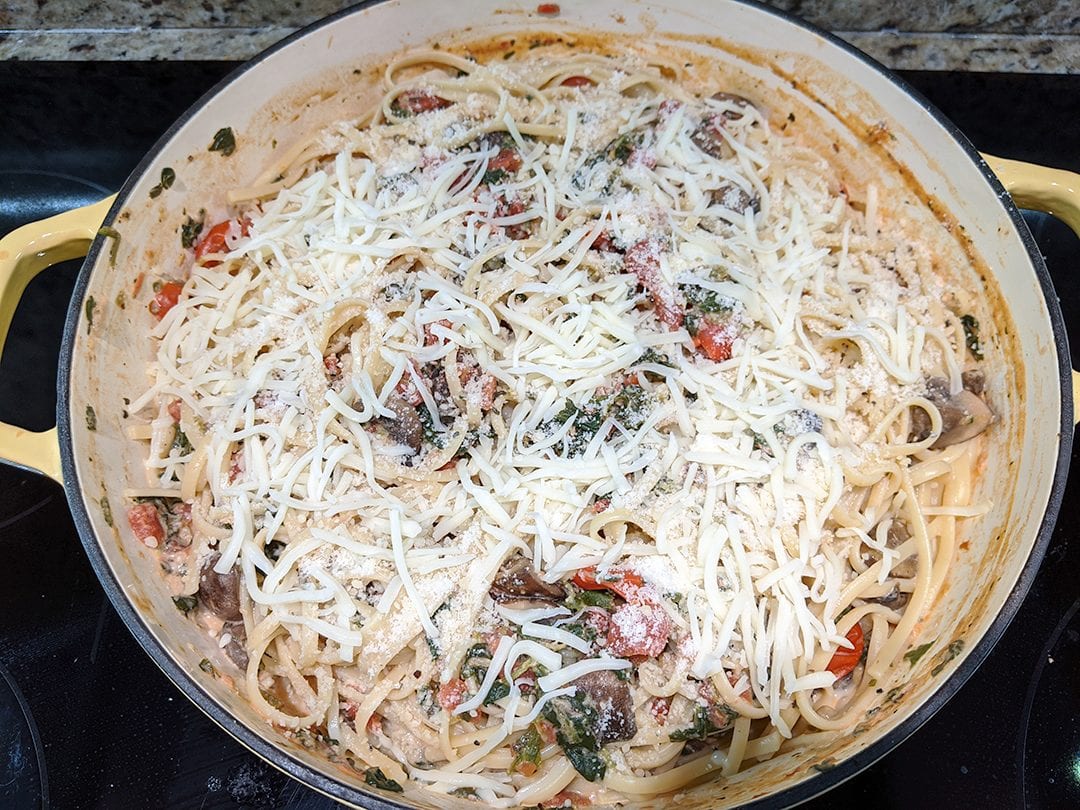
Add the cooked, drained pasta. Using tongs, toss everything together until the pasta is well coated. You may have to add some of the pasta cooking water to help loosen the pasta – I find doing so actually makes the pasta sauce creamier. I topped my finished pasta with shredded mozzarella cheese – why not?
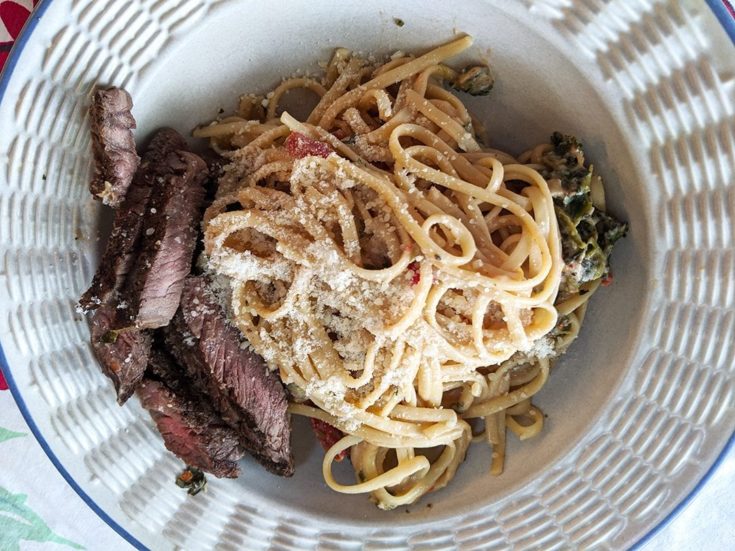
Slice your steak into strips and serve on top of the pasta or serve into individual pasta bowls with steak on the side like I did here and top with more freshly grated Parmesean at service.
And there you have it! This dish is filled with flavor from all the vegetables and cheese, and so satisfying.
Thanks, Ree, for your inspiration! This recipe is going on my regular menu rotation!
Yield: 6
Steak with Creamy, Cheesy Pasta, Tomatoes & Mushrooms
This dish is inspired by The Pioneer Woman's Steakhouse Pasta. It's filled with flavor from all the vegetables and a creamy, cheesy sauce perfect for pasta. Delicious and so satisfying!
Prep Time15 minutes
Cook Time30 minutes
Total Time45 minutes
Ingredients
1 1/2 pounds dried pasta, I used linguine but pappardelle or fettuccine works, too
1 Tablespoon olive oil
8oz baby portobello mushrooms, quartered
3 cloves garlic, minced
1 cup cherry tomatoes, halved, optional
1 15oz can petite diced tomatoes
1/2 cup dry white wine or chicken stock
1/2 teaspoon granulated sugar
1/4 teaspoon crushed red pepper flakes
1/2 Tablespoon dried basil
1/2 cup heavy cream
1/2 cup half-n-half
2-3 oz cream cheese at room temperature and cut into chunks
3/4 cup freshly grated Parmesan cheese + more for serving
1 Tablespoon prepared horseradish
1 box frozen spinach, thawed, drained and squeezed dry with paper towels and chopped again to break up clumps OR 3 cups fresh spinach
1-2 cups reserved pasta cooking water
1 pound chuck steak OR skirt steak, flank steak - any thin steak that will grill quickly
Instructions
Fill a large pot with water, cover with a lid, and bring to a boil. While waiting for the water to boil, make the pasta sauce.
Heat a 12" heavy-bottomed skillet over medium heat. Add 1 Tablespoon olive oil. Add mushrooms and saute for 5 minutes or so until the mushrooms begin to brown and release their liquid.
Add minced garlic, stir, and saute for 1 minute or less until the garlic becomes fragrant.
Add white wine, stir scraping the brown bits on the bottom of the skillet and gently simmer until the liquid is reduced by half.
Add cherry tomatoes, if using, stir and cook until the tomatoes are just softened.
Add petite diced tomatoes and dried basil, stir. Gently simmer, uncovered, for 10 minutes.
Get steak ready for the grill. Sprinkle lightly with salt and pepper on both sides. Grill for 3-4 minutes on each side for medium-rare. Or use a grill pan or large skillet on the stovetop. Remove to a plate and cover loosely with foil. Allow to rest until service.
Cook pasta according to package directions. Reserve 1-2 cups of pasta cooking water. Drain cooked pasta. Set aside.
Reduce heat under tomato sauce to low. Add heavy cream, half-n-half, and horseradish. Stir until warmed.
Add cream cheese and stir until melted.
Add Parmesan and stir.
Add spinach and stir. If using fresh spinach, cook until it begins to wilt.
Add the cooked, drained pasta. Using tongs, lift the pasta until coated with sauce. You may need to use the reserved pasta water to thin the sauce so it coats evenly.
Cut steak into 1/2" strips and serve on top or along side the pasta.
Notes
Feel free to substitute 1/2 cup grated fontina cheese for cream cheese. You may use 1 cup half-n-half in place of 1/2 heavy cream and 1/2 cup of half-n-half.
This is such an easy, quick and economical meal! In 30 minutes, you’ll have dinner on the table – no kidding. Mimi’s One-Skillet Chicken, Rice, Broccoli, and Cheesy Casserole is flavorful and satisfying. All the cooking is done in one skillet – as you would expect from the title. Ha!
I like this recipe for a couple of reasons. You don’t need to use any canned cream soups. As the rice and chicken cook, the liquid becomes creamy from the starch in the rice. The chicken and rice cook together in the skillet, so there’s no need to cook the rice separately. You could add a handful of toasted, slivered almonds or toasted pine nuts. Or how about some browned sliced mushrooms – that would be delicious, too.
Once the onions and chicken are browned, you’ll add the uncooked rice to the skillet and saute until the grains become translucent. Then add chicken stock. The brown bits in the bottom of the skillet dissolve in the liquid and give the cooked rice such an appealing light brown color.
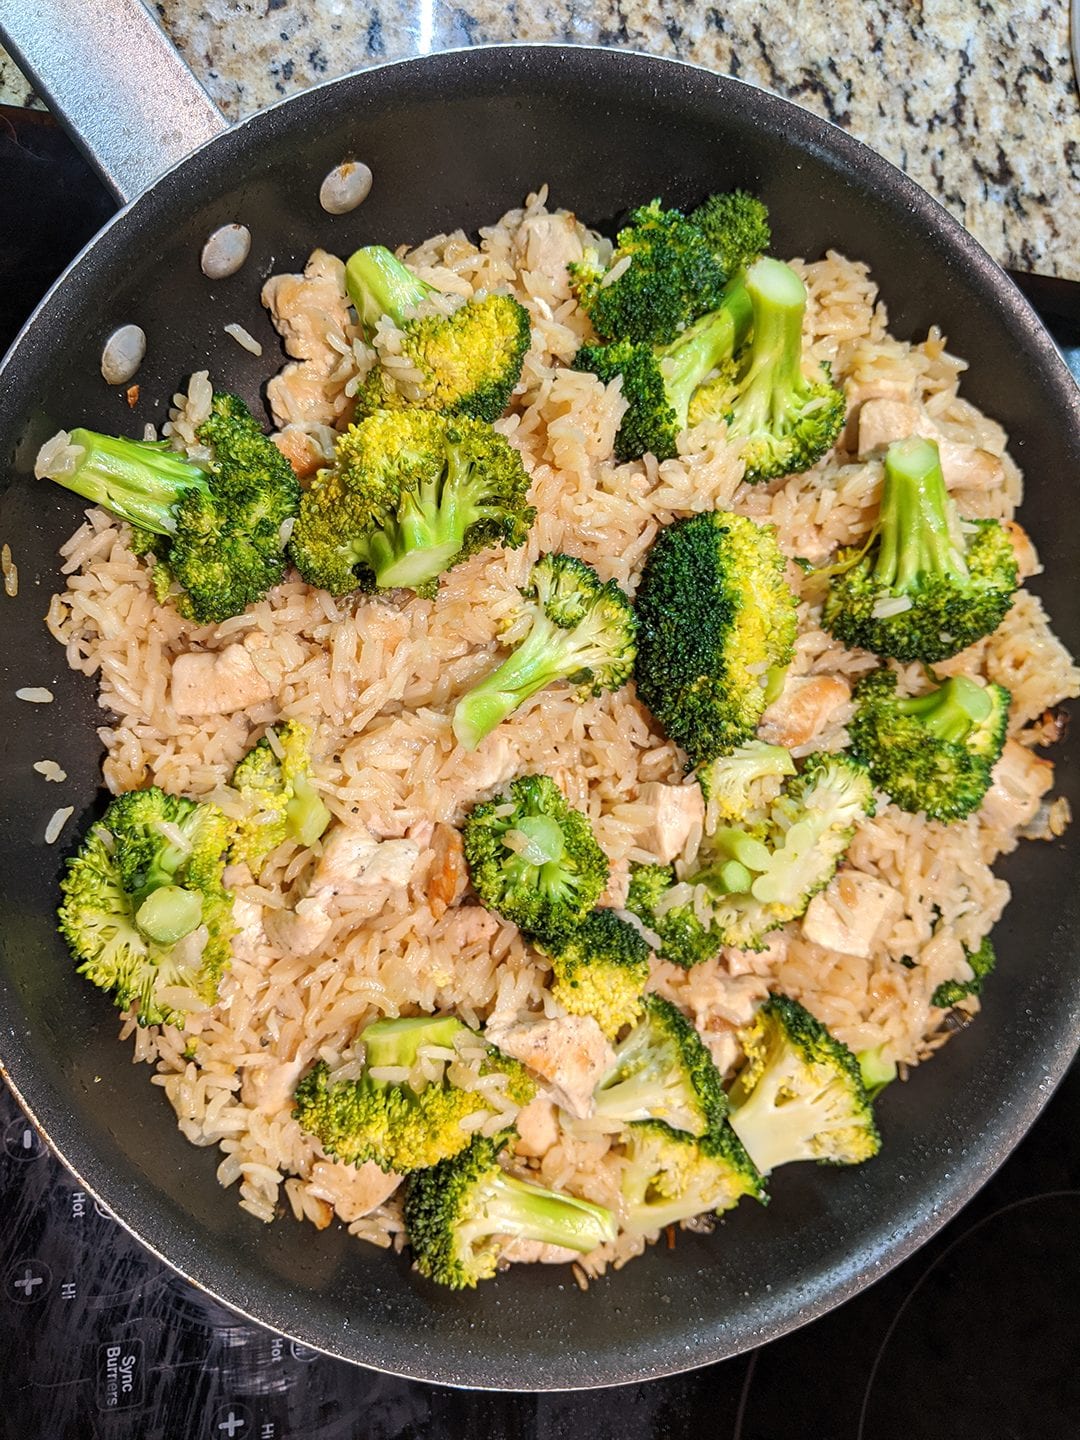
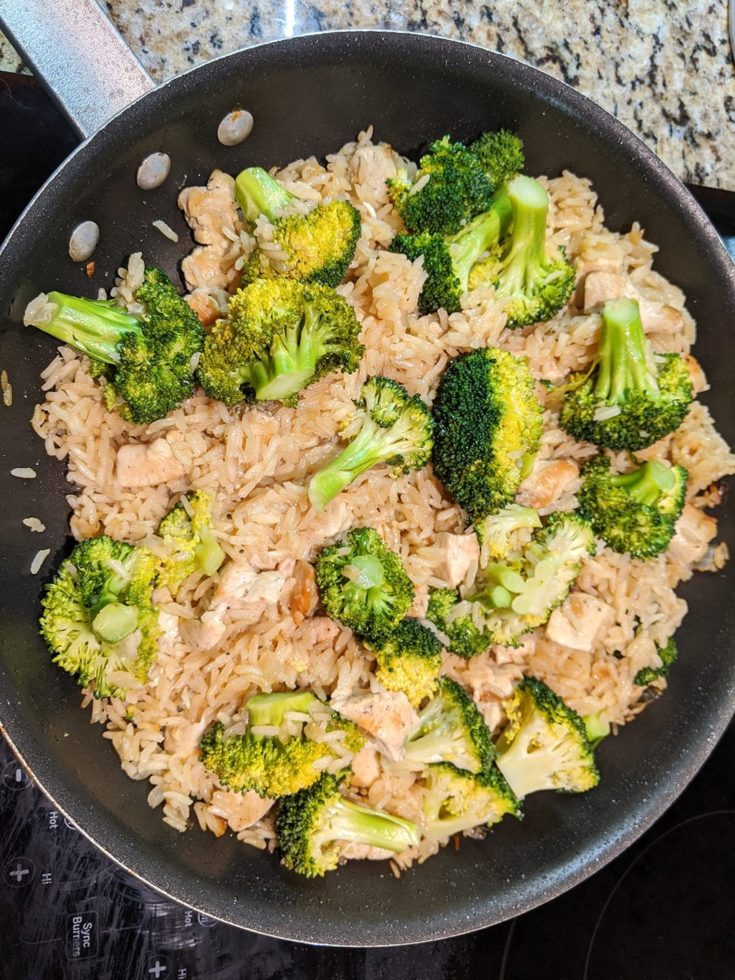
The picture above doesn’t have the melted, cheesy topping. I wanted you to see how beautifully green the broccoli turned out. That’s because you add it halfway through the chicken/rice cooking process, so it steams perfectly and is tender-crisp. I used fresh broccoli, but you could substitute frozen if that’s what you have on hand.
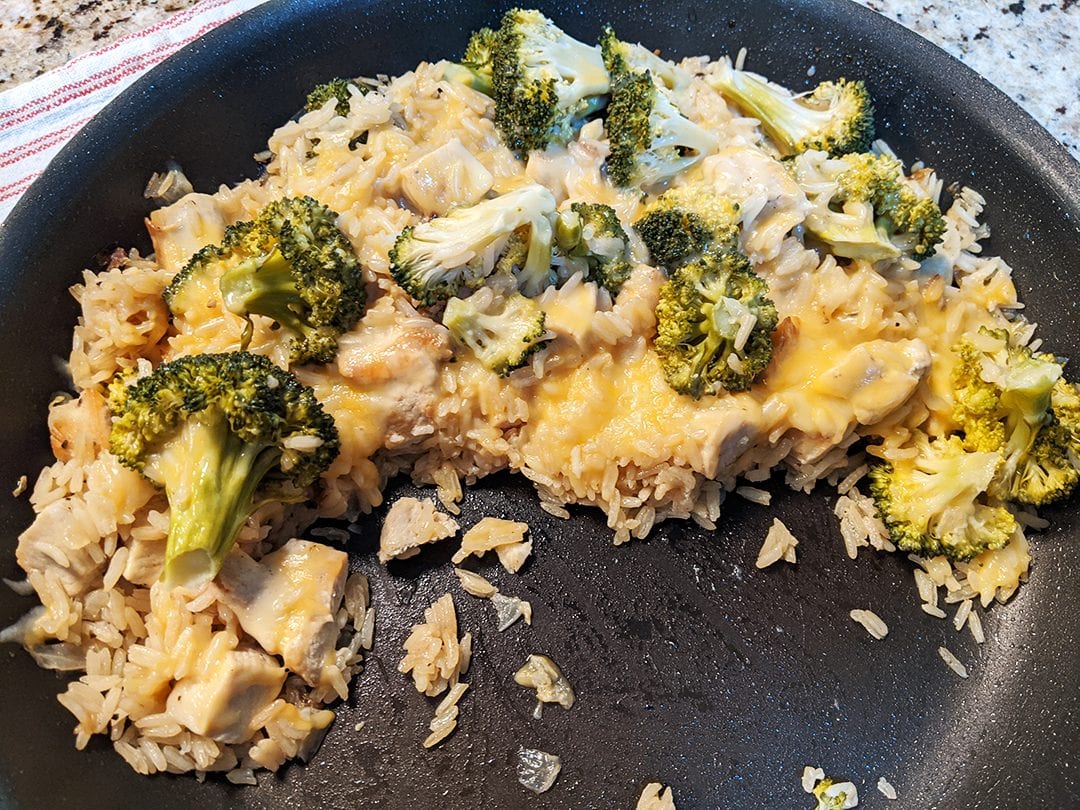
Yep, nice and cheesy, too! Now I’m hungry! Time to reheat leftovers for lunch. Another perk.
Yield: 4-6
Mimi's One-Skillet Chicken, Rice, Broccoli, and Cheesy Casserole
This is such an easy, quick and economical meal! In 30 minutes, you'll have dinner on the table - no kidding. Mimi's One-Skillet Chicken, Rice, Broccoli, and Cheesy Casserole is flavorful and satisfying. All the cooking is done in one skillet
Prep Time10 minutes
Cook Time30 minutes
Total Time40 minutes
Ingredients
1 pound boneless, skinless chicken breast, cut into 1" cubes
3 Tablespoons olive oil, divided
1 medium onion, diced
2 cloves garlic, minced
1 cup long-grained rice
2 1/2 cups chicken stock
2 1/2 cups fresh broccoli florets
2 cups shredded cheese, cheddar or Monterey Jack or a combination of the two
Instructions
Heat 2 Tablespoons olive oil in a 12" skillet over medium-high heat.
Add the onion and quickly saute until translucent. Push the cooked onions to one side of the skillet. Put the minced garlic on top of the onions.
Add chicken to skillet. Saute until the chicken is browned - 5-7 minutes.
Push the cooked chicken to one side of the skillet. Add 1 Tablespoon olive oil and rice. Stir and saute rice until the grains become translucent.
Add chicken stock. Lower heat to a simmer. Stir until ingredients are evenly distributed and the brown bits at the bottom of the skillet are dissolved in the liquid. Put a lid on the skillet and cook for 12 minutes.
Remove lid and distribute broccoli florets evenly over the top. Put the lid back on and cook for another 8 minutes.
Remove skillet from heat. Stir in 1/2 cup of cheese. Sprinkle the remaining cheese over the top. Replace lid and allow to sit for 1-2 minutes or until the cheese is melted.
Notes
Optional Additions: handful of toasted, slivered almonds or handful of toasted pinenuts, sliced and browned mushrooms.