I am a noodle fanatic. I love all types. And if you take a look around my blog, you’ll find several noodle recipes. I prefer noodles to rice with Asian dishes. There’s something so satisfying about every saucy bite. Richard bought me a pasta attachment for my mixer a couple of years ago. I made homemade egg noodles for soup and beef & noodles in no time flat. Before that, I had a Marcato pasta maker and I’d hand crank them out or make sheets of pasta for ravioli. There’s nothing like homemade noodles. And there are so many shapes of dried pasta available at the store, too. I’ve been known to loiter in the pasta aisle at the grocery just to look and see what’s new. It’s my favorite grocery aisle.
One noodle I’ve not served before were Asian rice noodles. No, I did not make them – some things are worth paying for. I’ve made dishes with udon, eaten my fair share of lo mein, and everyone’s had ramen at some point in life. But rice noodles didn’t appeal to me for some reason. They looked wimpy. They’re translucent. They looked brittle and fragile. I just wasn’t sure if rice noodles would have the same toothy bite as pasta and egg noodles. Well, I was wrong. They do. As an added bonus, rice noodles are gluten-free.
One day I was perusing one of my favorite food blogs Half Baked Harvest. Tieghan posted her recipe for Saucy Garlic Butter Shrimp with Coconut Milk and Rice Noodles. I was smitten. There was something about her rice noodles swimming in a garlicky, coconut milk, butter sauce surrounded by perfectly cooked shrimp that pushed me over the edge. I had to try rice noodles.
Before I dived into Tieghan’s recipe, I wanted to cook something simple with rice noodles first just to get the hang of preparing them and to test the texture. I hopped over to my favorite Asian market where they have the best noodle aisles. Not just one aisle, but two. Yeah, I was there for a while.
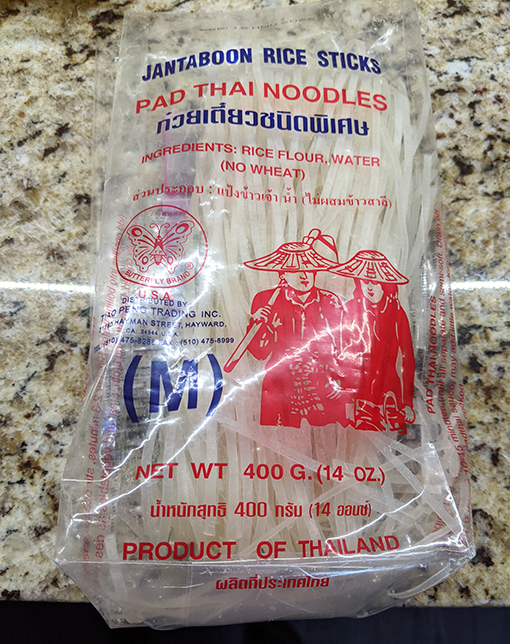
A simple pad thai recipe was the way to go for my experiment. I found this great bag of pad thai noodles that were the perfect width – not too wide and not too skinny. And I found a quick and easy chicken pad thai recipe over at Tasty – One-Pot Pad Thai. Believe it or not, I have a good supply of Asian cooking ingredients in my pantry. Really, the noodles were the only ingredient I needed to buy.
Let’s talk a minute about cooking rice noodles.
The package instructions were worthless for someone who’s taking the rice noodle maiden voyage. Something like “cook in boiling water until done.” Hmmm.
And I wasn’t quite sure about Tasty’s boiling instructions. Again, “cook noodles in boiling water following package directions.” Hmmm.
I finally landed on very simple instructions on the Internet. “Put noodles in a large bowl. Pour boiling water over the noodles. Stir until they’re done.” Hmmm – but that’s the way I went. I figured I could check for noodle doneness without overcooking, which the instructions said would ruin any pad thai dish. The process took about 8 minutes for the width of my noodles, just a little short of al dente.
One-Pot Chicken Pad Thai is categorized as “gluten-free.” Soy sauce is made with fermented wheat. Be sure to use tamari or soy labeled as “gluten-free in this recipe if you have a gluten allergy or sensitivity
Any stir fry dish comes together quickly. Once you begin the cooking process, plan to be committed until the dish is finished. I don’t think the cooking part took more than 20 minutes. I get all my slicing and dicing and make the pad thai noodle sauce in advance of going to the stove.
First, boil four quarts of water. Place dry noodles in a large bowl. Pour the boiling water over the noodles and stir around with tongs to make sure the noodles are submerged. Every once in a while, stir the noodles to make sure they aren’t sticking together. After 6 minutes, start checking for doneness. Finished noodles for pad thai should be slightly short of al dente. Drain the noodles in a colander, rinse with cold tap water to stop the cooking, and run your fingers through the noodles to make sure it’s all cooled down nicely. Shake the colander to remove as much water as you can. Pour one Tablespoon toasted sesame oil over the noodles. And using tongs, toss them until they’re coated with oil so they don’t stick together. Set aside.
PREP:
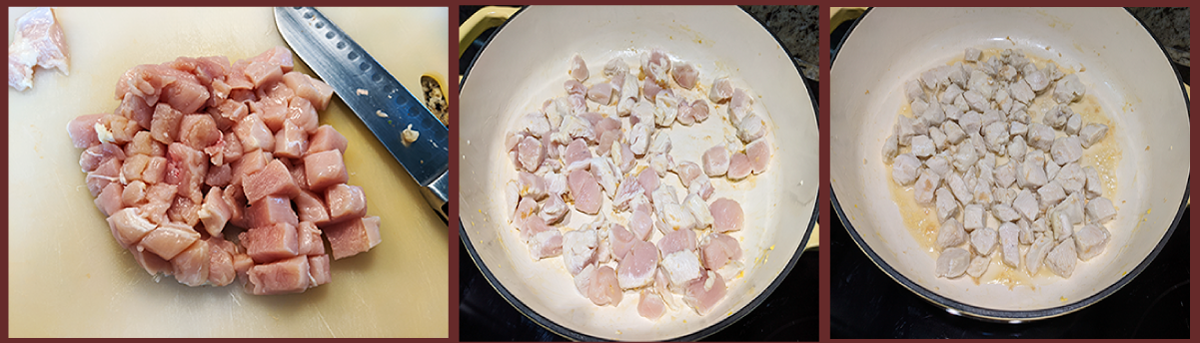
Cut one large chicken breast in half horizontally, slice into strips and dice into 1″ cubes. Set aside.
Crack two eggs into a small bowl and lightly whisk. Set aside.
Slice 1/3 cup of shallots or one large shallot into thin rounds. Set aside. (In a pinch, I’d sub red or sweet yellow onion.)
Seed one medium fresh red chile. Cut into thin slivers. Set aside.
Slice 3-4 green onions into 1″ pieces. Set aside.
Rough chop 1/2 cup fresh cilantro. Set aside.
In a 2-cup measure mix 3 Tablespoons each fish sauce, rice vinegar, gluten-free soy sauce or tamari, brown sugar, lime juice, sriracha. Mix and set aside.
OK – you’re ready – let’s go! Time to tell your people to wash their hands, set the table, and get a beverage. Your saucy hot pad thai will be ready in minutes. In my beloved family, that process takes at least 20 minutes – just enough time to pull everything together.
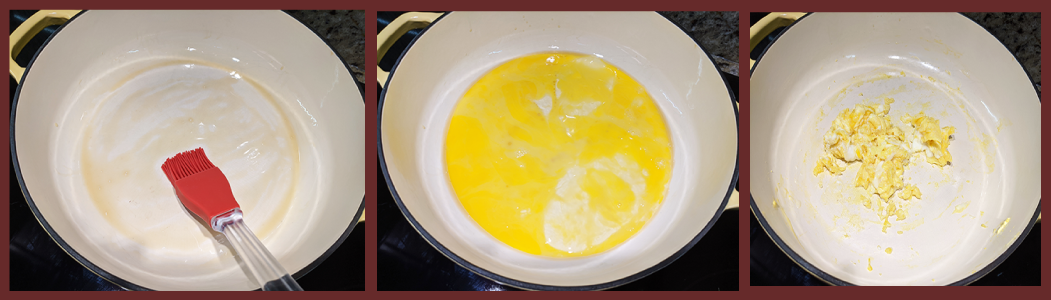
Heat a 12″ skillet over medium-high heat. Brush with 1/2 Tablespoon toasted sesame oil. Add lightly beaten eggs to the skillet. Scramble until very lightly browned. Remove to a bowl. Return skillet to the cooktop.
One large chicken breast will make four servings. I sliced the breast in half and cubed it into 1″ pieces. Over medium-high heat, brush the skillet with 1/2 Tablespoon toasted sesame seed oil. Add the chicken cubes, stir, and saute until there’s no more pink in the middle. Remove cooked chicken to a bowl with the cooked eggs. Return skillet to the cooktop.
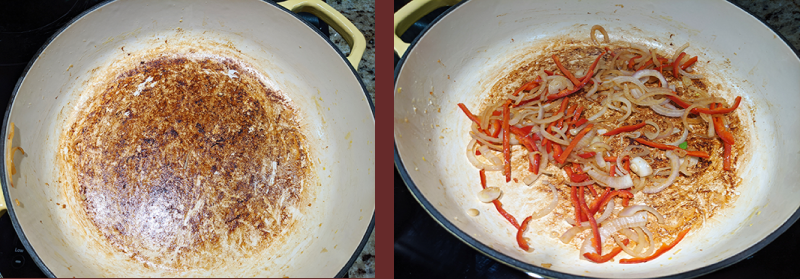
Right now your skillet is pretty hot. You can see the beautiful brown bits of flavor leftover from browning the chicken. Reduce heat to medium. Add the shallots and peppers. Quickly saute for 1-2 minutes. Add to bowl with chicken and egg. Set aside.
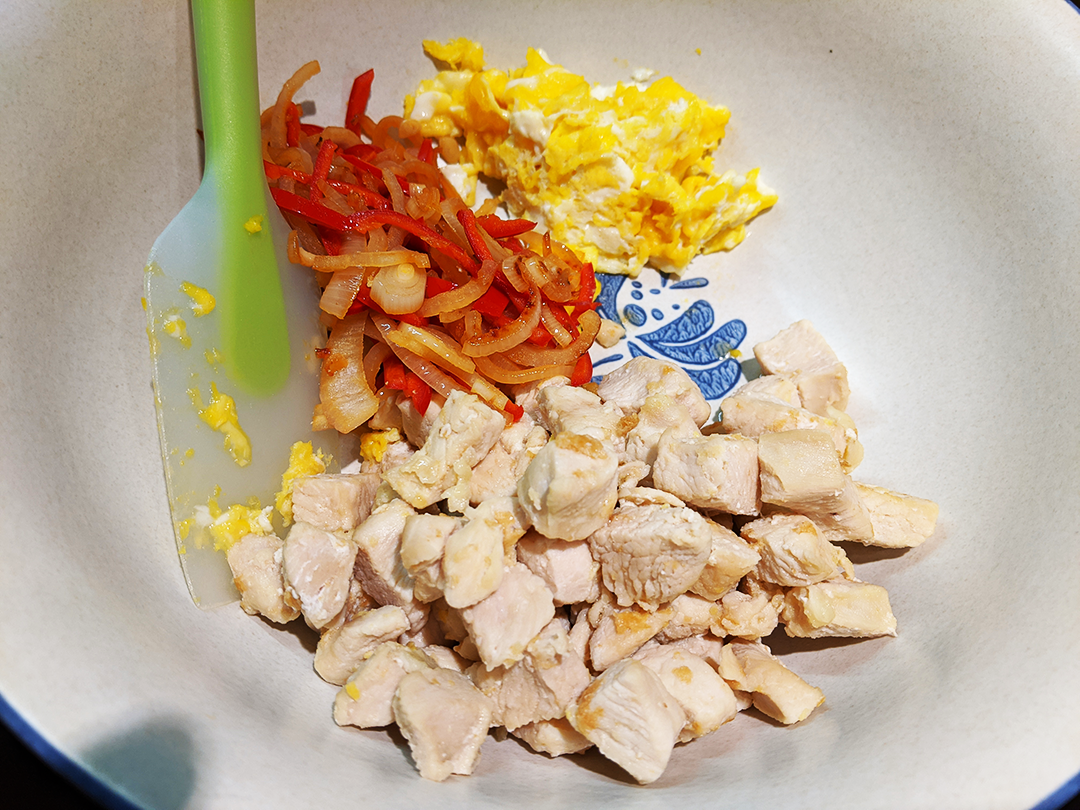
Here’s what your lovely reserve bowl should look like after all that quick stir-frying. Time to move on to the star of the show.
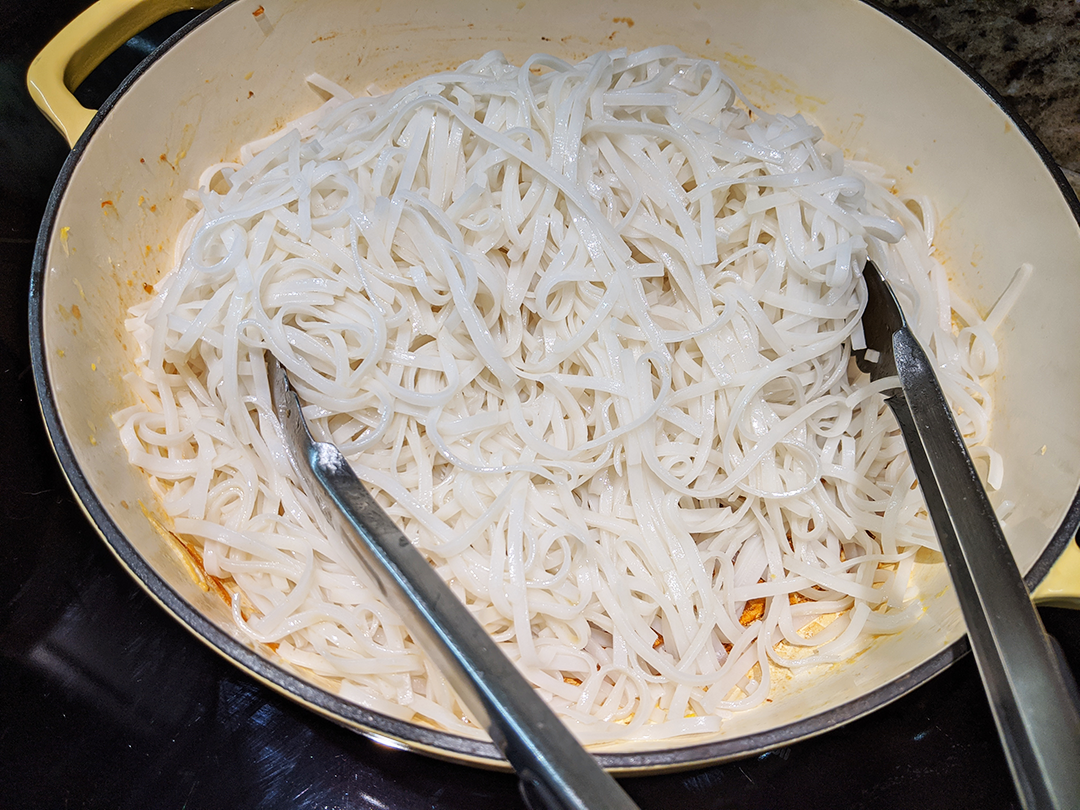
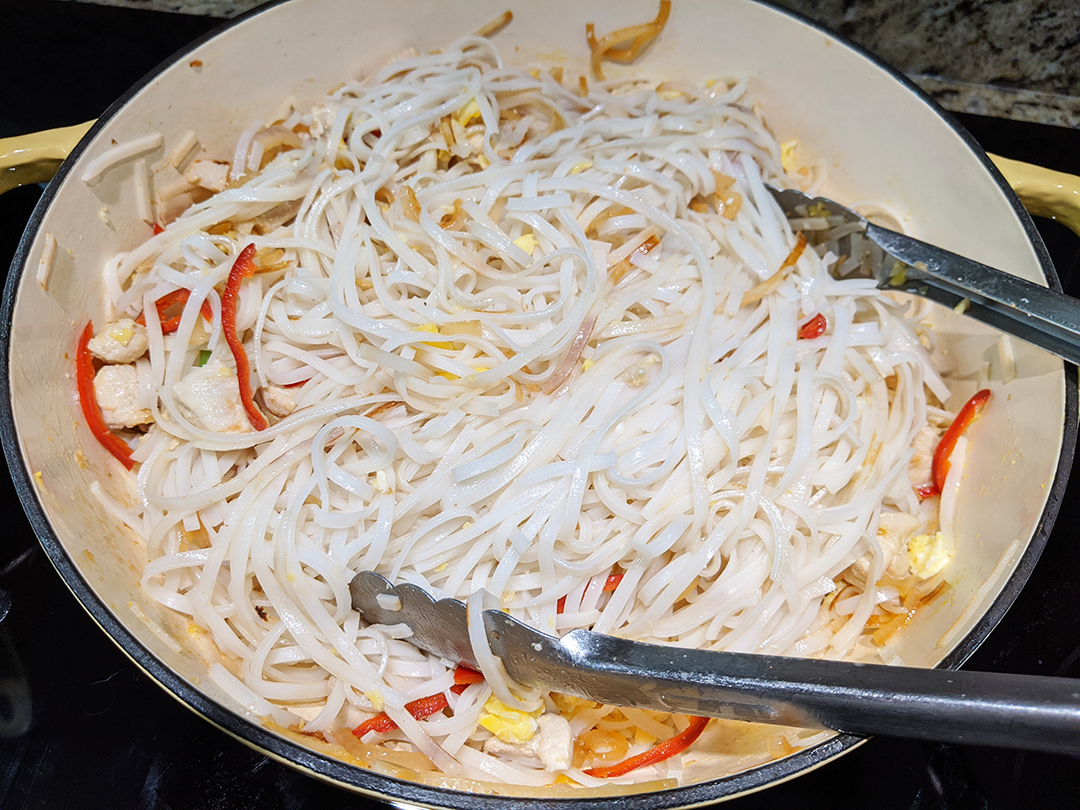
Add cooked rice noodles to skillet. Remember – your noodles are coated with toasted sesame oil – don’t worry immediately about sticking to the bottom of your pan. Using tongs, toss noodles in the skillet.
Return the chicken, veggies, and scrambled egg to the skillet. Continue to toss with tongs until all is incorporated.
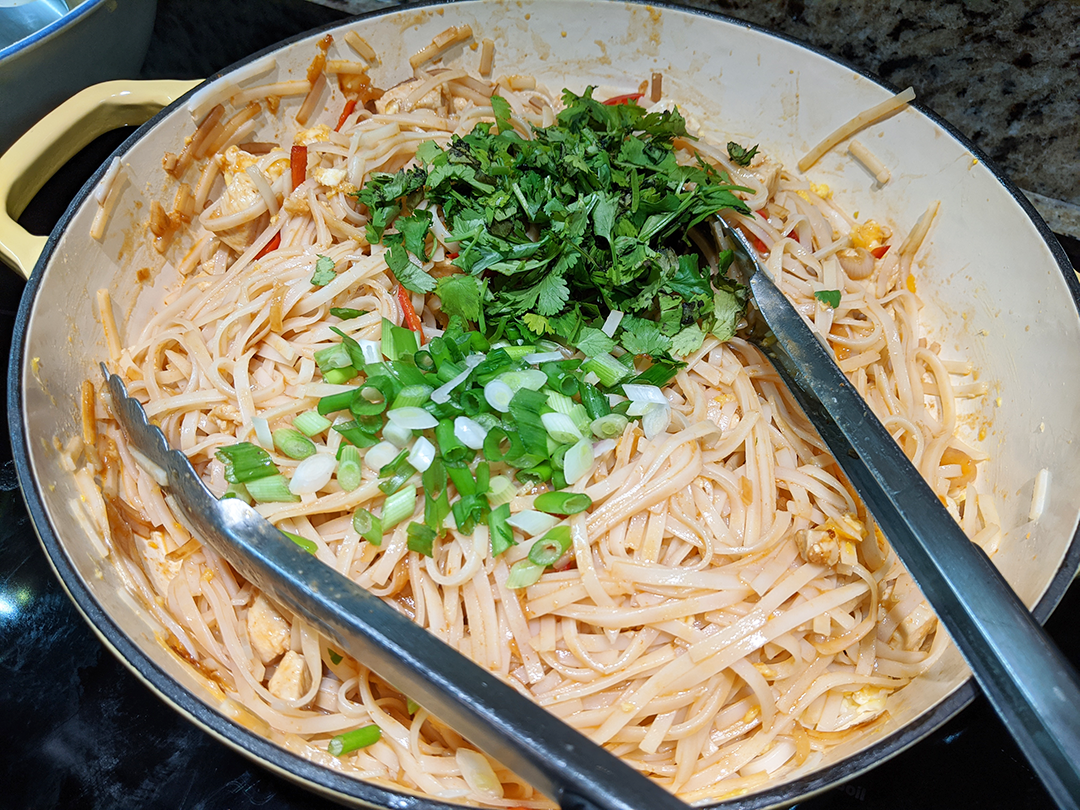
Pour sauce into the skillet and toss to coat
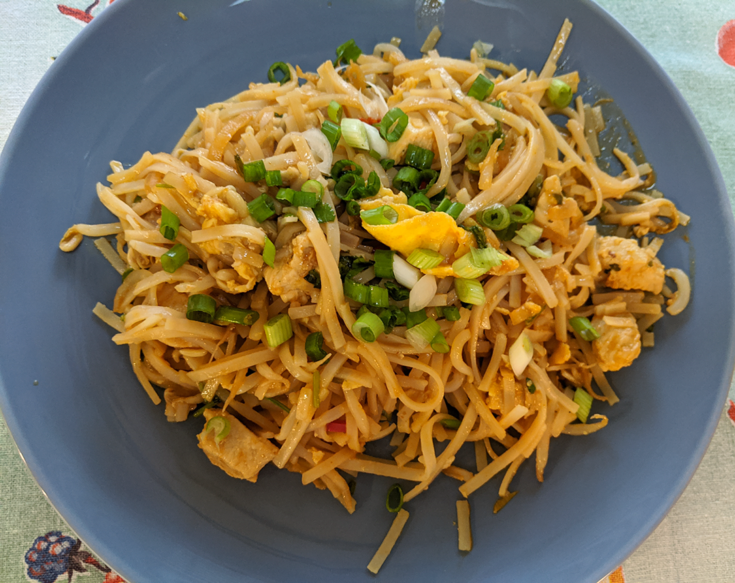
Add cilantro, green onions, crushed peanuts, and bean sprouts. Toss to combine. Divide onto individual plates or bowls and garnish with crushed peanuts, green onions, and cilantro. Enjoy!
One-Pot Chicken Pad Thai
One-Pot Chicken Pad Thai is an easy and quick stir fry recipe with favorite Asian flavors and a nice sauce with a bite of heat. Crushed peanuts add a nice crunch.
Prep Time15 minutes
Cook Time20 minutes
Total Time35 minutes
Ingredients
4 SERVINGS
8 oz pad thai rice noodles
2 eggs, lightly beaten
1 large chicken breast, cut into 1" chunks
1/3 cup or 1 large shallot, thinly sliced into rounds
1 red chili, stem and seeds removed and cut into slivers
1-15oz can bean sprouts, drained OR 2 cups fresh bean sprouts
1/2 cup peanuts, crushed
3-4 green onions, cut into 1" pieces
1/3 cup fresh cilantro, roughly chopped
For the Sauce
3 Tablespoons each fish sauce, rice vinegar, gluten-free soy sauce or tamari, brown sugar, lime juice, sriracha
Instructions
Prepare rice noodles Place uncooked noodles in a large bowl. Pour 3-4 quarts of boiling water over the noodles. Toss lightly with tongs to make sure noodles are submerged. Let steep for 6 minutes, tossing occasionally to keep noodles from sticking together. Check for doneness - noodles should be just short of al dente - maybe 1-2 minutes more. Drain in a colander. Rinse noodles with cold water to stop cooking and shake to remove excess water. Return to bowl and add 1 Tablespoon toasted sesame oil. Toss until noodles are coated. Set aside.
Over medium-high heat, brush the inside of a 12" skillet with 1/2 Tablespoon toasted sesame oil. Add beaten eggs. Scramble until set. Remove to a bowl. Set aside.
Brush the skillet again with 1/2 Tablespoon toasted sesame oil. Add peppers and shallots. Stir fry for 1 minute. Remove to bowl with eggs. Set aside.
Brush the skillet with 1/2 Tablespoon toasted sesame oil. Add chicken and stir fry until the meat is no longer pink in the middle. Remove to bowl with eggs, peppers, and shallots. Set aside.
Reduce heat to medium. Add noodles and toss just to warm.
Add reserved chicken, eggs, peppers, and shallots. Toss to combine.
Add sauce. Toss to coat.
Add bean sprouts, crushed peanuts, green onions, and cilantro. Toss to combine.
Divide into individual servings. Garnish with extra crushed peanuts, green onions, and cilantro.
Notes
One-Pot Chicken Pad Thai is categorized as "gluten-free." If you have gluten allergy or sensitivity, please be sure to use "gluten-free" soy sauce or tamari.
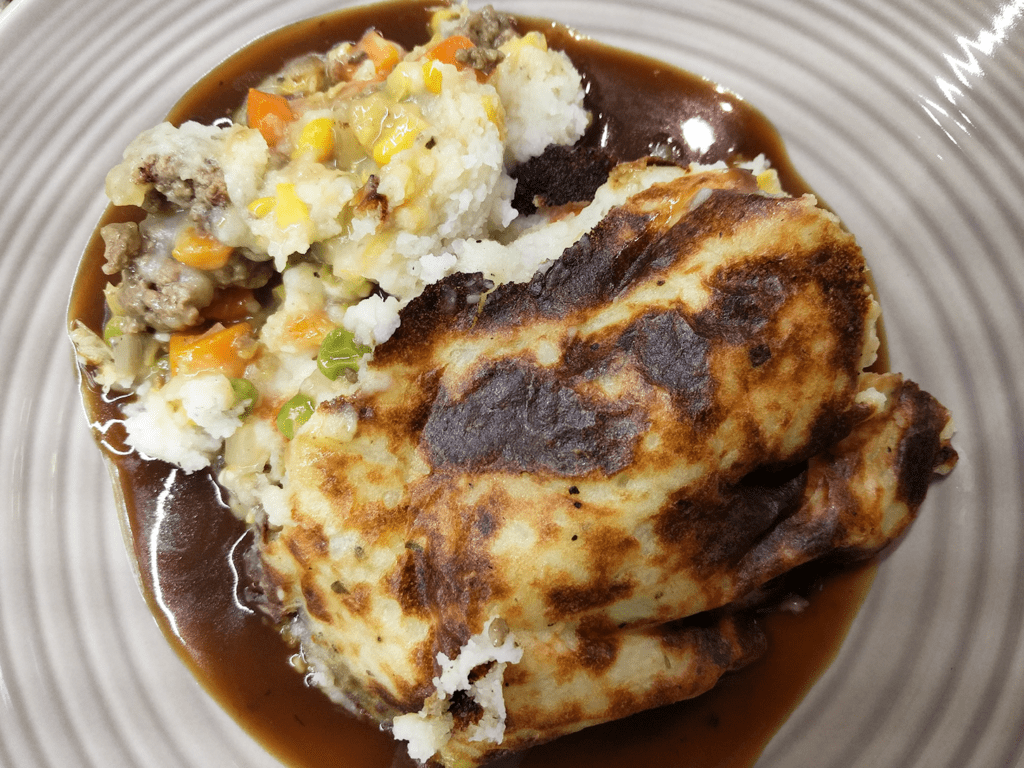
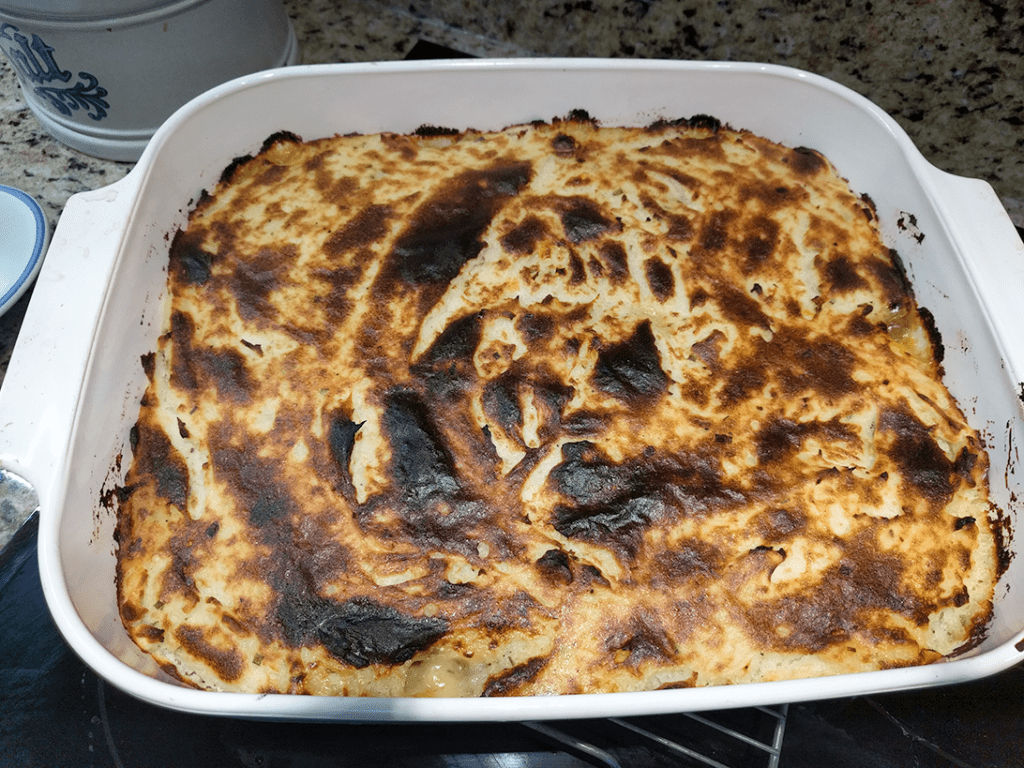
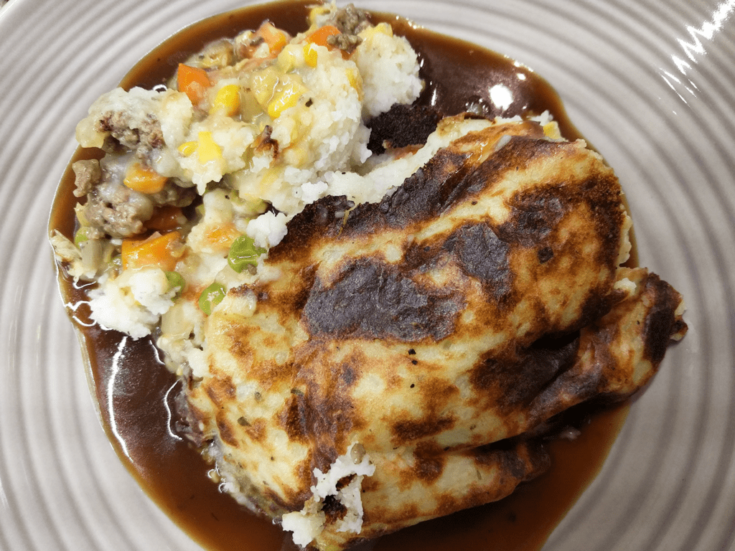
Here’s another comfort food “oldie-but-goodie.” Hot and bubbly from the oven ground meat and vegetable casserole topped with a classic whipped potato crust that forms a nicely browned top layer. Mimi’s Shepherd’s Pie is made special by adding a can of creamed corn on top of the meat and vegetables and before the potato layer is slathered on. Warm and satisfying, indeed. YUM!
And there’s the bonus of the rich brown gravy that comes together as the casserole bakes. This is one of my son-in-law’s favorite meals, cold day or not. And it’s easy to make – this is a good dish for beginning cooks. It’s a no-brainer.
I learned to add creamed corn from this recipe at Bitchin’ Kitchen – who made her own. You know what else she taught me – make the mashed potatoes with both sweet and russet potatoes. The resulting mashed potatoes are orange – perfect to serve kiddos before a Halloween Night on the Town. And she tops the mashed potato topping with crushed potato chips for a nice crunch. Yes, I’ve made her recipe and it’s fabulous! You can find Nadia G’s recipe HERE. I loved Bitchin’ Kitchen. If you’ve never watched her show, it’s well worth seeking out. Nadia was not only a talented chef, but she also has a twisted sense of humor that I adore. Her show was fun, and she and her support cast of characters always me laugh, and I learned a lot, too. Nadia had an interesting take on some classic recipes like KEY LIME HABENERO CHEESECAKE. Or how about her CREAMY GORGONZOLA AND PORTOBELLO MUSHROOM RISOTTO? I adore her pizza dough recipe found HERE At Mimi’s Table.
I digress . . . I did not make this pie with sweet potatoes. However, just substitute 1/2 sweet potatoes and 1/2 russet potatoes and there you have it.
What makes this recipe soooo easy?
We all should have a pound or two of lean ground beef/turkey in the refrigerator/freezer, right? Use your microwave to defrost frozen ground beef/turkey, if that’s what’s happening in your busy world. And all the rest is assembled from frozen vegetables like peas & carrots, chopped onions. And canned creamed corn, if you aren’t into making your own like Nadia G.
Dare I say it? Yes, buy ready-made mashed potatoes, if you must, but you’ll need a couple of packages for adequate top layer cover – that’s expensive but at times necessary. I get it. If you have time, make your own mashed potatoes with russets or russets/sweet potatoes. Your people will love you.
Shall we cook together? I think so.
Start your potatoes
You know the drill. Peel 2-3 pounds of potatoes. I opt for more potatoes – in my family’s world that’s the most important part. Russets are preferred here. Or an equal combination of russets and sweet potatoes. Put the potatoes in a large pot, cover with water, 2 teaspoons Kosher salt, and bring to a boil. Boil potatoes for 10 minutes, turn off the heat, cover with a lid and let sit for another 10 minutes. This is the way I like to prepare potatoes to be mashed. I have an electric stove-top, so when I turn off the heat on the burner, the potatoes benefit from a moving-to-cooler bath. They’re not boiled to death. While the potatoes are processing, I get the meat layer ready.
Get the meat layer ready
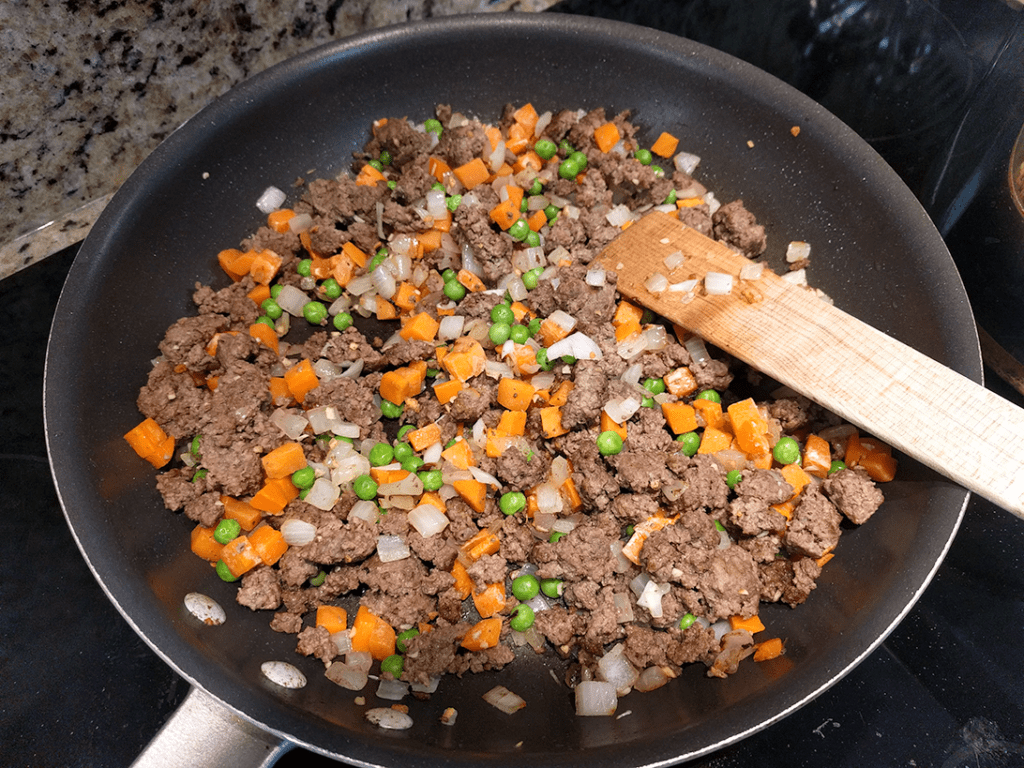
Brown 2 pounds of ground beef over medium-high heat. I would recommend using nothing less than 85% fat content beef. Yes, 75-80% ground beef is cheaper, but there’s so much fat drained off after browning that I’m not sure cheaper ground meat is cost-effective. Nadia uses ground sirloin, a great lean choice. Or use ground turkey browned in 2 Tablespoons of olive oil, an excellent substitute, leaner, protein-packed, and calorie-friendly. Want to go crazy? Use ground lamb.
Once the meat is browned, drain off fat leaving about 2-3 Tablespoons in the skillet. Add one large chopped onion and saute until translucent. Add 1-2 cloves of crushed garlic and cook for another minute. Add 1 teaspoon salt and 1 teaspoon ground black pepper.
Add one cup of beef broth then add 1-2 12oz bags of frozen peas and carrots, stir and cook through until the veggies are thawed and hot. Adding a second bag of frozen vegetables is a fabulous way to extend the recipe – you can serve more people.
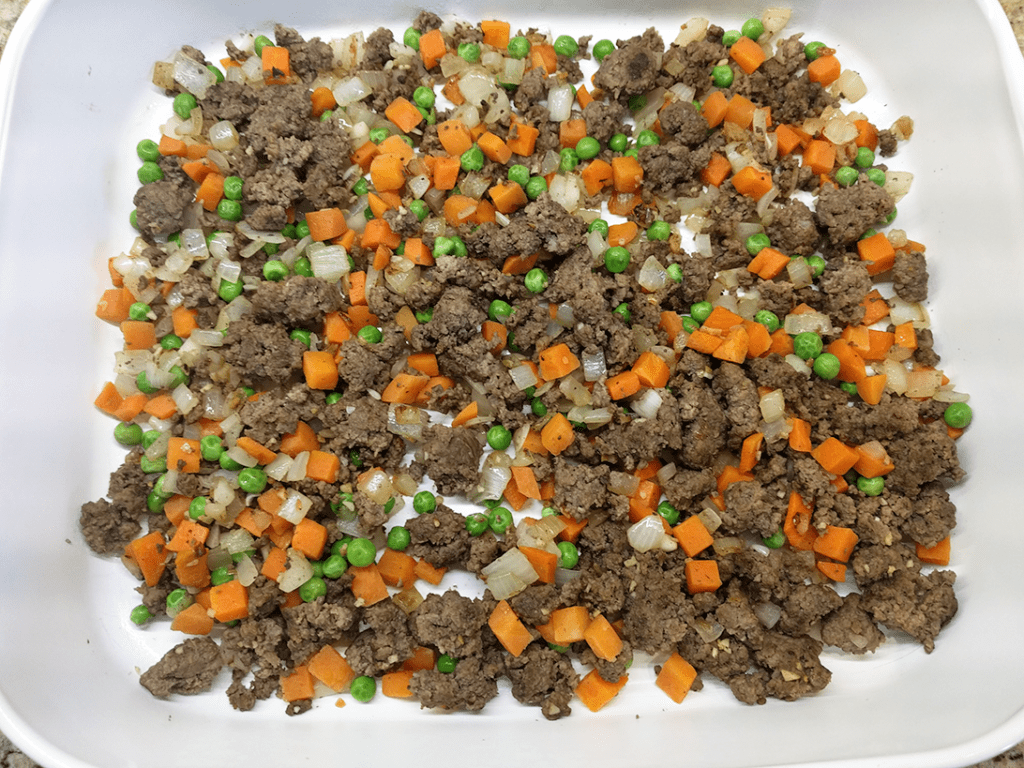
Assemble the first layer
Distribute cooked meat layer in the bottom of a 9×13″ baking dish.
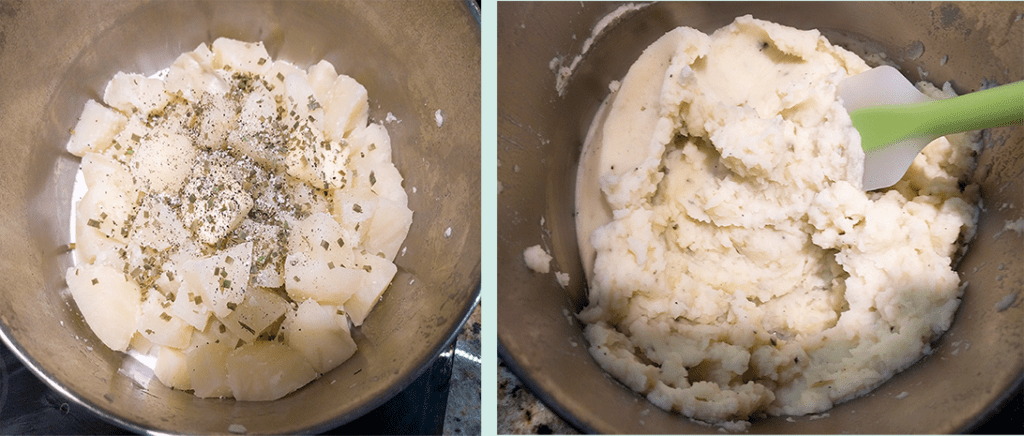
Drain and mash potatoes
I rarely measure the milk/half ‘n half I use. Usually, I just pour maybe 1/2 cup and mash with 1/4 stick of butter. If the potatoes are too dry, I add a little more milk/half ‘n half and mash again until I get the right consistency. For this recipe, it’s OK if the potatoes are a little wet – they’ll spread easier and liquid will evaporate as the casserole bakes. I added 1 teaspoon of dried chives to this batch. And I either use milk or half ‘n half or a mixture of both depending on my mood. If I want really rich tasting mashed potatoes, like for the holidays, I’ll use only half ‘n half.
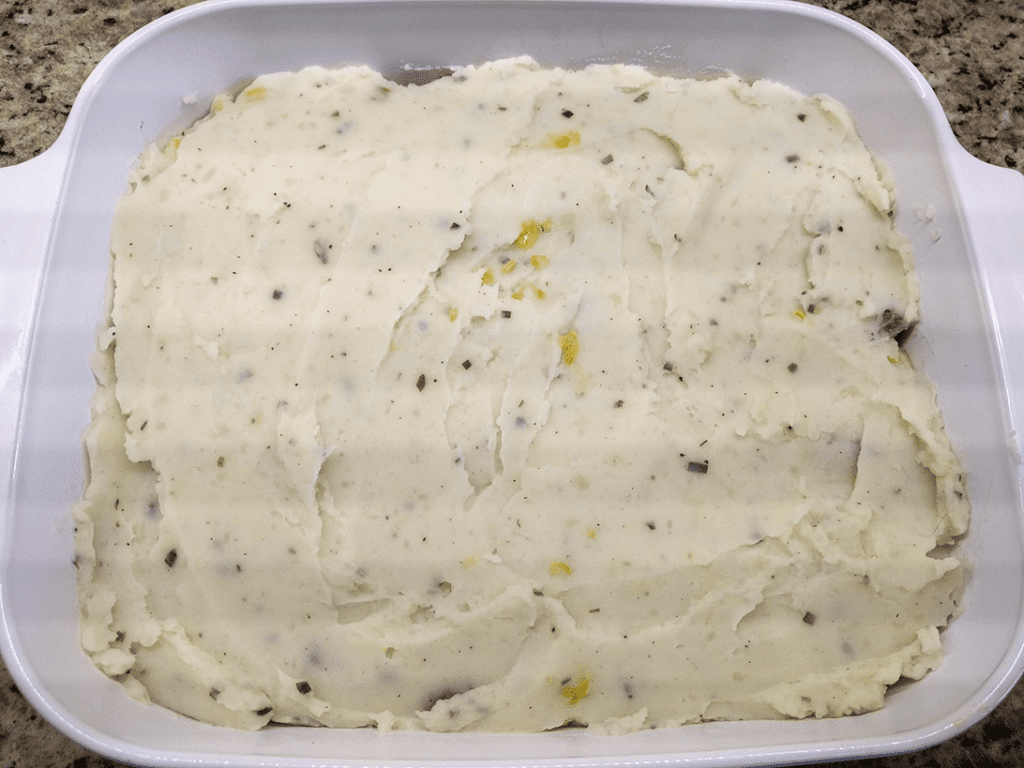
Then slather the mashed potatoes evenly over the meat mixture. Proper Shepherd’s Pie has lots of mashed potatoes.
Pop into a 350°F oven for 20-25 minutes. Everything is cooked, so you’re basically heating the casserole through. Flip on the broiler and let the mashed potato layer get nicely browned.
I like to serve my Shepherd’s Pie in bowls, like pasta bowls. And serve with warmed, crusty bread with butter. Or serve with a nice green salad.
Yield: 6-8
Mimi's Shepherd Pie
Here's another comfort food "oldie-but-goodie." Hot and bubbly from the oven ground meat and vegetable casserole topped with a classic whipped potato crust that forms a nicely browned top layer. Mimi's Shepherd's Pie is made special by adding a can of creamed corn on top of the meat and vegetables and before the potato layer is slathered on. Warm and satisfying, indeed. YUM!
Prep Time30 minutes
Cook Time30 minutes
Total Time1 hour
Ingredients
1-2 lbs lean ground beef, ground turkey, or ground lamb
1 large onion, diced
1-2 cloves garlic, minced
1-2 12oz bags frozen mixed vegetables without diced potatoes
1 15oz can creamed corn
2-3 pounds potatoes, any combination of russets and sweet potatoes, peeled and cut into cubes
1/2 - 3/4 cup whole milk
1/4 cup unsalted butter
1 teaspoon dried chives
Instructions
Heat oven to 350F degrees.
In a large skillet over medium-high heat, brown ground meat. If you're using very lean meat, add 1-2 Tablespoons olive oil to promote browning.
Add diced onion and minced garlic. Stir and sautee for 3-5 minutes until the onions become translucent.
Add frozen vegetables and stir until heated through.
While the meat is browning, prepare the potatoes. Put cubed potatoes in a large pan, cover with water, add 2 teaspoons salt, and bring to a boil. Reduce heat a bit and allow potatoes to gently boil for 10 minutes. Turn off heat, put on the pan lid, and allow potatoes to steep in the hot water for 10 minutes. Drain. Return potatoes to the heat. Add milk or half 'n half and butter, and mash. Add chives and stir to combine. Taste and season with salt and pepper, if needed.
Once the meat/vegetable mixture is done, spread evenly in the bottom of a 9x13" baking dish. Add one cup beef broth or reconstituted beef bullion. Evenly spread creamed corn over the meat/vegetable mixture.
Slather the top of the casserole with warm mashed potatoes, and spread evenly. Bake uncovered in the oven for 20-25 minutes or until the casserole is heated through.
Turn on the broiler and let the mashed potato layer evenly brown. About 5-10 minutes.
Serve in wide pasta-type bowls with warm crusty bread and butter, or with a nice green salad.
Notes
Mimi's Shepherd's Pie is an excellent recipe for anyone learning to cook. It's simple and straightforward.
Use any lean meat - beef, turkey or lamb. If using lamb, I'd crank up the garlic. And use russet potatoes or a combination of white and sweet potatoes for the mashed layer.
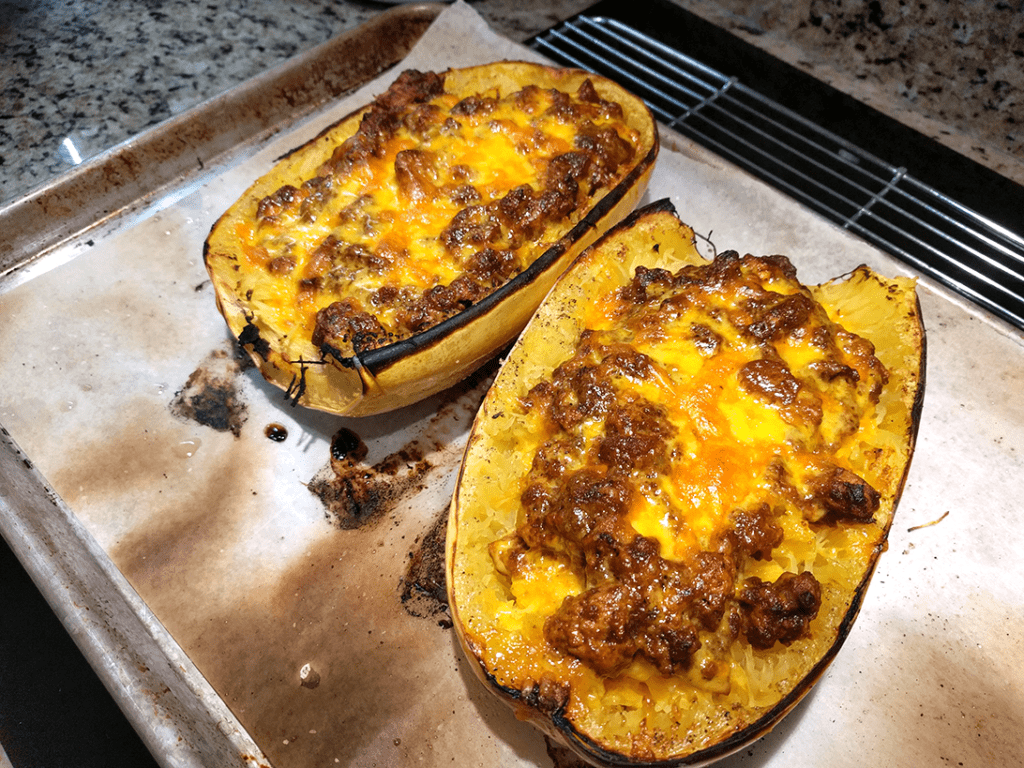
If you love squash and chili, you’re going to love this recipe from the Half Baked Harvest blog. Tieghan Gerard has done it again!
Cincinnati Chili Stuffed Spaghetti Squash is best served on a beautiful fall or winter day, whether it’s cool, downright cold, rainy, or snowy, Tieghan’s dish is only one of her phenomenal comfort food offerings. Sweet and stringy spaghetti squash topped with a mild chili flavored with cinnamon and allspice is a yummy pairing of flavors. Tieghan has several recipes where she uses cooked spaghetti squash as the vessel for a wide variety of cheesy and meaty toppings. Like this one for Spanakopita Stuffed Spaghetti Squash. You must check out her blog.
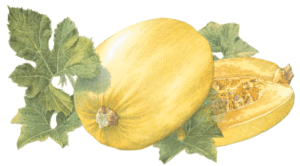
I started cooking spaghetti squash several years ago. I like that it’s not pasta. It has a slightly sweet flavor with a stringy bite. Most times I baked it, scraped the beautiful flesh into a serving bowl, tossed with butter, salt, pepper, and a little Parmesan cheese, and served it as a side dish. But I like the idea of serving the squash strands in their skins, little boats, topped with great stuff. I’m serving this more and more as I’m looking for lower-calorie meals. Yeah, there’s meat and cheese and stuff, but count the squash as a low-calorie alternative to pasta, and you won’t feel guilty at all about the calorie-filled toppings. And think about carbs – there are practically no carbs! Spaghetti squash is gluten-free! Hail, hail to the lovely spaghetti squash!
Spaghetti squash is the perfect side or main for children and grandchildren. (Heck, I think it’s fun!) Wouldn’t you love to watch them drag their forks across the flesh and watch the magic happen? It’s fun! Besides, spaghetti squash is filled with vitamin C, vitamin B6, niacin, potassium, manganese, and even some calcium. There are only 42 calories per cup. Seriously, spaghetti squash is a nutritional no-brainer!
Spaghetti squash is also very easy to grow. I planted a couple of plants in my Billings garden one year and had wheelbarrows full to share with neighbors. If you have garden space and enthusiastic friends, be sure to include a plant in the spring.
Are you curious? Are you hopeful? Are you HUNGRY??
Make Cincinnati Chili – OH, Yes!
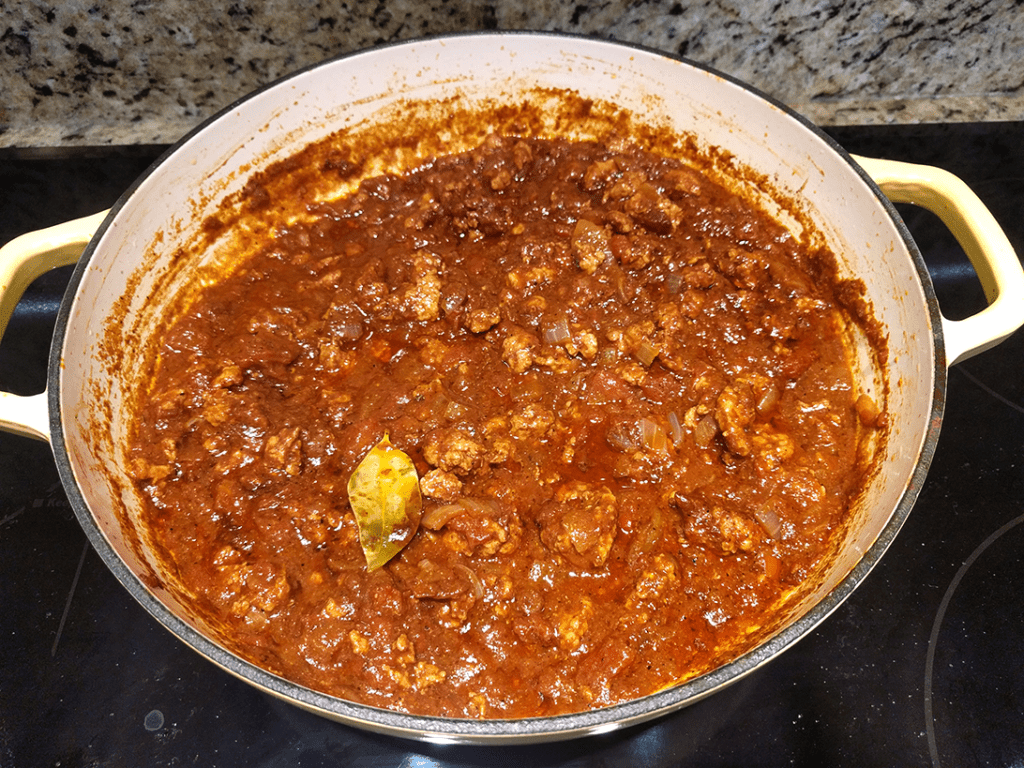
Put together ingredients for Cincinnati chili. Skyline Chili in Cincinnati is a food icon and this chili recipe pays homage to that recipe, perfectly done. Yes, it should simmer for 3 hours, stovetop or CrockPot. I made the full chili recipe, served half, and froze the other half for Coney dogs or traditionally served over spaghetti with lots of cheese on top. I’ve visited Skyline Chili in Cincinnati. Eaten their Coney’s – two of the cutest little hot dogs in buns topped with lots of chili, chopped onion, and tons of finely shredded cheddar cheese. I’ve ordered their chili over spaghetti topped with lots of cheddar cheese. This stuff is addicting. Tieghan’s mother’s recipe is spot on!
Make the chili with ground turkey or ground chicken instead of ground beef. Add a can of drained and rinsed pinto beans or light kidney beans in place of or along with the ground meat, if that’s the way you roll.
When I pick spaghetti squash, I go big or go home. I made this recipe with one large squash. Richard & I ate half for dinner and had leftovers the next night. It’s the perfect dish served for 2 people with enthusiastic appetites.
Bake Your Spaghetti Squash
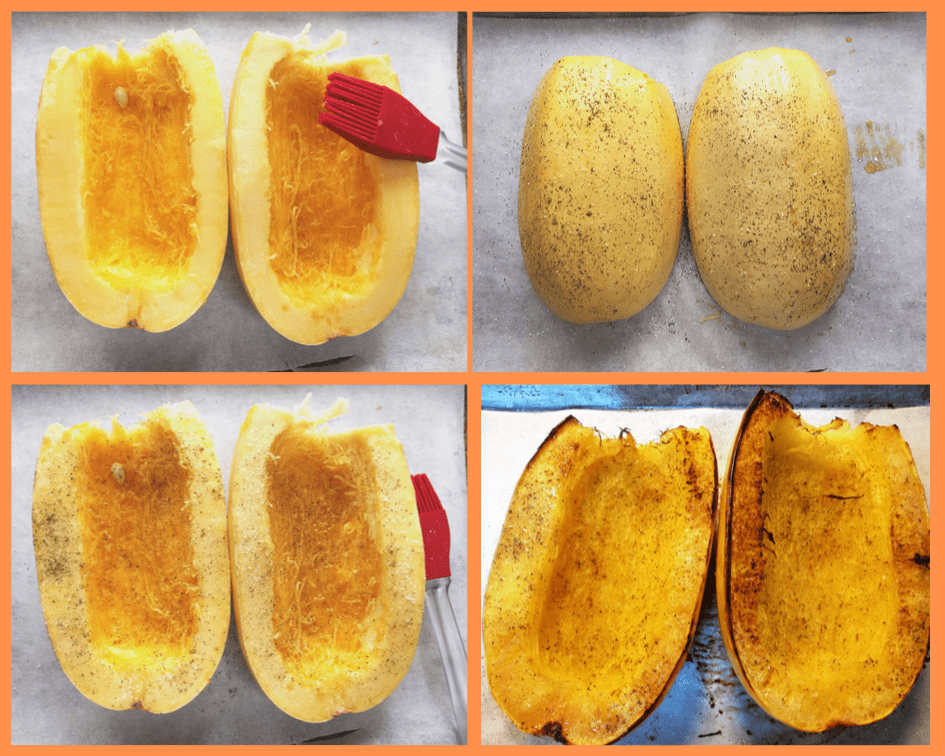
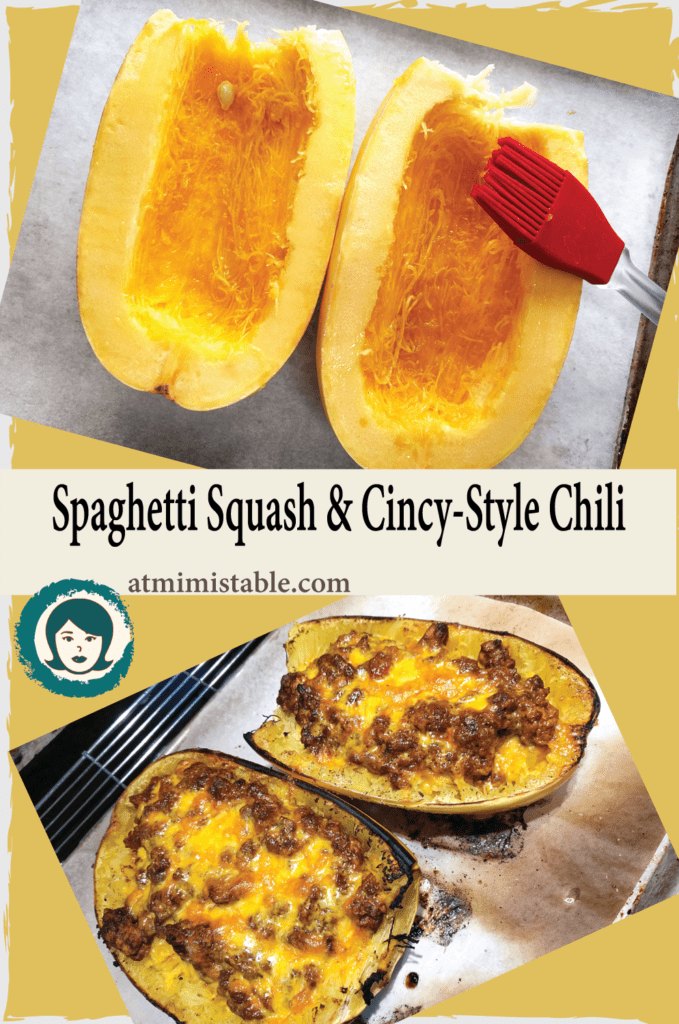
Cut the squash in half and remove seeds. Place the halves on a parchment-lined baking sheet. Brush the inside lightly with olive and sprinkle salt and pepper. Turn the halves over and repeat. Bake skin side up in a 350°F oven for 45-50 minutes. Remove and allow to slightly cool.
OK – I hear you. “Mimi, 3 hours for chili and 1 hour to bake the squash? Are you nuts?” Yes, I am but it’s so worth it!
Return to oven/broiler to melt the cheese. I chose the broiler.
I need to pay more attention to showing my dishes at serving. I’m just so excited about eating that I don’t pay too much attention to photography once dinner is ready and I’m hungry! HA! You can serve with sour cream, extra cheese, mashed avocado, salsa.
Cincinnati Chili Stuffed Spaghetti Squash is best served on a beautiful fall or winter day, whether it's cool, downright cold, rainy, or snowy, Tieghan's dish is only one of her phenomenal comfort food offerings. Sweet and stringy spaghetti squash topped with a mild chili flavored with cinnamon is a yummy pairing of flavors. Tieghan has several recipes where she uses cooked spaghetti squash as the vessel for a wide variety of cheesy and meaty toppings. Like this one for Spanakopita Stuffed Spaghetti Squash. You must check out her blog.
1 Tablespoon unsweetened cocoa powder, dark or regular
2 teaspoons cumin
1½ teaspoon allspice
1½ teaspoon Kosher salt
1½ teaspoon cinnamon
1 teaspoon cayenne
½ teaspoon garlic powder, not garlic salt
2 cups chicken broth
1-28oz can crushed tomatoes
2-8oz cans tomato paste
1½ teaspoons vinegar (I used cider vinegar)
1 Tablespoon Worchestershire sauce
2 bay leaves
2 small or 4 large spaghetti squash
Olive Oil
Salt & Pepper
2-3 cups shredded sharp cheddar cheese
Instructions
Set a large heavy bottom soup pot over medium heat. Add olive oil then onion and cook for 5 minutes.
Add the ground meat to the pot, breaking it up with a spatula as it browns.
Add the next nine ingredients. Stir and briefly cook until the spices become fragrant.
Add chicken broth, tomatoes, tomato paste, vinegar, Worchestershire sauce and bay leaves.
Stir and simmer over low heat or in a CrockPot for at least 3 hours.
About an hour before you're ready to eat, heat the oven to 350F.
Cut the squash in half, remove the seeds, and set the ovals flesh side up on a parchment lined baking sheet.
Brush the inside with olive oil. Sprinkle with salt and pepper.
Turn the halves over, skin side up, and repeat.
Bake for 45-50 minutes. If your squash is small, 30-40 minutes.
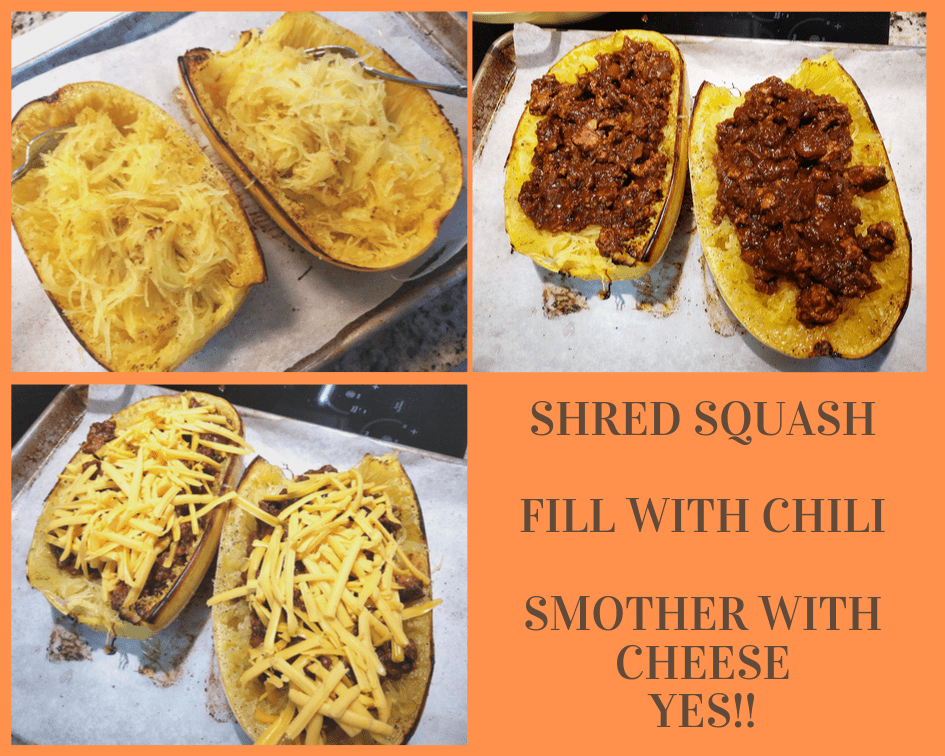
When done, flip the squash over into a shallow bowl and begin to scrap the insides with a fork to reveal the lovely squash strands.
Ladle chili over the squash inside the cavity. Liberally sprinkle with shredded cheddar cheese.
Place under the broiler for 5-7 minutes until the cheese is melted and slightly browned.
Notes
Cincinnati-Style chili is mild and has a slightly sweet flavor from the cinnamon and allspice in the recipe. Feel free to serve with your favorite chili toppings - sour cream, mashed avocado, extra cheese, crackers, hot sauce. You can use cans of drained and rinsed pinto or light red kidney beans in addition to or to replace part or all the ground meat.
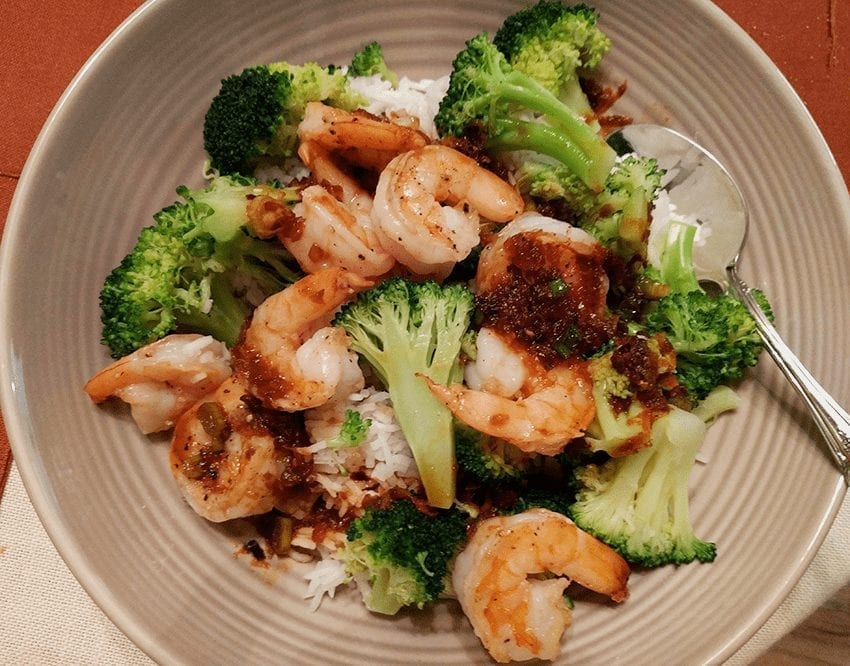
Orange Shrimp with Broccoli and Garlic is one of my favorite types of dishes. Crushed red pepper, orange zest, and garlic lend the simple sauce a bright delicious bite. And it’s so quick and easy! Orange Shrimp any time of the year but is a fabulous dish when your schedule is tight and fast food is not an option. You know, like during the holidays!
I always have a pound or two of raw shrimp (21-25 count) in the freezer. It’s handy for lots of quick meals like Shrimp Tacosor Shrimp Scampior Shrimp and Grits. Frozen shrimp don’t take long to defrost, either. Measure out what you need for your recipe. I use a scale for an accurate amount. Then I put them in a colander in the sink and run cool water over them until the shrimp are ready. I also use raw shrimp rather than cooked frozen ones, because raw shrimp will absorb all the lovely flavors either as they’re marinated or as you cook them. Garlic and lemon are two of my favorites, but you could use coriander, red pepper flakes, cumin or curry. Seriously delicious!
Here are a couple of things to remember when cooking raw shrimp:
Rinse shrimp after the shells and tails are removed. Remove the black vein at the top. Most frozen packed shrimp come deveined, but it’s a good idea to check anyway.
Once rinsed, place shrimp on a baking sheet lined with paper toweling. Use another layer to pat dry the top. Shrimp should be dried off to get a proper sear.
Don’t overcook your shrimp! It’s easy to do. Place shrimp in a hot pan with a little olive oil. As soon as they become translucent, turn them over to cook the other side. Really, 2-3 minutes per side is more than enough. You want a nice crunchy bite, not a rubbery one. It’s a texture thing.
Yield: 4
Orange Shrimp with Broccoli and Garlic
Quick and light, Orange Shrimp with Broccoli and Garlic is perfect for an easy and informal dinner with a little citrus and spice. Yummy!
Ingredients
1 1/2 pound shrimp (21-25 count) peeled, deveined, and rinsed under cool water
3-4 cups fresh broccoli, separated into florets
2-3 Tablespoons olive oil
1-2 garlic cloves, peeled and minced
1 cup orange juice, freshly squeezed
2 Tablespoons soy sauce
1 1/2 Tablespoon granulated sugar
Zest of one orange
1/2 - 1 teaspoon crushed red pepper flakes, depending on how much spice you want, or leave it out
1 teaspoon cornstarch
Sliced green onion for garnish
Sesame seeds for garnish
3 cups Jasmine rice, cooked according to package directions
Instructions
Line a sheet pan with a couple of layers of paper toweling. Place shrimp on the toweling in a single layer. Take another sheet of paper toweling and pat the shrimp dry. Sprinkle with salt and pepper. Set aside
Heat a large skillet over medium-high heat. Add 1 Tablespoon olive oil into the skillet. Add broccoli florets for 3-5 minutes until broccoli is tender. Remove broccoli from the skillet into a bowl or plate and set aside.
Use the same skillet and heat over medium-high heat. Add 1 Tablespoon olive oil. Add minced garlic and let sizzle for 30 seconds or until garlic becomes fragrant. Add red pepper flakes, if using. Place shrimp in the skillet in a single layer. (You may have to cook in 2 batches.)
As soon as the shrimp becomes translucent, flip over the cook the other side. Total cooking time is 2-3 minutes per side, at most. Remove cooked shrimp and garlic, pepper flakes to bowl/plate with the broccoli.
Return the skillet to the stove. Add orange juice, sugar, and soy sauce. Bring to a boil and reduce until slightly thickened.
Mix 1 teaspoon cornstarch with 2 teaspoons cold water. Add to skillet and continue to cook for 1-2 minutes until the sauce becomes shiny. Add orange zest.
Pour finished sauce over shrimp and broccoli. Garnish with sliced green onions and sprinkle with sesame seeds. Serve over cooked hot rice.
If you’re like me, we scour the internet looking for delicious recipes that take us out of our comfort zone. Sometimes I get stuck in a rut of making the same dishes over and over again. It’s not like the meals aren’t delicious. But sometimes we just need to rock the boat a bit. I just love Pinterest and visit every day looking for inspiration. Pinterest is a great resource for me where I find great food bloggers and recipes of all sorts like this one:
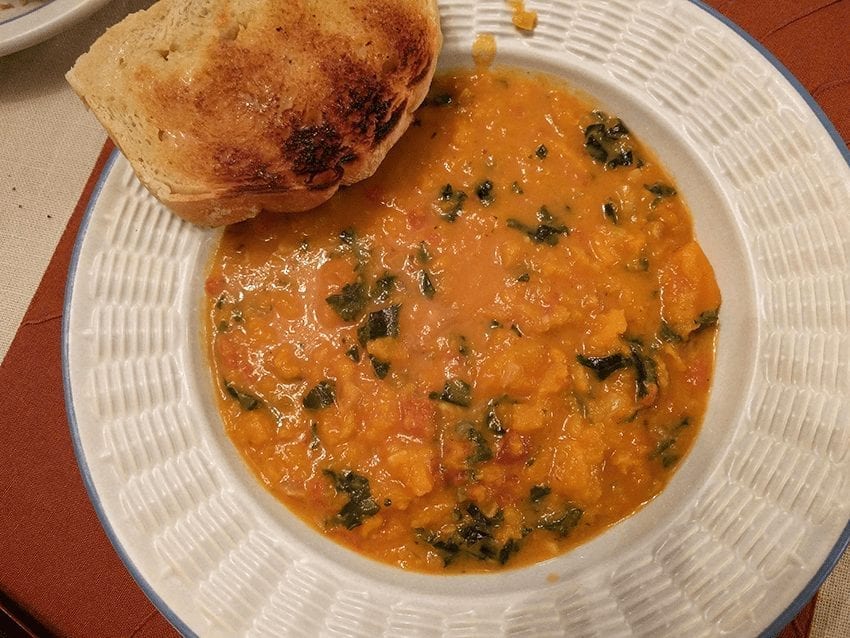
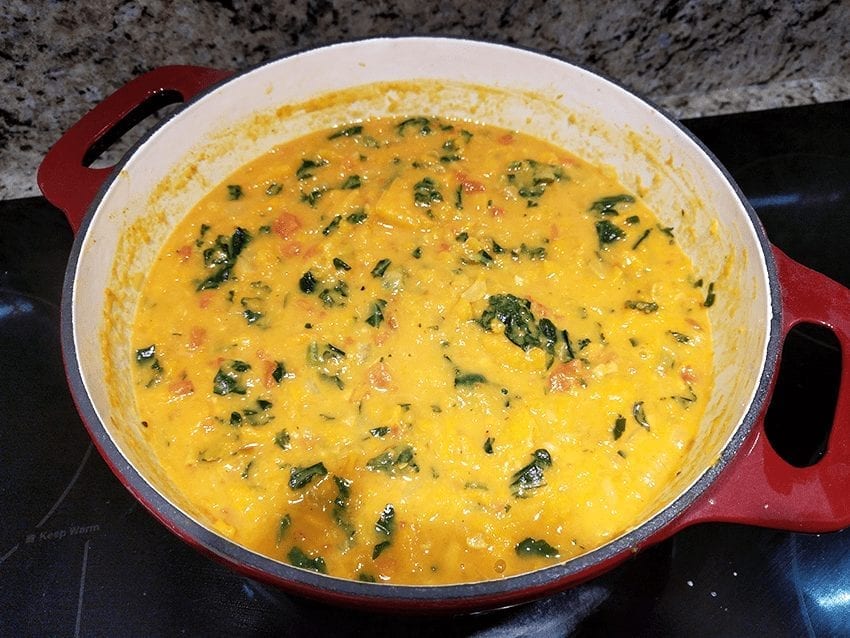
I was looking around one afternoon and my eyes lit up when I landed onA Pinch of Yum and this wonderful recipe for Spicy Peanut Soup with Sweet Potato & Kale. Why don’t I ever think about combinations like this? I’m in the Midwest. I don’t think this way. Sweet potato simmered with sweet curry and turmeric in coconut milk and broth finished with kale – seriously flavorful. There are even chopped peanuts in the recipe that gives this soup a little crunch – awesome!
And healthy! Look at all the good stuff it’s made from. Lindsay’s soup is thickened with creamy peanut butter instead of the usual roux of butter, flour, and milk. I didn’t miss it a bit. Many of us serve soup as a first course to a holiday meal and Spicy Sweet Potato Soup with Peanuts and Kale would be a stellar beginning.
And quick! Forty minutes from cutting board to table. I always have sweet potatoes on hand during fall and winter, so that was a cinch. I bought a package of frozen, chopped kale at the grocery to make prep even easier.
I didn’t have jalapeno, so I substituted crushed red pepper flakes. Lindsay calls for two cups of water. I used chicken stock instead. She likes to leave her sweet potatoes in bite-sized chunks, and I mashed mine up a bit to make the soup thicker. Try it. You’ll love it!
This dish is a warm and comforting, healthy, gluten-free, bowl of happiness. Lindsay at a Pinch of Yum says she was inspired to make this soup based on a West African recipe for groundnut soup. It would be fabulous as a first course for a holiday meal.
Author: A Pinch of Yum, Lindsay
Recipe type: Soups & Stews
Cuisine: American
Serves: 6
Ingredients
2 Tablespoons olive oil
1 small to medium onion, diced
½ teaspoon crushed red pepper flakes
2 cloves garlic, minced
3 large sweet potatoes, peeled and cubed
1-14 oz can fire roasted or petite diced tomatoes
1-14oz can light coconut milk
2 cups chicken stock
1 teaspoon salt
1 teaspoon sweet curry powder (I use Penzey's)
½ teaspoon turmeric
½ cup unsalted peanuts, chopped
¼ cup creamy peanut butter
1-10oz bag frozen chopped kale
Instructions
Put olive oil in a heavy soup pot over medium-high heat. Add onion and cook until lightly browned.
Add sweet potato cubes and stir until they become lightly browned - 3-5 minutes.
Add garlic, stir and cook until the garlic becomes fragrant - 1 minute.
Add the curry powder and turmeric to the sweet potatoes. Stir and cook until the spices are fragrant, a minute or so.
Add the tomatoes, coconut milk, chicken stock, salt, and chopped peanuts. Stir everything together.
Bring the soup to a simmer and continue to cook uncovered for 20 minutes or until the sweet potatoes are tender.
Add peanut butter and kale. Stir and continue to simmer until the soup is thick and creamy.


 Before I dived into Tieghan’s recipe, I wanted to cook something simple with rice noodles first just to get the hang of preparing them and to test the texture. I hopped over to my favorite Asian market where they have the best noodle aisles. Not just one aisle, but two. Yeah, I was there for a while.
 Let’s talk a minute about cooking rice noodles.
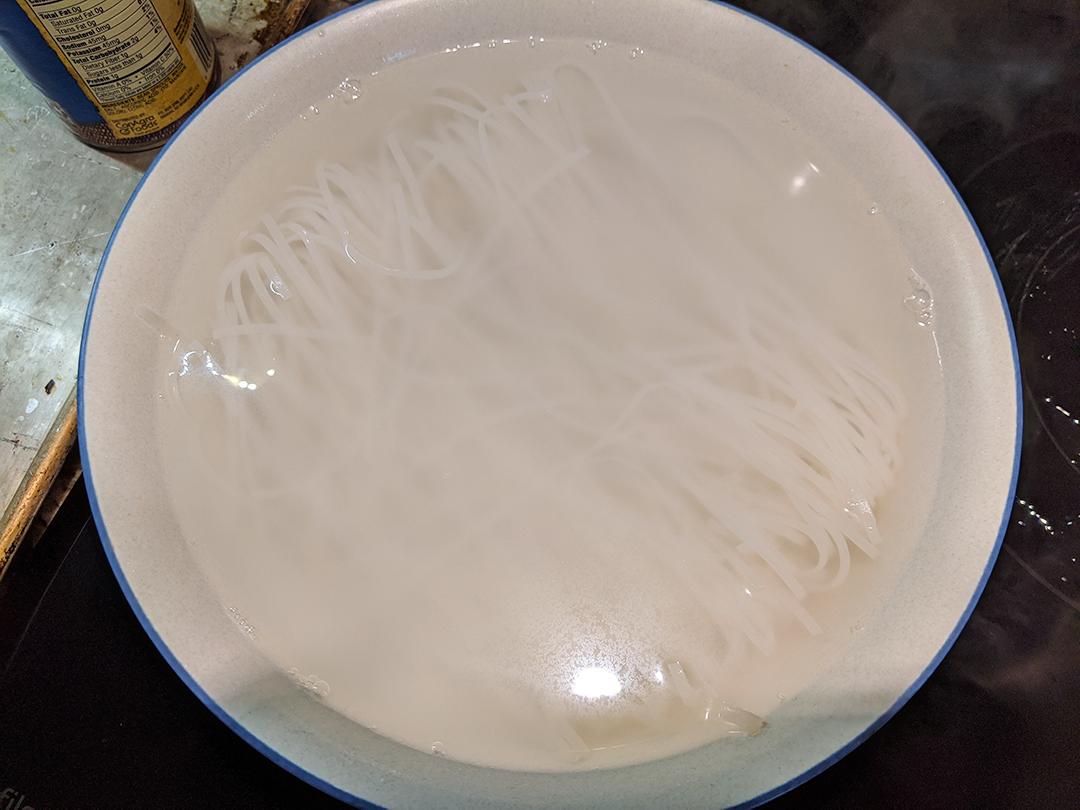


 Spaghetti squash is the perfect side or main for children and grandchildren. (Heck, I think it’s fun!) Wouldn’t you love to watch them drag their forks across the flesh and watch the magic happen? It’s fun! Besides, spaghetti squash is filled with