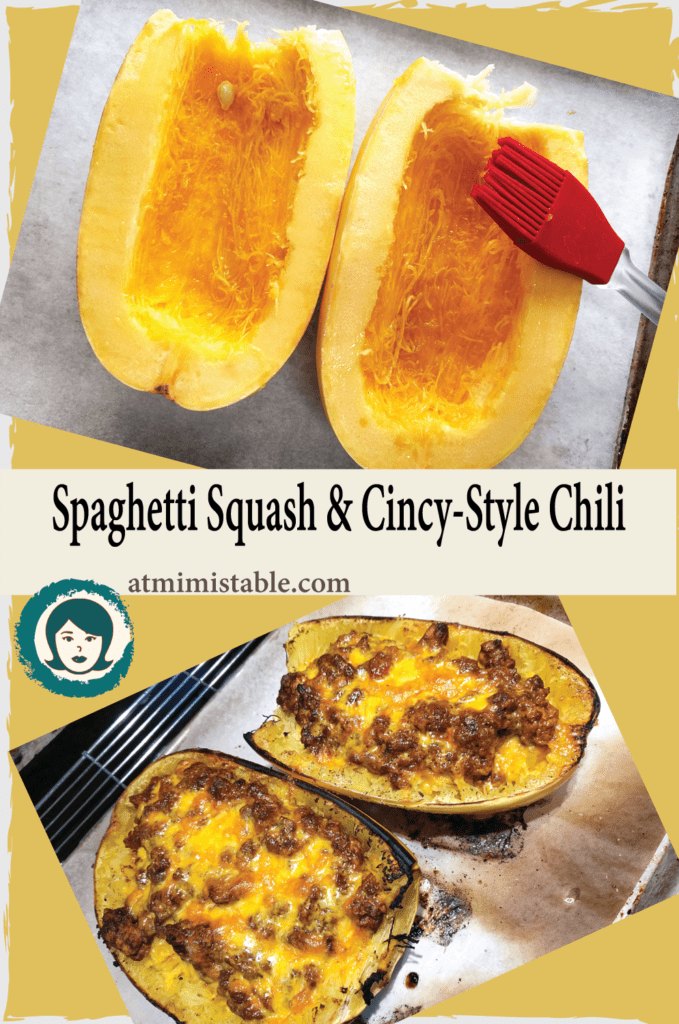
If you love squash and chili, you’re going to love this recipe from the Half Baked Harvest blog. Tieghan Gerard has done it again!
Cincinnati Chili Stuffed Spaghetti Squash is best served on a beautiful fall or winter day, whether it’s cool, downright cold, rainy, or snowy, Tieghan’s dish is only one of her phenomenal comfort food offerings. Sweet and stringy spaghetti squash topped with a mild chili flavored with cinnamon and allspice is a yummy pairing of flavors. Tieghan has several recipes where she uses cooked spaghetti squash as the vessel for a wide variety of cheesy and meaty toppings. Like this one for Spanakopita Stuffed Spaghetti Squash. You must check out her blog.
I started cooking spaghetti squash several years ago. I like that it’s not pasta. It has a slightly sweet flavor with a stringy bite. Most times I baked it, scraped the beautiful flesh into a serving bowl, tossed with butter, salt, pepper, and a little Parmesan cheese, and served it as a side dish. But I like the idea of serving the squash strands in their skins, little boats, topped with great stuff. I’m serving this more and more as I’m looking for lower-calorie meals. Yeah, there’s meat and cheese and stuff, but count the squash as a low-calorie alternative to pasta, and you won’t feel guilty at all about the calorie-filled toppings. And think about carbs – there are practically no carbs! Spaghetti squash is gluten-free! Hail, hail to the lovely spaghetti squash!
Spaghetti squash is the perfect side or main for children and grandchildren. (Heck, I think it’s fun!) Wouldn’t you love to watch them drag their forks across the flesh and watch the magic happen? It’s fun! Besides, spaghetti squash is filled with vitamin C, vitamin B6, niacin, potassium, manganese, and even some calcium. There are only 42 calories per cup. Seriously, spaghetti squash is a nutritional no-brainer!
Spaghetti squash is also very easy to grow. I planted a couple of plants in my Billings garden one year and had wheelbarrows full to share with neighbors. If you have garden space and enthusiastic friends, be sure to include a plant in the spring.
Are you curious? Are you hopeful? Are you HUNGRY??
Make Cincinnati Chili – OH, Yes!
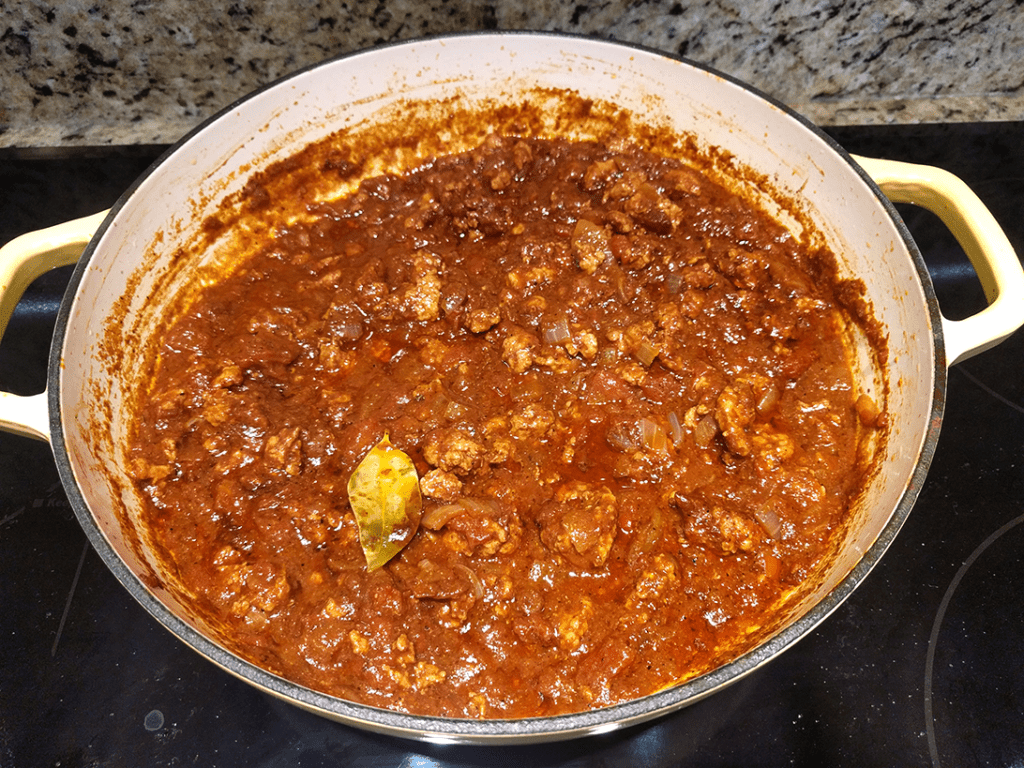
Put together ingredients for Cincinnati chili. Skyline Chili in Cincinnati is a food icon and this chili recipe pays homage to that recipe, perfectly done. Yes, it should simmer for 3 hours, stovetop or CrockPot. I made the full chili recipe, served half, and froze the other half for Coney dogs or traditionally served over spaghetti with lots of cheese on top. I’ve visited Skyline Chili in Cincinnati. Eaten their Coney’s – two of the cutest little hot dogs in buns topped with lots of chili, chopped onion, and tons of finely shredded cheddar cheese. I’ve ordered their chili over spaghetti topped with lots of cheddar cheese. This stuff is addicting. Tieghan’s mother’s recipe is spot on!
Make the chili with ground turkey or ground chicken instead of ground beef. Add a can of drained and rinsed pinto beans or light kidney beans in place of or along with the ground meat, if that’s the way you roll.
When I pick spaghetti squash, I go big or go home. I made this recipe with one large squash. Richard & I ate half for dinner and had leftovers the next night. It’s the perfect dish served for 2 people with enthusiastic appetites.
Bake Your Spaghetti Squash
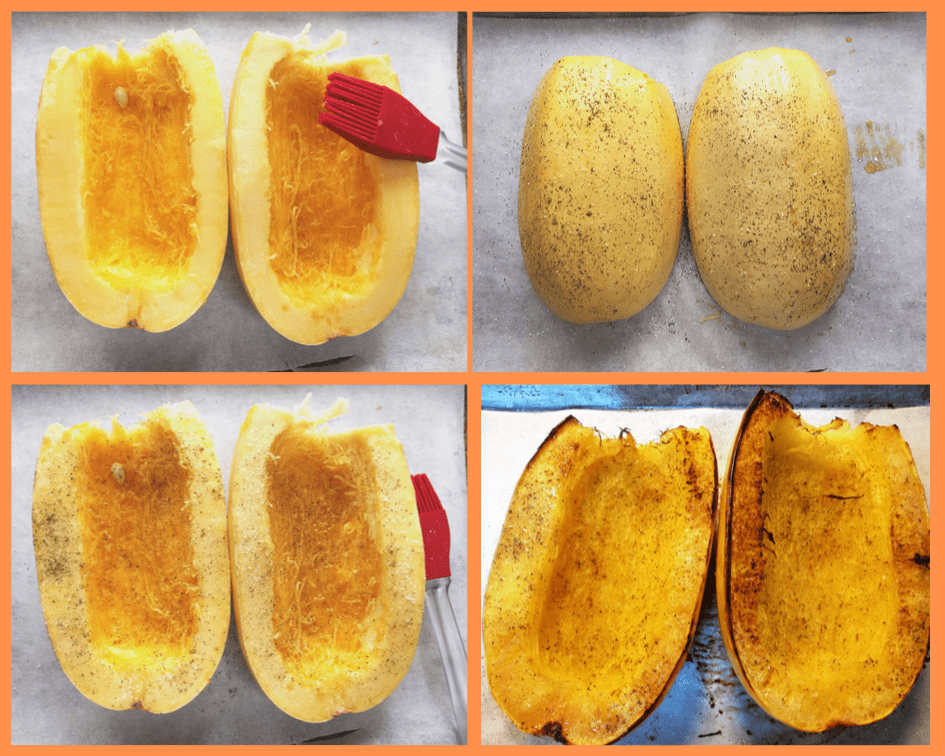
Cut the squash in half and remove seeds. Place the halves on a parchment-lined baking sheet. Brush the inside lightly with olive and sprinkle salt and pepper. Turn the halves over and repeat. Bake skin side up in a 350°F oven for 45-50 minutes. Remove and allow to slightly cool.
OK – I hear you. “Mimi, 3 hours for chili and 1 hour to bake the squash? Are you nuts?” Yes, I am but it’s so worth it!
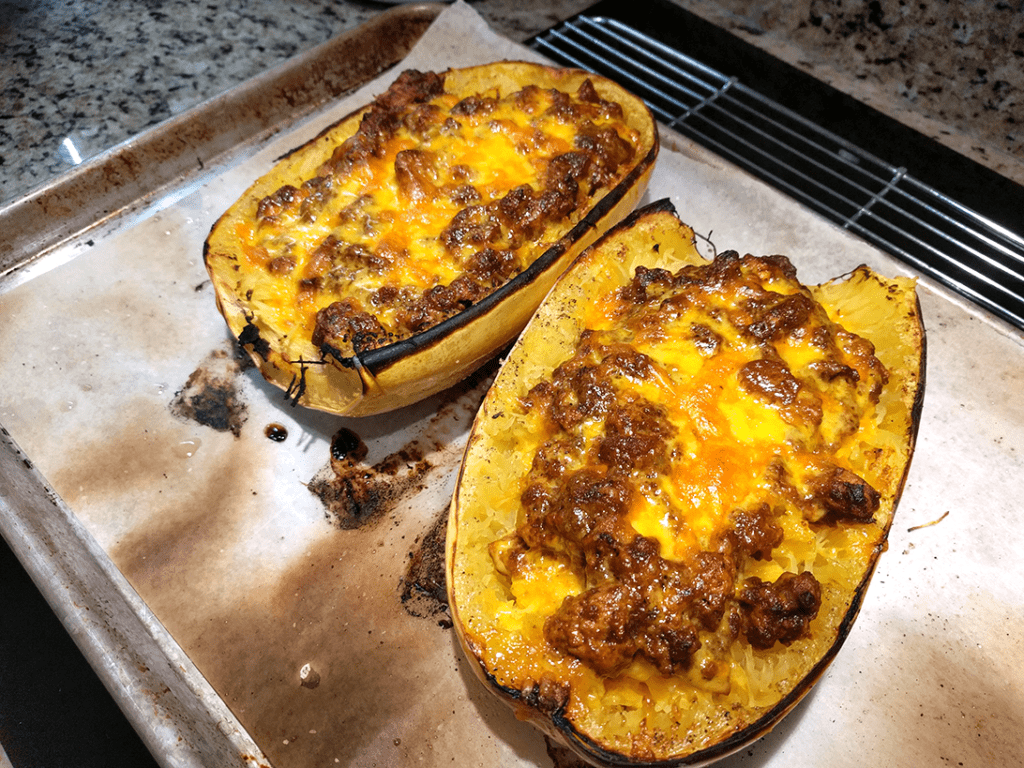
Return to oven/broiler to melt the cheese. I chose the broiler.
I need to pay more attention to showing my dishes at serving. I’m just so excited about eating that I don’t pay too much attention to photography once dinner is ready and I’m hungry! HA! You can serve with sour cream, extra cheese, mashed avocado, salsa.
Cincinnati Chili Stuffed Spaghetti Squash is best served on a beautiful fall or winter day, whether it's cool, downright cold, rainy, or snowy, Tieghan's dish is only one of her phenomenal comfort food offerings. Sweet and stringy spaghetti squash topped with a mild chili flavored with cinnamon is a yummy pairing of flavors. Tieghan has several recipes where she uses cooked spaghetti squash as the vessel for a wide variety of cheesy and meaty toppings. Like this one for Spanakopita Stuffed Spaghetti Squash. You must check out her blog.
1 Tablespoon unsweetened cocoa powder, dark or regular
2 teaspoons cumin
1½ teaspoon allspice
1½ teaspoon Kosher salt
1½ teaspoon cinnamon
1 teaspoon cayenne
½ teaspoon garlic powder, not garlic salt
2 cups chicken broth
1-28oz can crushed tomatoes
2-8oz cans tomato paste
1½ teaspoons vinegar (I used cider vinegar)
1 Tablespoon Worchestershire sauce
2 bay leaves
2 small or 4 large spaghetti squash
Olive Oil
Salt & Pepper
2-3 cups shredded sharp cheddar cheese
Instructions
Set a large heavy bottom soup pot over medium heat. Add olive oil then onion and cook for 5 minutes.
Add the ground meat to the pot, breaking it up with a spatula as it browns.
Add the next nine ingredients. Stir and briefly cook until the spices become fragrant.
Add chicken broth, tomatoes, tomato paste, vinegar, Worchestershire sauce and bay leaves.
Stir and simmer over low heat or in a CrockPot for at least 3 hours.
About an hour before you're ready to eat, heat the oven to 350F.
Cut the squash in half, remove the seeds, and set the ovals flesh side up on a parchment lined baking sheet.
Brush the inside with olive oil. Sprinkle with salt and pepper.
Turn the halves over, skin side up, and repeat.
Bake for 45-50 minutes. If your squash is small, 30-40 minutes.
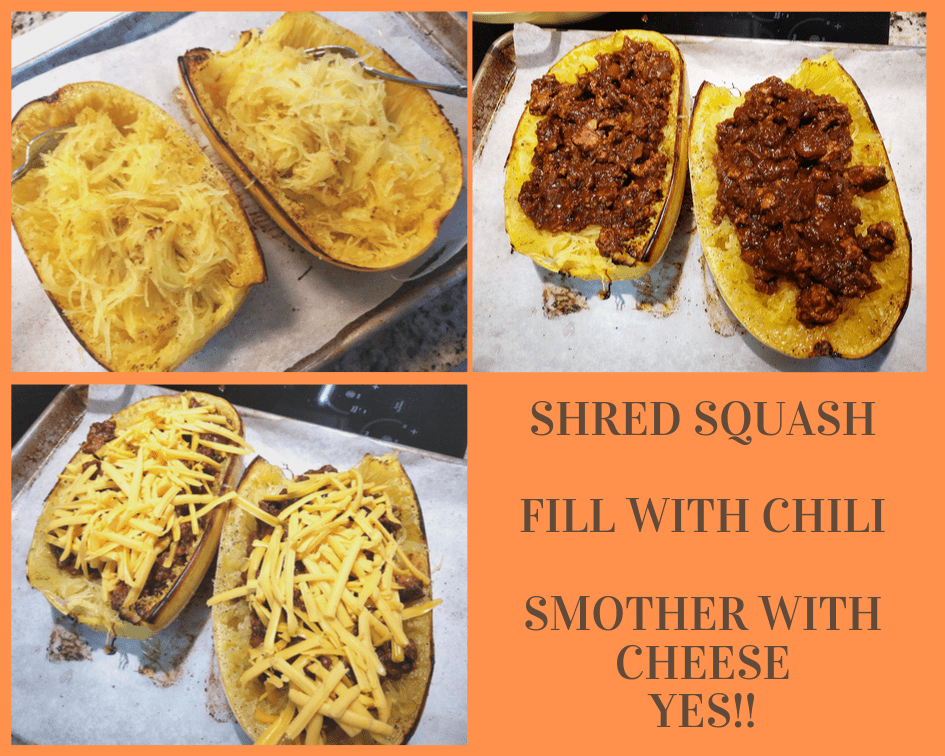
When done, flip the squash over into a shallow bowl and begin to scrap the insides with a fork to reveal the lovely squash strands.
Ladle chili over the squash inside the cavity. Liberally sprinkle with shredded cheddar cheese.
Place under the broiler for 5-7 minutes until the cheese is melted and slightly browned.
Notes
Cincinnati-Style chili is mild and has a slightly sweet flavor from the cinnamon and allspice in the recipe. Feel free to serve with your favorite chili toppings - sour cream, mashed avocado, extra cheese, crackers, hot sauce. You can use cans of drained and rinsed pinto or light red kidney beans in addition to or to replace part or all the ground meat.
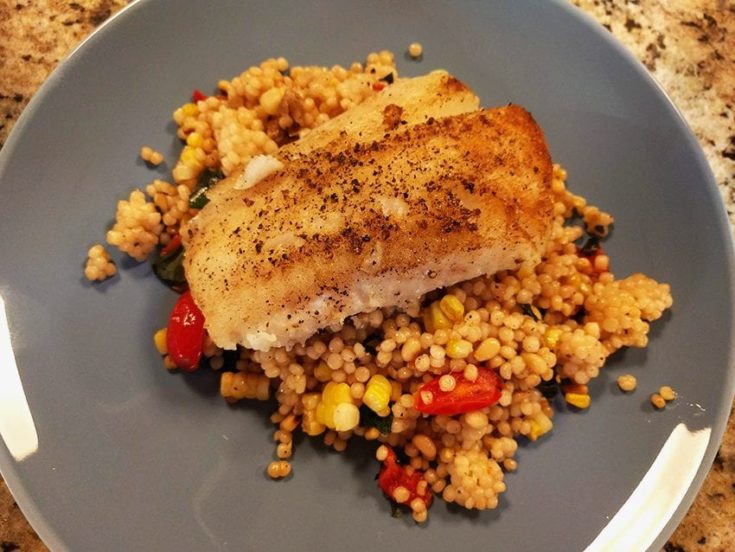
Bursting with fresh flavors from a summer garden, Pan-Seared Cod Filet with tomatoes, corn, and basil-infused Israeli couscous will become a fabulous, flavorful favorite in your quick fix menu rotation.
Fresh seafood, like these cod filets, is quick and easy to prepare. Almost any thick, white, flaky fish filet will cook in the blink of an eye. I’ve found cod filets to be very budget-friendly. Flavorful and meaty, this cod filet is the centerpiece of the dish, nestled on top of a bed of Israeli couscous mixed with a variety of fresh and healthy summer vegetables and herbs. Lots of clean flavors.
Have you ever used Israeli couscous? It is substantially larger than regular couscous. I love its chewy, pearly mouth feel. In fact, some packers actually call it “pearl” couscous. Israeli couscous cooks quicker than rice, about 10 minutes from start to finish. I like to cook mine in chicken stock, but water or beef stock would work, too.
Israeli Couscous, Giant Couscous, Pearl Couscous
Israeli couscous came onto the culinary scene in the 1950s. It’s actually pasta – don’t mistake it for quinoa – made with semolina and water. Israeli couscous was introduced by then Prime Minister David Ben Gurion to feed the influx of immigrants coming to Israel. It comes in regular form and you can find whole-wheat versions as well or tri-colored where tomato and peas lend color to the finished product. And couscous can be served cold or at room temperature, like in a salad, or warm just like any starchy side. Master Class Articles “What Is Israeli Couscous?”
I use Israeli couscous in another recipe Shrimp and Scallop Stew with Israeli Pilaf. A great recipe from Martha Stewart’s kitchen. I like to use Bob’s Red Mill brand that comes as traditional and tri-color. But any commercially available Israeli couscous will do. Common Mediterranean couscous looks almost like polenta or coarsely ground cornmeal, so you’ll easily notice the difference.
A Tip for Searing Fish Filets
I always, always blot any sort of seafood folded in between layers of paper toweling. You want the seafood patted as dry as possible in order to get it ready for a nice sear. If you don’t, there’s too much water in the fish and the filets will steam rather than brown. I do this with shrimp or scallops, too, whether the seafood is fresh or frozen. This step is especially important if you want to dredge, bread, and fry seafood, or else the coating won’t stick to the meat and the dredge or batter will fall away as it’s fried and there goes your beautiful breading burning at the bottom of the fryer. The goal here is for a well-prepared fish that will have a nice brown crust, but a moist flaky inside whether it’s seared or fried – just the way you want it. So, how hot should the pan be? I’ve found somewhere between medium and medium-high is best – not too hot. I like to warm my cast iron skillet for 5 minutes or so to make sure the skillet is properly pre-heated.
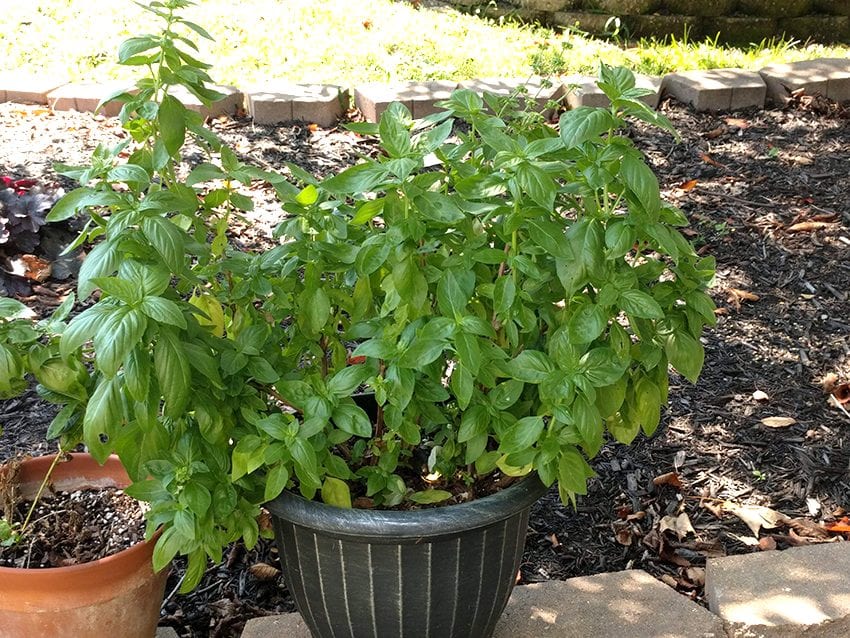
An Ode to Basil
I love, unabashedly love, basil – probably not an ode, but it’s the best I’ve got. Every summer I grow a big potful on my front porch. I run my fingers through the leaves just to come away with one of the best culinary smells of summer. Some like to use oregano or rosemary or thyme – my go-to is always basil. I prefer the distinctive almost anise-like taste and smell – fresh or dried – to just about any other herb. Personally, I think thyme is over-rated. Parsley is just so, well, bland. I can’t imagine making any pesto with parsley – not my thing. Of course, basil in spaghetti sauce is a must. And my mother used to roast a rump roast in an oven-baking baking bag simply seasoned with salt, pepper, and dried basil mixed with a can of tomato soup – out-of-this-world gravy to pour over mashed potatoes! Basil simply makes me happy.
I just got a motherload of fresh pine nuts delivered to me by my friend, Cindy, from Nut-tos in West Seneca, NY.? Nut-tos is a beloved roasted nut distributor in the Buffalo area. You know what I’ve been dreaming about – PESTO!
Three basil plants in a 14″ pot. I moved the plant to a semi-sunny area of my garden in August, and out of the stressful heat of the late summer sunshine. My plant really likes its new location – big healthy leaves of goodness.
So, while I’m high on basil, let’s look at why it’s such a healthy herb. Basil is a powerful antioxidant. It’s a good source of magnesium which promotes good blood flow, is high in Vitamin A for good eyesight, and has been shown to be a good anti-inflammatory. As part of an aromatherapy routine, basil is beneficial to relieve tension, melancholy, depression and mental fatigue. Gee, no wonder I’m so head-over-heels in love with basil. Maybe it’s what my body craves – along with chocolate, wine, and anything in a pie crust.
Yield: 4
Pan-Seared Cod Filet with Tomato, Corn and Basil Couscous
Bursting with fresh flavors from a summer garden, Pan-Seared Cod Filet with Tomatoes, Corn, and Basil-infused Israeli couscous will become a fabulous, flavorful favorite in your quick fix summer-time menu rotation. Delicious and so easy and quick to prepare!
Prep Time10 minutes
Cook Time25 minutes
Total Time35 minutes
Ingredients
2 lbs thick cod filets, fresh or frozen and thawed, cut into 4 equat portions
2 Tablespoons olive oil
2 cups Israeli couscous
21/2 cups of chicken stock or water
1 pint cherry tomatoes, cut in half
3-4 ears of fresh corn, steamed and cut from the cob; or 2 cups frozen corn
1/2 - 1 cup fresh basil, shredded into pieces or julienned
1/2 cup toasted pine nuts or toasted slivered almonds
Salt & Pepper
Instructions
Line a baking sheet with paper toweling. Place the fish on top, and use more paper toweling to pat dry the fish surface. Spray the filets lightly with cooking spray. Sprinkle with salt & pepper. Turn the fish over and repeat.
Start the couscous. In a 3-quart pot, add chicken stock or water, and couscous. Over medium-high heat, bring to a boil, then immeiately reduce to a simmer. Cover and simmer for 10 minutes. Once done, fluff with a fork, cover, and set aside.
In a 12" cast iron skillet, heat the olive oil over medium-high heat. Place the filets in the hot skillet. Sear for 5 minutes per side. Be sure not to crowd the skillet - you may have to cook in 2 batches. You want to sear the fish, not steam it. Each side should form a nice lightly-browned crust. Remove cooked filets to a plate, cover lightly with aluminum foil, and set aside.
Add pine nuts or almonds to the hot skillet. Pan toast, stirring frequently, until the nuts are lightly browned. Remove to a plate and set aside.
In the same skillet, reduce heat to medium or medium-low add the couscous, tomatoes, corn, and nuts. Toss gently until everything is well combined. Add basil and toss. Check seasoning.
To Assemble the Dish: Place one cup of the warm couscous mixture in the middle of a plate. Top with one cod filet. Sprinkle the fish with fresh lemon juice. Serve.
Notes
Cod filets come in all shapes and sizes. Prefer the thicker filet sections for this recipe. The flatter parts of the filet are excellent for making fish & chips. Toasted garlic bread would be a great side or any tossed salad.
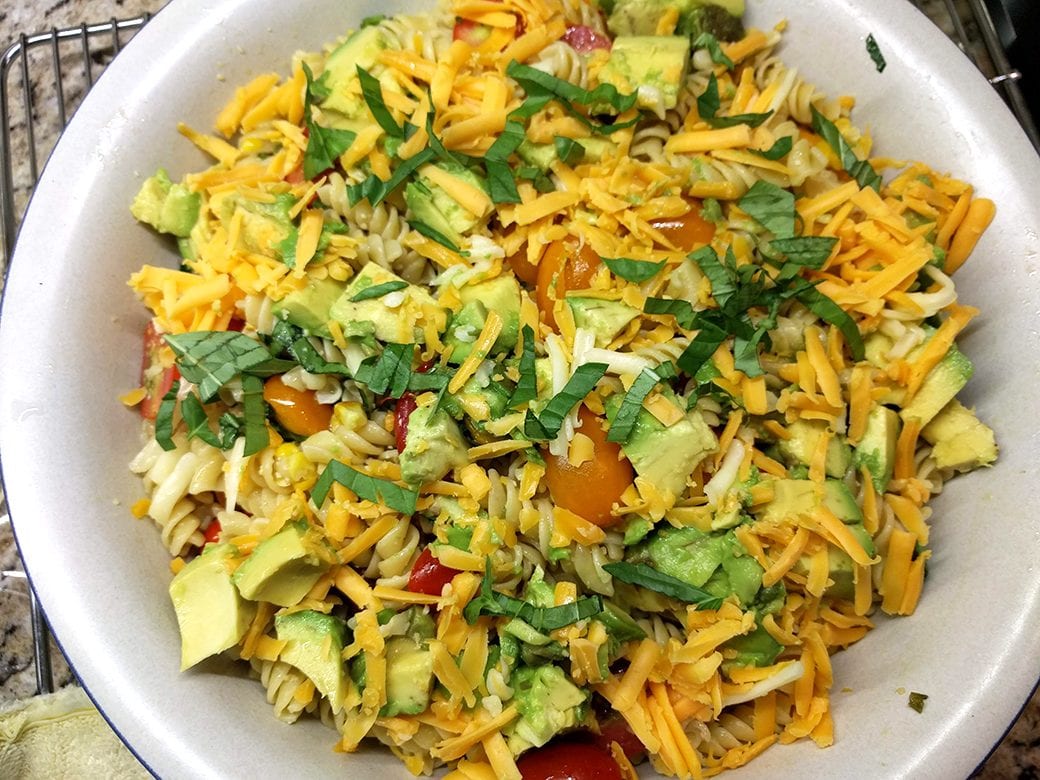
Summertime Tomato, Avocado, Roasted Corn,Basil Pasta Salad is a salad bowl to behold! This salad is the perfect side or main dish for the height of summer’s flavorful bounty. In August, we can find all these ingredients readily available at the height of their freshness. This is what summer eating is all about, without a doubt!
My inspiration for this recipe came from Teighan Gerard, the spirited, adventurous, creative energy behind Half Baked Harvest. I’ve followed Teighan for several years now, and subscribe to her blog. Every Sunday she emails her subscribers her “Nine Favorite Things” post. There are even more great photos in the post of her family, her home in Colorado which is a converted barn. When I need a pick me up, I saunter on up to her blog and allow my eyes and brain to rest. Her food photography is absolutely stunning. This is one talented and down-to-earth young woman. Here’s a link to Teighan’s fabulous pasta recipe.
This is such a cinch to quickly put together, especially during these last sultry summer days. I had fresh ears of corn that I grilled in their husks. A lovely pint of fresh sweet cherry tomatoes. An avocado that had to be eaten – such a chore! A hunk of the sharpest cheddar cheese in the refrigerator. My basil produced very well this season, so I grabbed a bunch of that, too.
I think when you approach recipes like this one, feel free to transform it into anything you wish or have on hand. Here are a couple of change-ups you might enjoy:
A Tex-Mex version with a can of drained black beans, corn, tomatoes, avocado, and cilantro with a dressing made with olive oil, lime juice, a squirt of sriracha mixed with a sprinkling of cumin;
A French-inspired version made with a couple of drained cans of tuna, chopped cornichons, finely diced red onion, and capers with a lemon/mayo/thyme based dressing;
Add a cup or two of diced cooked chicken to the original recipe for a great dinner salad.
Any way you decide, you’ll have a fabulous summer side or main dish salad.
Yield: 4-6 servings
Summertime Tomato, Avocado, Roasted Corn, Basil Pasta Salad
The perfect salad for the last sultry days of summer. All ingredients are at their peak flavor. You'll have a nice side dish in no time at all!
Prep Time15 minutes
Cook Time15 minutes
Total Time30 minutes
Ingredients
1 lb rotini or Gemelli pasta
1 cup fresh basil, roughly chopped
1 cup sharp cheddar cheese, shredded
1/3 cup olive oil
1/4 cup grated parmesan or pecorino cheese
2-3 Tablespoons fresh-squeezed lemon juice
1 teaspoon dijon mustard
1 Tablespoon fresh chives, chopped
Pinch crushed red pepper flakes
1 teaspoon Kosher salt
1/2 teaspoon black pepper
4 ears fresh corn, steamed or grilled in their husks.
2 cups or 1-pint cherry tomatoes, cut in half
1 avocado, diced
Instructions
Cook the pasta according to package directions for al dente pasta.
While the pot of water is coming to a boil, start to make the salad dressing and prepare the vegetables.
In the bottom of a large salad bowl, mix together dressing ingredients: olive oil, parmesan or pecorino cheese, lemon juice, dijon mustard, red pepper flakes, salt and ground pepper. Whisk together until well combined and the dressing thickens a little. (Or put dressing ingredients in a pint canning jar and shake until mixed and slightly thickened.)
Add the chives to the dressing and whisk until distributed. Set salad bowl aside.
Cut corn kernels from the cob, set aside.
Cut tomatoes in half, set aside.
Dice avocado set aside.
Drain the cooked pasta and run under cool water to stop cooking. Shake the colander to release more water.
Add pasta to the salad bowl with dressing. Toss until dressing evenly coats the pasta.
Top pasta with corn, tomatoes, avocado, cheese, and basil. Toss until well combined.
Check for seasoning and serve!
Notes
I added more salt and pepper to the dressing. I added 1 teaspoon dijon mustard. If you have leftover cooked chicken, dice the meat and add to the salad for more of a dinner salad.
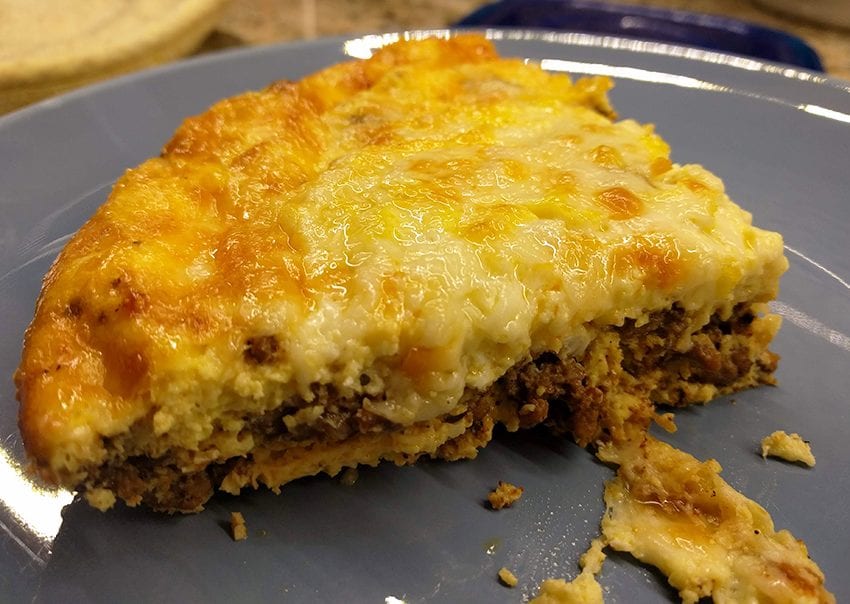
We all need a quick and easy meal like this one in our arsenal. And everyone likely has a pantry and freezer with the ingredient staples on hand. Easy Crustless Taco Pie is not only delicious but gluten-free, low carb and keto-friendly. And did I mention this taco pie is kid-friendly, too? A win-win in my book of tricks.
There’s nothing special that you need. Ground beef or ground turkey, eggs, cheddar cheese, taco seasoning are the staples here.
Serve with a dollop of full-fat sour cream (keto-friendly), guacamole, spicy salsa and a simple shredded lettuce salad on the side with diced tomatoes.
Here’s a tip! I like to buy ground beef in multi-pound packages from a big box store. The meat is usually leaner, 85-15% fat and I find it is cheaper per pound than buying ground meat in the grocery. When you make this recipe, why not brown 2-3 pounds at a time. Then separate the cooked meat into equal portions, load a freezer bag or two and store in the freezer. You’ll have cooked ground meat at the ready for another recipe Sloppy Joe’s or quick meat spaghetti sauce or tacos. Looking for even leaner meat? Use ground turkey instead. I’ve found ground turkey may be substituted for ground beef in most recipes.
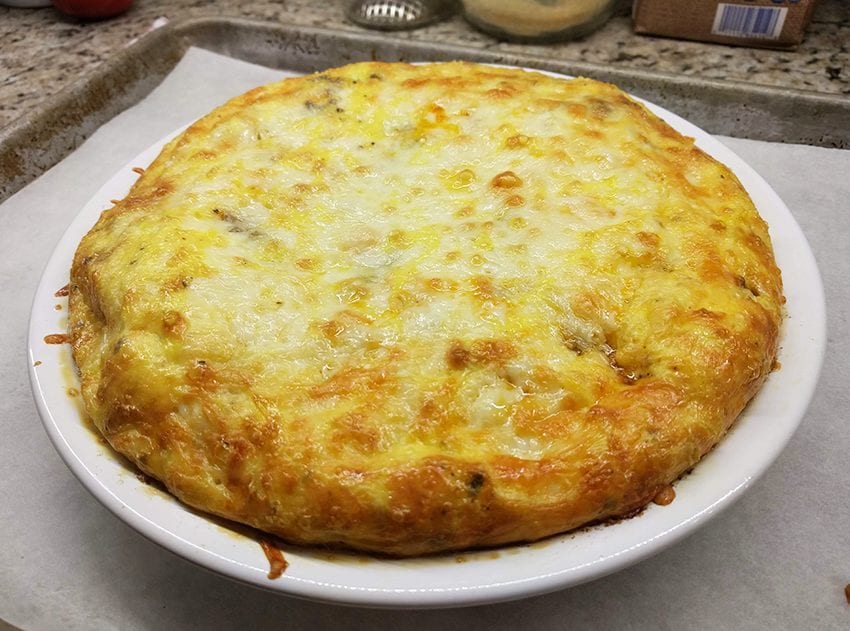
I had to share this recipe if only to show the beautiful rise from the eggs. Yes, the dish deflates a little while it cools. But look! Isn’t it pretty out of the oven?
You’re happy! Your kids are happy! Everyone’s happy!
Yield: 4
Quick and Easy, Crustless Taco Pie - Gluten Free & Low Carb!
We all need a quick, simple, and easy meal like this one in our arsenal. And everyone likely has a pantry and freezer with the ingredient staples on hand. Quick and Easy Crustless Taco Pie is not only delicious but gluten-free and low carb. And did I mention kid friendly? A win-win in my book of tricks.
Prep Time20 minutes
Cook Time35 minutes
Total Time55 minutes
Ingredients
In a small bowl combine:
2 Tablespoons chili powder
1 Tablespoon paprika
1 Tablespoon kosher salt
1 Tablespoon ground black pepper
2 teaspoons ground cumin
1 teaspoon garlic powder
1 teaspoon onion powder
1 Mexican oregano
1/4 - 1/2 cayenne pepper, if desired
For Meat Filling
1 pound ground beef or turkey
1 medium onion, diced
2 cloves garlic, minced
3 Tablespoons taco seasoning, above
6 large eggs
1 cup heavy cream or half-n-half
4-6 oz shredded cheddar cheese, or Monterey Jack, or Monterey Pepper Jack depending on your pepper heat
Instructions
Taco Pie Assembly
Preheat oven to 350F degrees.
Spray 9" pie dish with cooking spray. Set aside.
In a 12" skillet, brown ground meat over medium-high heat until cooked through and no pink is showing.
Add diced onion and minced garlic. Saute for 1 minute.
Add 3 Tablespoons (or one package) of taco seasoning to the browned meat. Continue to cook for 2 minutes until the mix becomes fragrant.
Spread the meat filling into the prepared pie dish.
In a large bowl, whisk the eggs, cream or half-n-half. Pour slowly over meat mixture in the pie pan.
Sprinkle with shredded cheese. Bake for 30 minutes or until the center has nicely risen and begins to brown. 30-40 minutes.
Remove taco pie to a cooling rack for 5 minutes. Cut into wedges and serve with accompaniments, if desired.
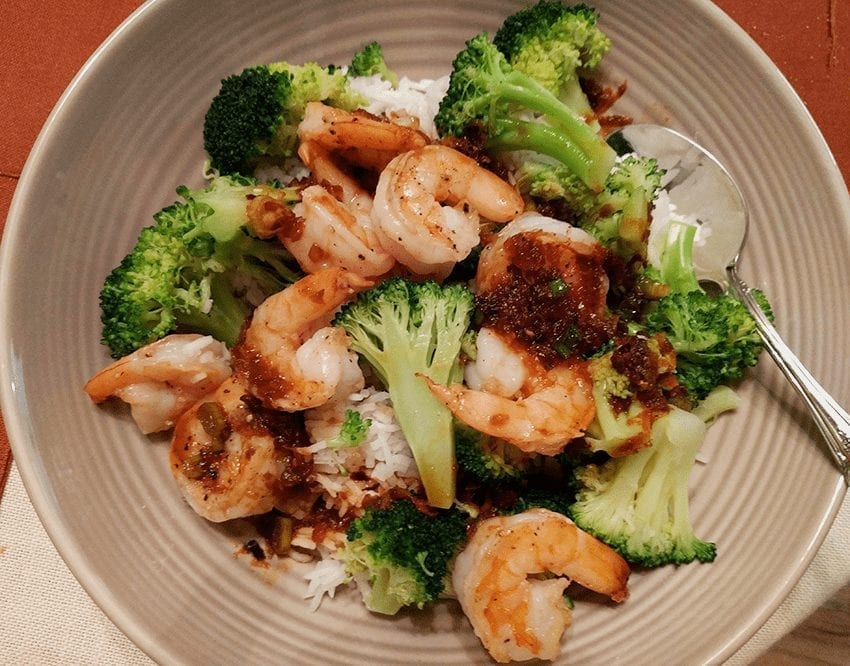
Orange Shrimp with Broccoli and Garlic is one of my favorite types of dishes. Crushed red pepper, orange zest, and garlic lend the simple sauce a bright delicious bite. And it’s so quick and easy! Orange Shrimp any time of the year but is a fabulous dish when your schedule is tight and fast food is not an option. You know, like during the holidays!
I always have a pound or two of raw shrimp (21-25 count) in the freezer. It’s handy for lots of quick meals like Shrimp Tacosor Shrimp Scampior Shrimp and Grits. Frozen shrimp don’t take long to defrost, either. Measure out what you need for your recipe. I use a scale for an accurate amount. Then I put them in a colander in the sink and run cool water over them until the shrimp are ready. I also use raw shrimp rather than cooked frozen ones, because raw shrimp will absorb all the lovely flavors either as they’re marinated or as you cook them. Garlic and lemon are two of my favorites, but you could use coriander, red pepper flakes, cumin or curry. Seriously delicious!
Here are a couple of things to remember when cooking raw shrimp:
Rinse shrimp after the shells and tails are removed. Remove the black vein at the top. Most frozen packed shrimp come deveined, but it’s a good idea to check anyway.
Once rinsed, place shrimp on a baking sheet lined with paper toweling. Use another layer to pat dry the top. Shrimp should be dried off to get a proper sear.
Don’t overcook your shrimp! It’s easy to do. Place shrimp in a hot pan with a little olive oil. As soon as they become translucent, turn them over to cook the other side. Really, 2-3 minutes per side is more than enough. You want a nice crunchy bite, not a rubbery one. It’s a texture thing.
Yield: 4
Orange Shrimp with Broccoli and Garlic
Quick and light, Orange Shrimp with Broccoli and Garlic is perfect for an easy and informal dinner with a little citrus and spice. Yummy!
Ingredients
1 1/2 pound shrimp (21-25 count) peeled, deveined, and rinsed under cool water
3-4 cups fresh broccoli, separated into florets
2-3 Tablespoons olive oil
1-2 garlic cloves, peeled and minced
1 cup orange juice, freshly squeezed
2 Tablespoons soy sauce
1 1/2 Tablespoon granulated sugar
Zest of one orange
1/2 - 1 teaspoon crushed red pepper flakes, depending on how much spice you want, or leave it out
1 teaspoon cornstarch
Sliced green onion for garnish
Sesame seeds for garnish
3 cups Jasmine rice, cooked according to package directions
Instructions
Line a sheet pan with a couple of layers of paper toweling. Place shrimp on the toweling in a single layer. Take another sheet of paper toweling and pat the shrimp dry. Sprinkle with salt and pepper. Set aside
Heat a large skillet over medium-high heat. Add 1 Tablespoon olive oil into the skillet. Add broccoli florets for 3-5 minutes until broccoli is tender. Remove broccoli from the skillet into a bowl or plate and set aside.
Use the same skillet and heat over medium-high heat. Add 1 Tablespoon olive oil. Add minced garlic and let sizzle for 30 seconds or until garlic becomes fragrant. Add red pepper flakes, if using. Place shrimp in the skillet in a single layer. (You may have to cook in 2 batches.)
As soon as the shrimp becomes translucent, flip over the cook the other side. Total cooking time is 2-3 minutes per side, at most. Remove cooked shrimp and garlic, pepper flakes to bowl/plate with the broccoli.
Return the skillet to the stove. Add orange juice, sugar, and soy sauce. Bring to a boil and reduce until slightly thickened.
Mix 1 teaspoon cornstarch with 2 teaspoons cold water. Add to skillet and continue to cook for 1-2 minutes until the sauce becomes shiny. Add orange zest.
Pour finished sauce over shrimp and broccoli. Garnish with sliced green onions and sprinkle with sesame seeds. Serve over cooked hot rice.


 Spaghetti squash is the perfect side or main for children and grandchildren. (Heck, I think it’s fun!) Wouldn’t you love to watch them drag their forks across the flesh and watch the magic happen? It’s fun! Besides, spaghetti squash is filled with vitamin C, vitamin B6, niacin, potassium, manganese, and even some calcium. There are only 42 calories per cup. Seriously, spaghetti squash is a nutritional no-brainer!
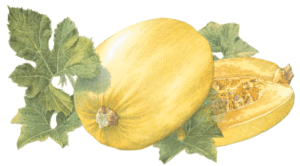 full to share with neighbors. If you have garden space and enthusiastic friends, be sure to include a plant in the spring.


 away with one of the best culinary smells of summer. Some like to use oregano or rosemary or thyme – my go-to is always basil. I prefer the distinctive almost anise-like taste and smell – fresh or dried – to just about any other herb. Personally, I think thyme is over-rated. Parsley is just so, well, bland. I can’t imagine making any pesto with parsley – not my thing. Of course, basil in spaghetti sauce is a must. And my mother used to roast a rump roast in an oven-baking baking bag simply seasoned with salt, pepper, and dried basil mixed with a can of tomato soup – out-of-this-world gravy to pour over mashed potatoes! Basil simply makes me happy.