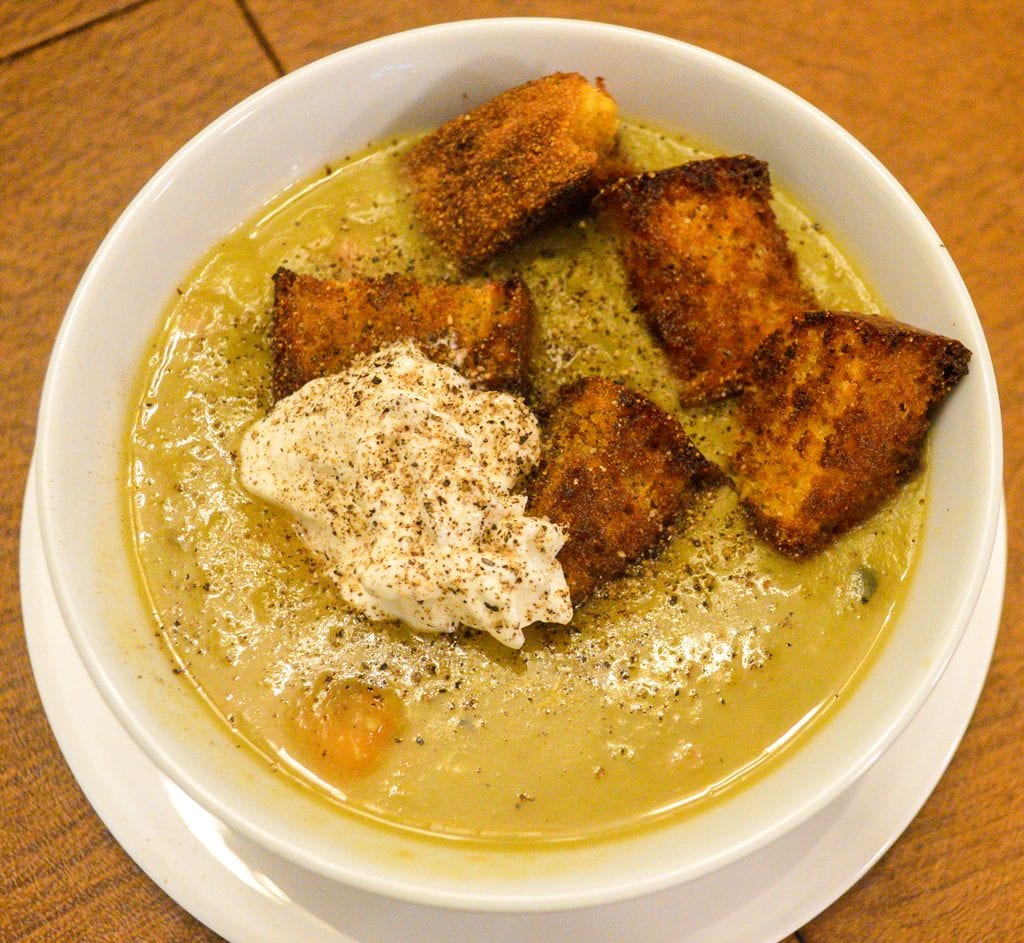
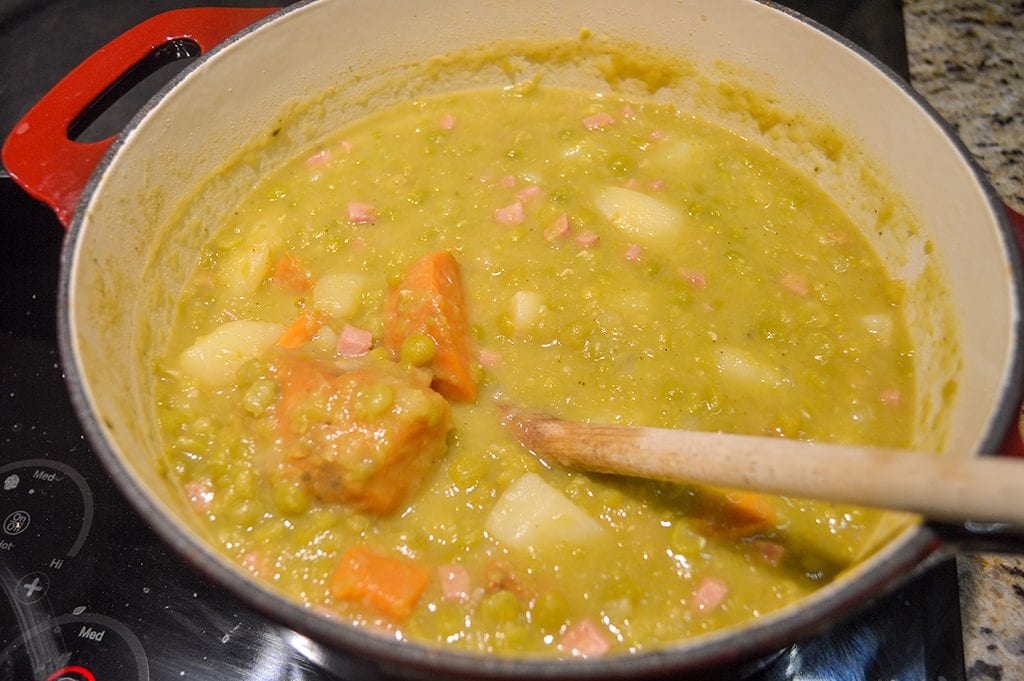
Doesn’t this split pea soup look yummy?? Especially when it’s finished off with crunchy cornbread croutons and a healthy dollop of sour cream. Very yummy!
I’ll admit that I didn’t grow up eating split pea soup. My mother and grandmothers never made it in my memory. My first experience with split pea soup was when my college roommates and I went to dinner at The Magic Pan, a restaurant housed inside the Glendale Town Center Mall at 61st and Keystone in Indianapolis. The Magic Pan was a popular creperie and Cindy, Beth and I loved frequent evening meals there. We ate our fair share of creamy chicken & mushroom crepes and their spinach souffle crepes – fabulous! Beth always ordered a bowl of split pea soup topped with either sour cream or sherry to begin her meal. I was curious. Honestly, I thought split pea soup looked rather disgusting, but one evening I gathered up the strength and tried it myself. OMG – my soup world was transformed! After our dinner outings came to an end and after The Magic Pan closed, I made this soup often and still do. It’s a staple on our winter-time menu. Creamy, without any added cream or half-n-half, and steamy, this soup is perfectly flavored with hints of onion, garlic, and carrots. A delightful spoonful with a little silver of sour cream – perfect.
Are Split Peas and Split Pea Soup Healthy to Eat?
Yes! Seriously healthy! Split Peas are gluten-free – you can replace the cornbread croutons in this recipe for gluten-free ones if you like. Split peas are high in fiber, low in fat, and are protein powerhouses! Instead of a dollop of sour cream, how about a heaping tablespoonful of low-fat Greek yogurt? Split pea soup can be made with low-sodium chicken broth (homemade is great, if you have it on hand) or water, and a variety of diced or cubed healthy vegetables. Sweet potatoes, carrots, and/or celery is what I’d recommend. And there’s no need to thicken the soup with flour and butter or with heavy cream. The peas thicken up enough that you may need to add additional broth or water to thin it out. One recipe I came across suggested squeezing a quarter lemon over a bowl and stirring it into the soup before eating. I contemplated that. I think it would brighten the flavors. And you don’t have to use ham, if you prefer a vegetarian version.
According to the website Speedy Remedies: 7 Health Benefits of Split Peas, these sweet little legumes can help regulate blood sugar, lower cholesterol, reduce cancer risks, promote weight control, improve heart health, help to relieve symptoms of irritable bowel syndrome, and may be helpful in reducing hot flashes.
Get out your soup pot and let’s make up a hearty and healthy batch!
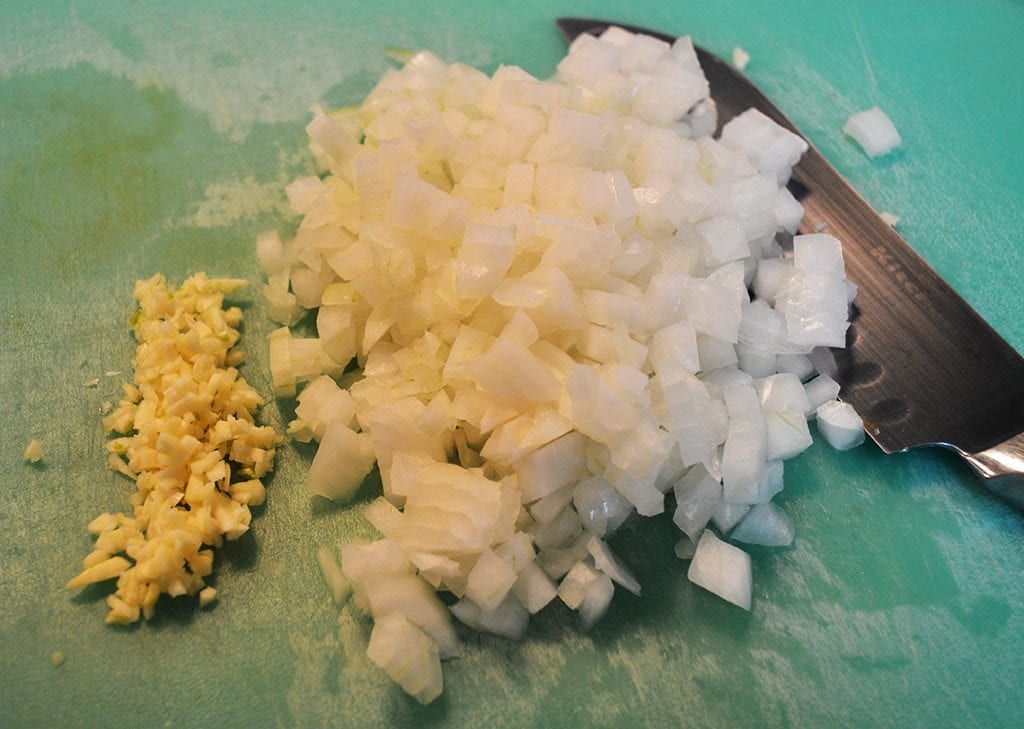
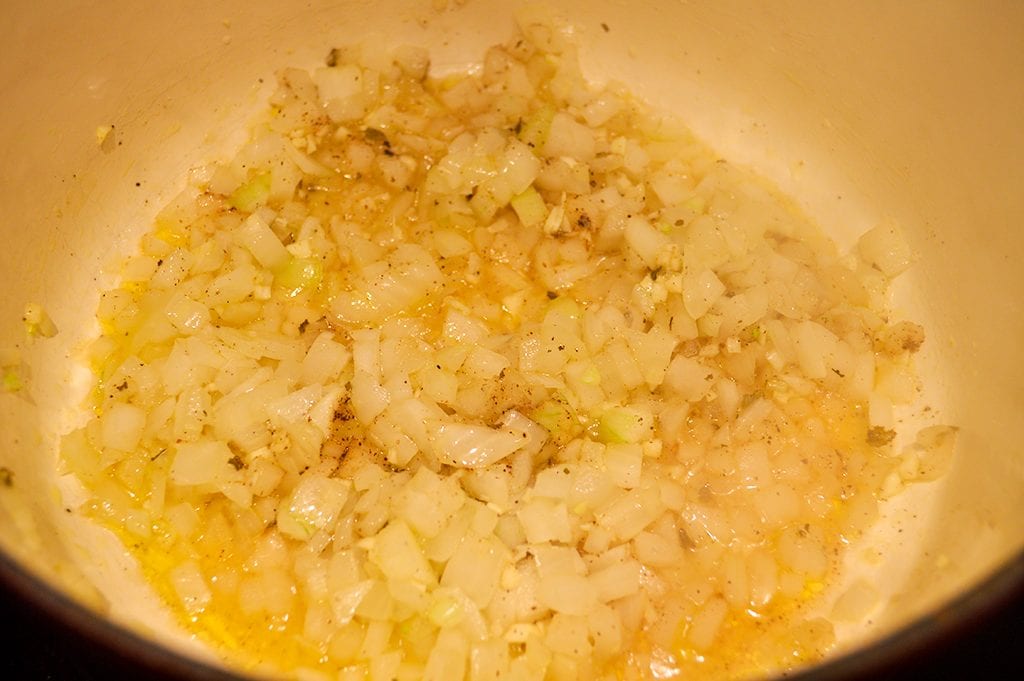
Dice one large yellow onion and mince two cloves garlic. Warm a 5-quart, heavy-bottom dutch oven over medium-high heat. Add 2 Tablespoons extra virgin olive oil and bring to temp. Add the onion and garlic and saute until translucent and fragrant, 3-5 minutes. Add 1 teaspoon dried oregano.
Stir and saute for another minute. At this point, you can add three peeled and diced carrots and/or celery, if using. I’m using sweet potatoes this time (see below).
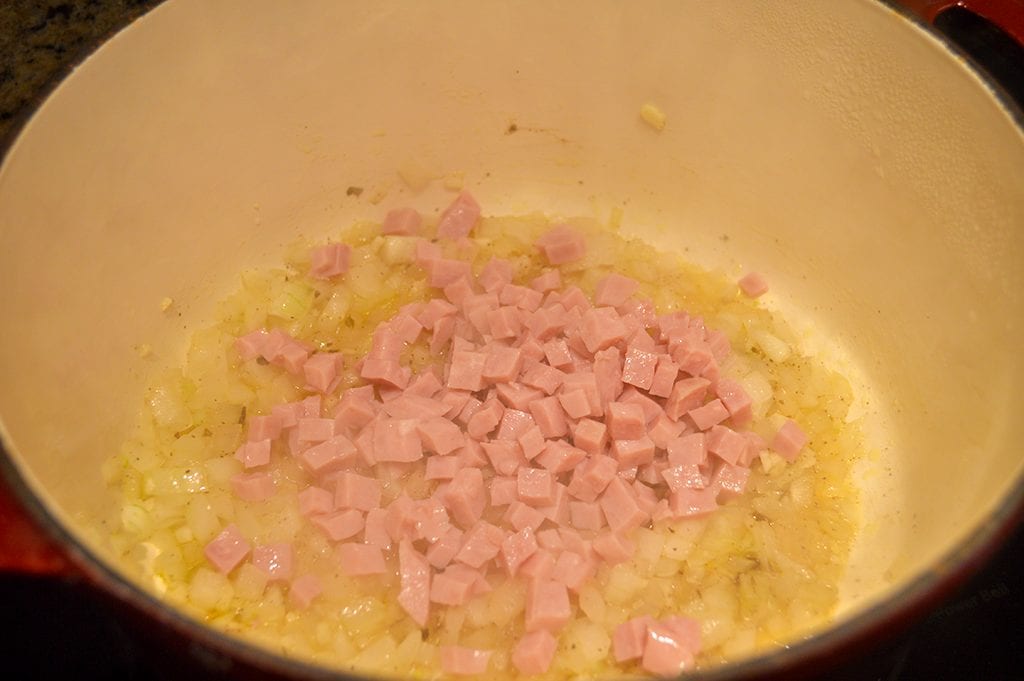
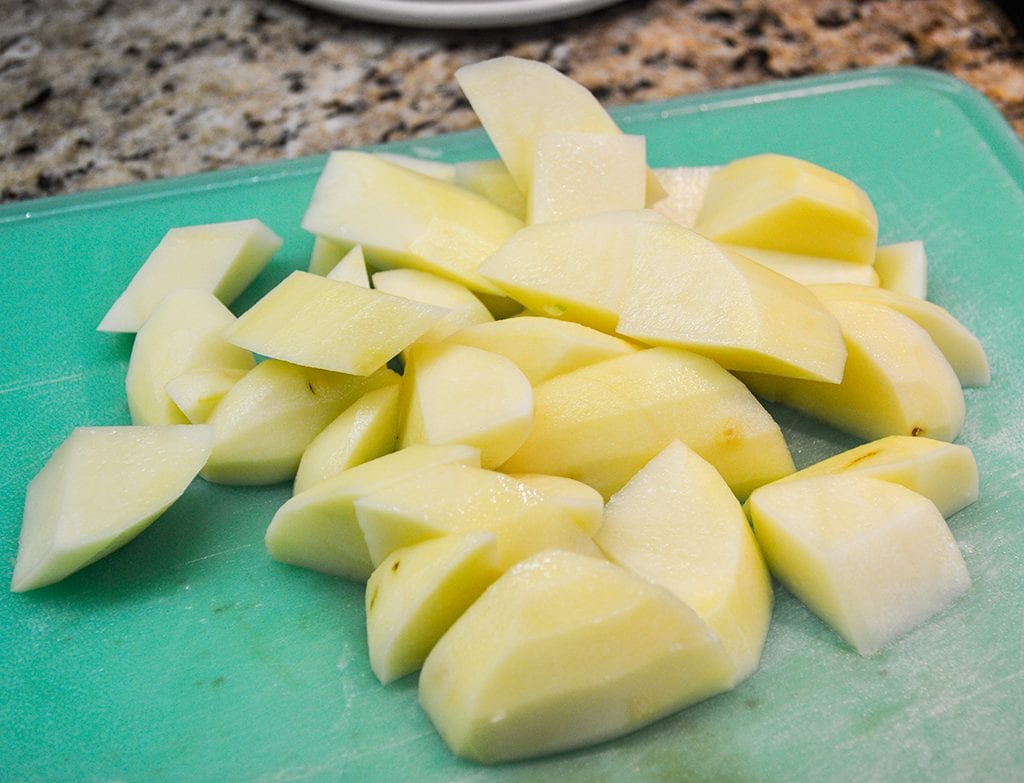
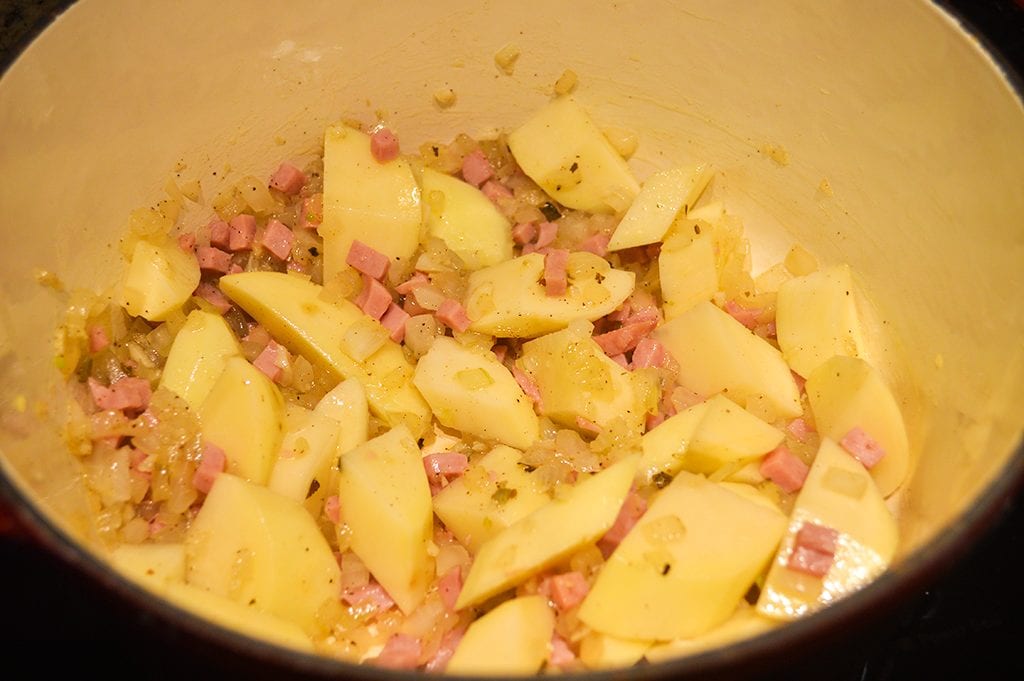
I used diced ham sold in packages at the grocery. But, this is an excellent time to use up leftover ham or you could substitute smoked ham hocks – one or two hocks or a smoked ham shank. If that’s the route you choose, add them to the broth just before you bring everything up to a boil. I like to put diced ham in with the onions and garlic and saute the ham a bit until the meat becomes slightly caramelized to add flavor. And, for this pot, I cut the russet potatoes into large chunks to give the soup a different texture. You can dice the potatoes into smaller pieces or use a couple of cupsful of frozen diced potatoes.
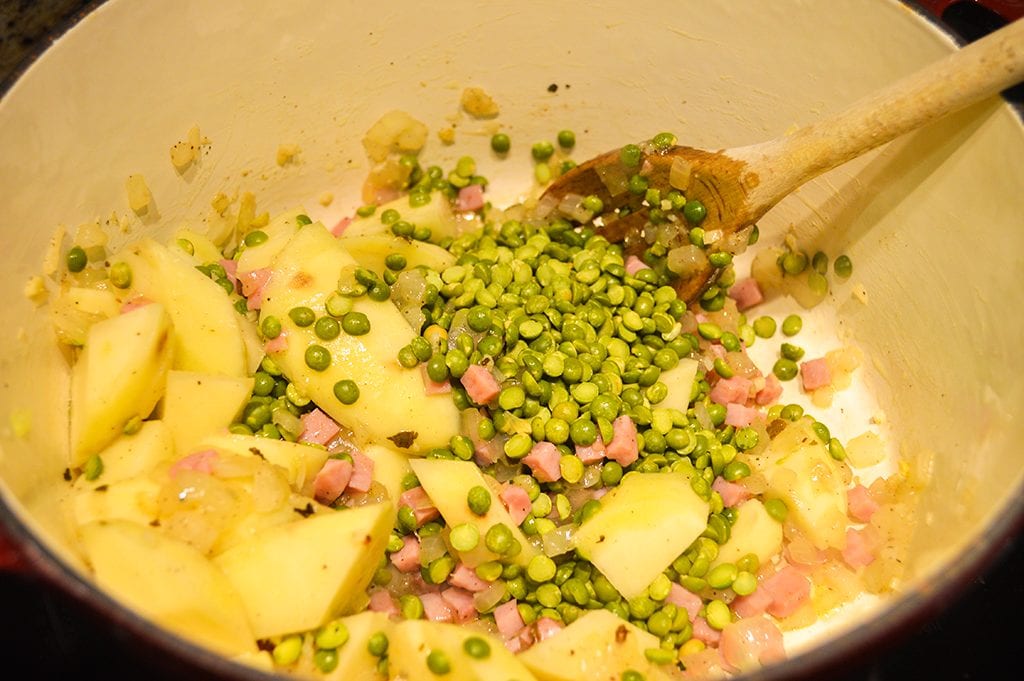
OK – add the potatoes, stir, and then 1/2 pound split peas. Stir all the ingredients.
Add four cups of low-sodium chicken stock (or homemade) and two cups of water. I had a leftover baked sweet potato so I peeled it and cut it into big chunks. If you’re using ham hocks or a shank instead of diced ham, now is the time to add those to the pot. Bring to a boil, reduce to simmer, and cook for 45 minutes. After the initial simmer, stir in the remaining split peas. Stir and continue to simmer for another 45 minutes or until the peas are soft. If using, remove ham hocks or ham shank, remove the meat from the bones, and add it back into the soup.
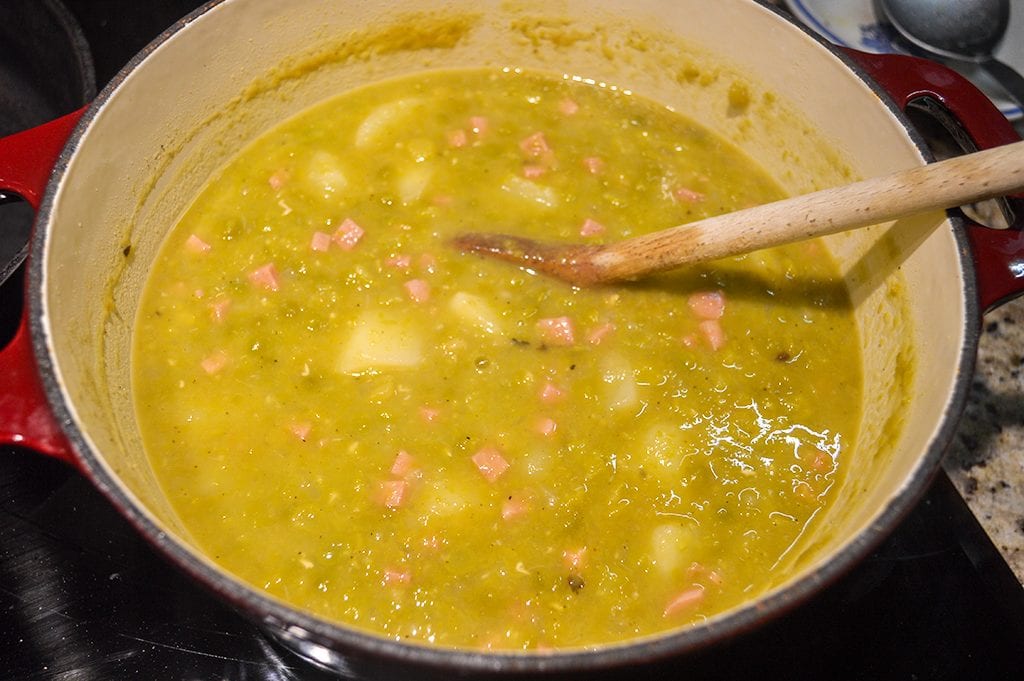
As the soup cooks, foam will rise to the surface. Just take a large spoon and skim off the foam. I’ve learned that the peas foam because of a water-soluble protein in the peas. It won’t hurt anything of you stir it back into the pot and eliminate the skimming step.
Really, there are no hard and fast rules for split pea soup. Once the cooking is complete, you can make the soup as thick (let it simmer a little longer) or as thin (add more broth/water) as you like. Use potato chunks like I’ve done here, or dice them. If you want a soup that looks homogeneous, mash the vegetables or use an immersion blender to break them down to make the soup smoother. You can add 1/2 – 1 cup of half-n-half to make the soup creamier.
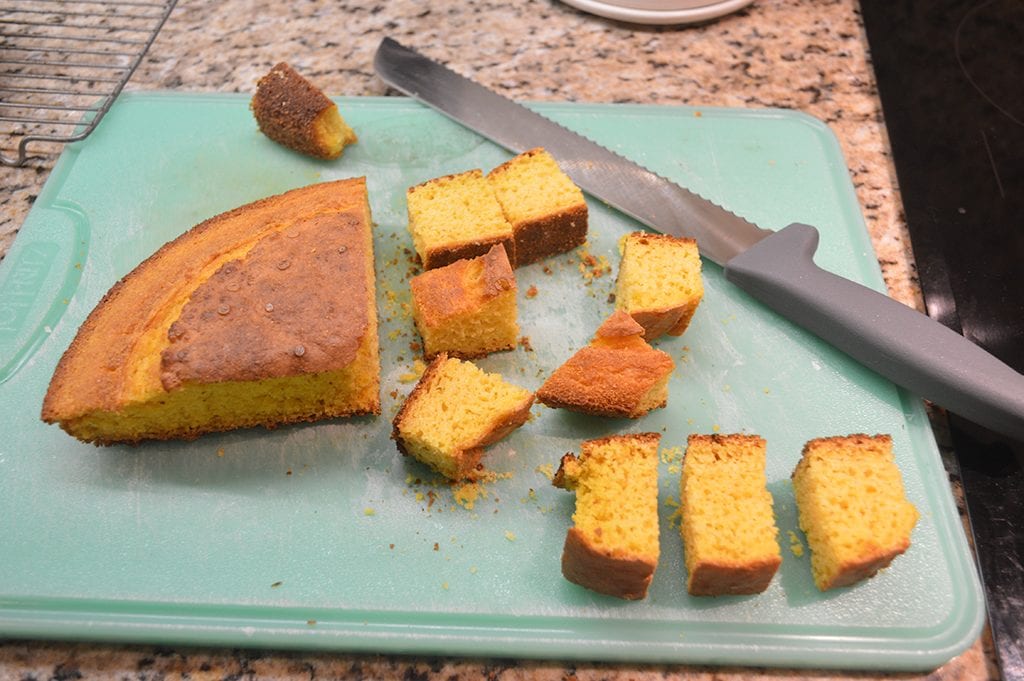
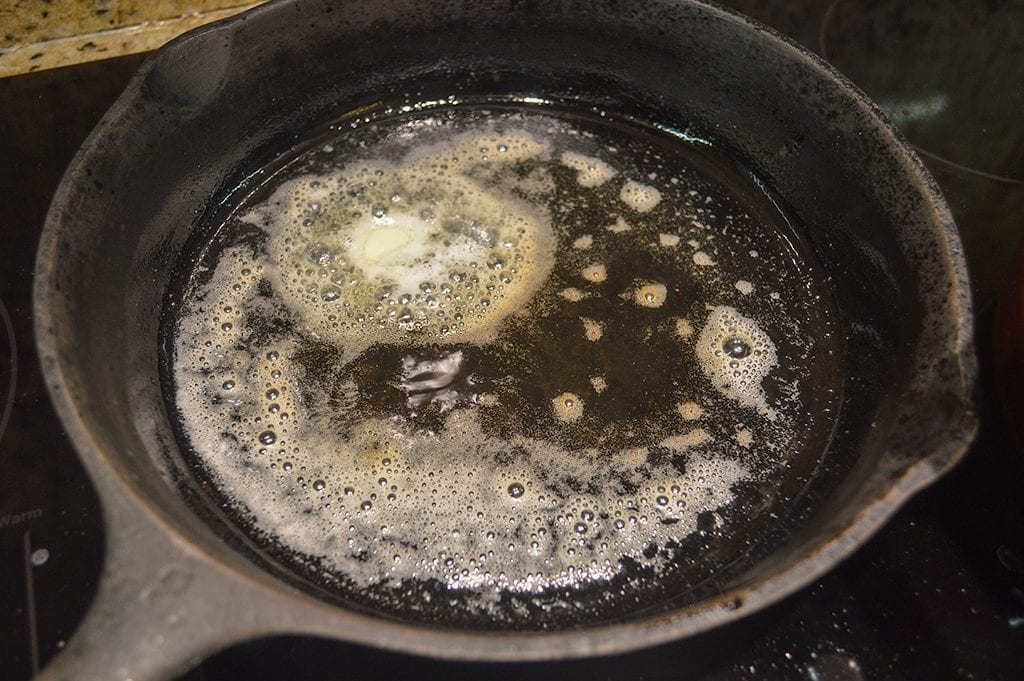
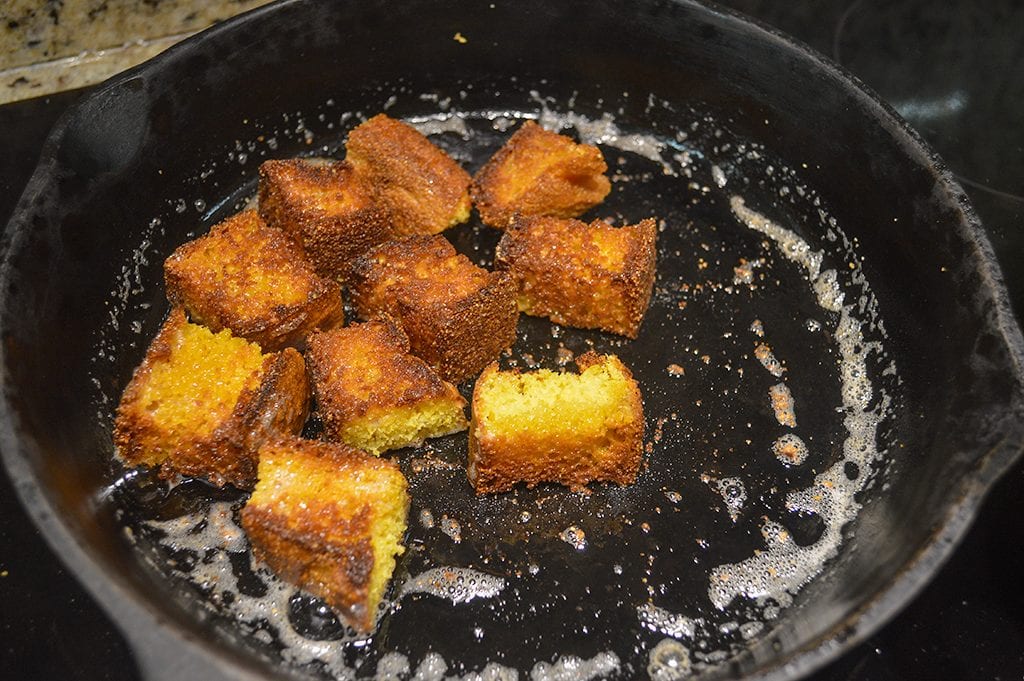
While the soup is cooking, it’s time to make the croutons. Croutons are better made with day-old crusty bread like a baguette. My cornbread was leftover from the day before and is perfect to transform into buttery, crunchy bites. Cut the cornbread into large chunks. In a heavy skillet over medium-high heat, melt 2 Tablespoons olive oil and 3 Tablespoons butter.
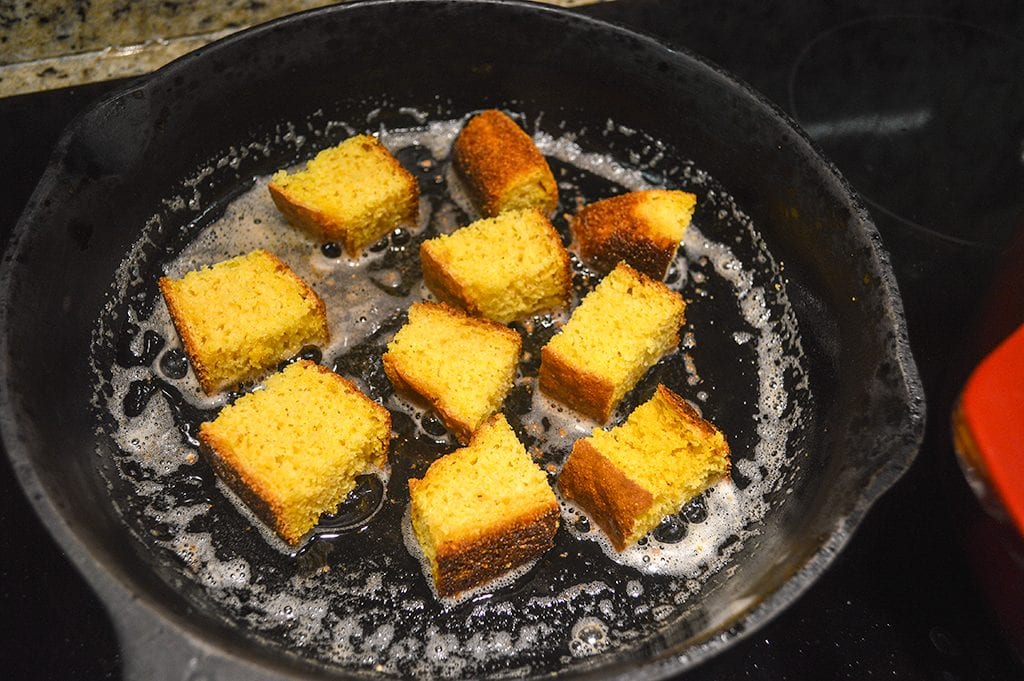
Add the cornbread cubes to the skillet and brown on all sides. Drain on a paper towel to absorb the excess fat.
Voilà! Your beautiful soup is all ready to serve. Top bowlsful with your gorgeous crunchy croutons and a nice dollop of sour cream or Greek yogurt and sprinkle with black pepper. Happy, Happy, Happy! Enjoy!
Hearty & Healthy Split Pea Soup with Ham and Cornbread Croutons
Mimi's Split Pea Soup with Cornbread Croutons is an old-timey and satisfying bowl of steamy comfort. This recipe is a good way to use up leftover ham. Add chunks of russet and sweet potatoes and top off the bowl with crunchy cornbread croutons for a filling wintry meal.
Recipe type: Soups & Stews
Cuisine: French American
Serves: 6-8 servings
Ingredients
2 Tablespoons olive oil
1 large yellow onion, diced
2 cloves garlic, minced
1-2 teaspoons dried oregano
2 stalks celery, diced (optional)
3 carrots, peeled & diced OR sweet potatoes peeled & cut into chunks or diced
2 medium to large russet potatoes, cut into chunks or diced
1 lb diced ham OR 2 smoked ham hocks or 1 large smoked ham shank
1 pound green or yellow dried split peas
6 cups any combination low-sodium chicken broth and water
½ - 1 cup half-n-half (optional)
Croutons
Day old cornbread cut into large cubes OR day old bauguette cut into large cubes crust on
2 Tablespoons olive oil
3 Tablespoons butter, salted or unsalted
Instructions
Over medium-high heat, add olive oil. Once hot add onions & garlic and celery & carrots (if using). Stir and saute until the onion is translucent. Add oregano. Stir. Add ham, stir, and saute until the meat just begins to brown on the edges.5-7 minutes.
Add potatoes, sweet potatoes (if using) and ½ pound of split peas. If you're using ham hocks or a ham shank in place of diced ham, add to the pot. Cover with chicken stock/water. Bring to a boil, reduce to simmer, and cook uncovered for 45 minutes. Skim off the foam that rises to the top of the soup or stir the foam back into the soup Stir the pot every once in a while to prevent vegetables from sticking to the bottom of the pot.
At the end of cooking time, add the remaining split peas. Stir and continue to simmer uncovered for another 45 minutes or until all the vegetables are soft.
Remove ham hocks or shank. Stir. If the soup is too thick, add more chicken broth/water. If it's too thin, continue to simmer longer to the desired thickness. Remove meat from the hocks or shank and add back to the soup.
Leave the potatoes in chunks or mash them with a potato masher or use an immersion blender to make a creamy soup. Add half-n-half if using. Stir. Check for seasoning.
Ladle soup into deep bowls. Add croutons, sour cream or Greek yogurt, and sprinkle with ground black pepper.
For Croutons
Heat olive oil and butter in a 10" skillet over medium, medium-high heat. Once the butter begins to brown, add the cornbread cubes and brown on all sides - less than 5 minutes total. Remove from skillet and drain on paper towels.
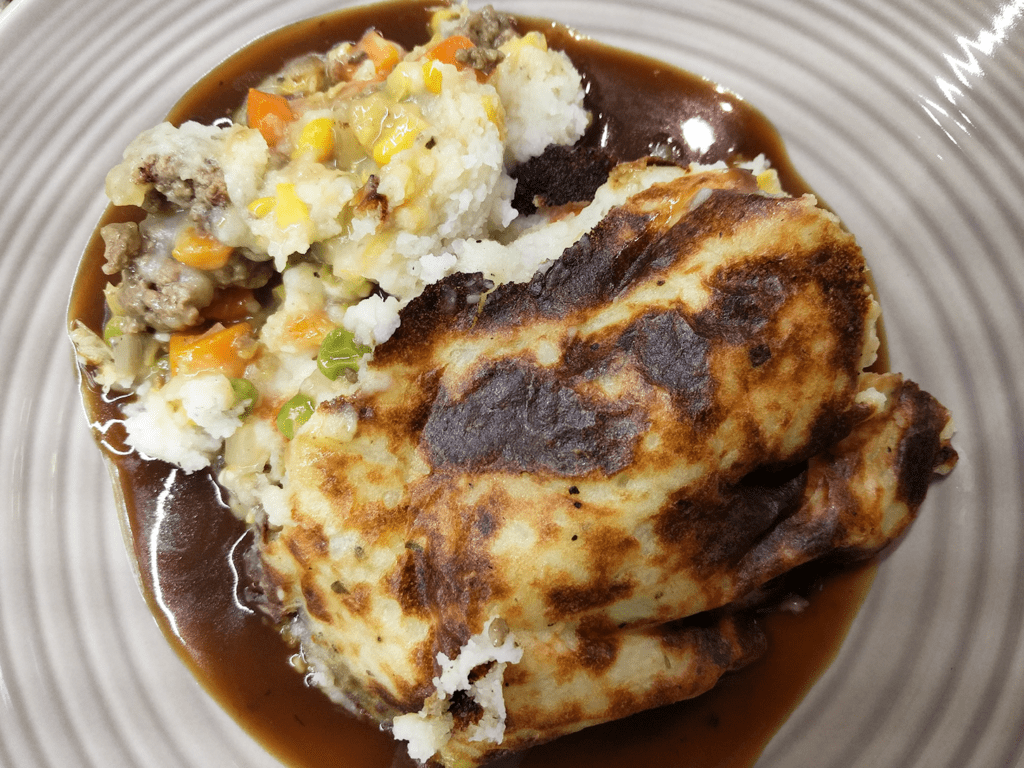
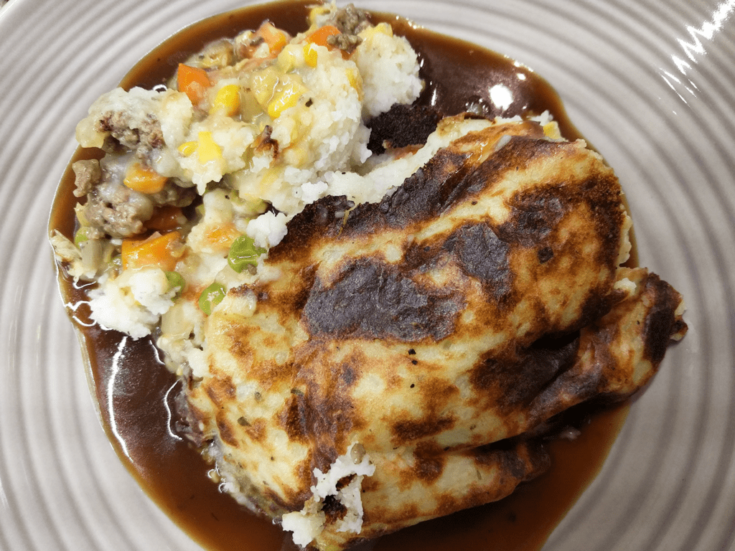
Here’s another comfort food “oldie-but-goodie.” Hot and bubbly from the oven ground meat and vegetable casserole topped with a classic whipped potato crust that forms a nicely browned top layer. Mimi’s Shepherd’s Pie is made special by adding a can of creamed corn on top of the meat and vegetables and before the potato layer is slathered on. Warm and satisfying, indeed. YUM!
And there’s the bonus of the rich brown gravy that comes together as the casserole bakes. This is one of my son-in-law’s favorite meals, cold day or not. And it’s easy to make – this is a good dish for beginning cooks. It’s a no-brainer.
I learned to add creamed corn from this recipe at Bitchin’ Kitchen – who made her own. You know what else she taught me – make the mashed potatoes with both sweet and russet potatoes. The resulting mashed potatoes are orange – perfect to serve kiddos before a Halloween Night on the Town. And she tops the mashed potato topping with crushed potato chips for a nice crunch. Yes, I’ve made her recipe and it’s fabulous! You can find Nadia G’s recipe HERE. I loved Bitchin’ Kitchen. If you’ve never watched her show, it’s well worth seeking out. Nadia was not only a talented chef, but she also has a twisted sense of humor that I adore. Her show was fun, and she and her support cast of characters always me laugh, and I learned a lot, too. Nadia had an interesting take on some classic recipes like KEY LIME HABENERO CHEESECAKE. Or how about her CREAMY GORGONZOLA AND PORTOBELLO MUSHROOM RISOTTO? I adore her pizza dough recipe found HERE At Mimi’s Table.
I digress . . . I did not make this pie with sweet potatoes. However, just substitute 1/2 sweet potatoes and 1/2 russet potatoes and there you have it.
What makes this recipe soooo easy?
We all should have a pound or two of lean ground beef/turkey in the refrigerator/freezer, right? Use your microwave to defrost frozen ground beef/turkey, if that’s what’s happening in your busy world. And all the rest is assembled from frozen vegetables like peas & carrots, chopped onions. And canned creamed corn, if you aren’t into making your own like Nadia G.
Dare I say it? Yes, buy ready-made mashed potatoes, if you must, but you’ll need a couple of packages for adequate top layer cover – that’s expensive but at times necessary. I get it. If you have time, make your own mashed potatoes with russets or russets/sweet potatoes. Your people will love you.
Shall we cook together? I think so.
Start your potatoes
You know the drill. Peel 2-3 pounds of potatoes. I opt for more potatoes – in my family’s world that’s the most important part. Russets are preferred here. Or an equal combination of russets and sweet potatoes. Put the potatoes in a large pot, cover with water, 2 teaspoons Kosher salt, and bring to a boil. Boil potatoes for 10 minutes, turn off the heat, cover with a lid and let sit for another 10 minutes. This is the way I like to prepare potatoes to be mashed. I have an electric stove-top, so when I turn off the heat on the burner, the potatoes benefit from a moving-to-cooler bath. They’re not boiled to death. While the potatoes are processing, I get the meat layer ready.
Get the meat layer ready
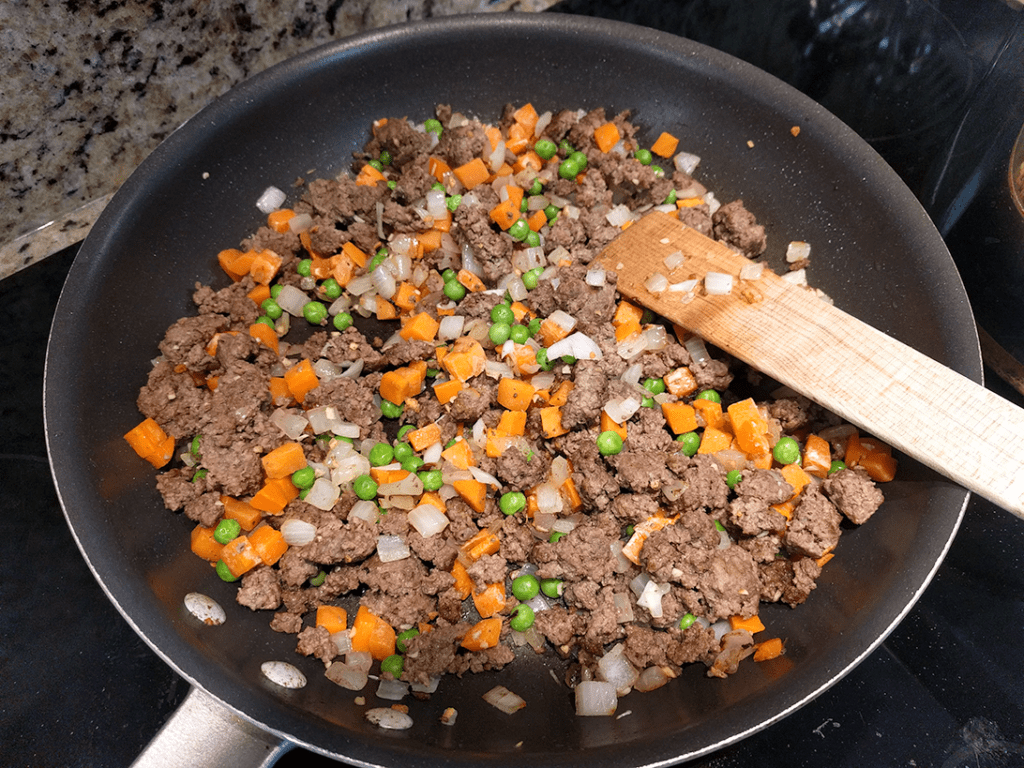
Brown 2 pounds of ground beef over medium-high heat. I would recommend using nothing less than 85% fat content beef. Yes, 75-80% ground beef is cheaper, but there’s so much fat drained off after browning that I’m not sure cheaper ground meat is cost-effective. Nadia uses ground sirloin, a great lean choice. Or use ground turkey browned in 2 Tablespoons of olive oil, an excellent substitute, leaner, protein-packed, and calorie-friendly. Want to go crazy? Use ground lamb.
Once the meat is browned, drain off fat leaving about 2-3 Tablespoons in the skillet. Add one large chopped onion and saute until translucent. Add 1-2 cloves of crushed garlic and cook for another minute. Add 1 teaspoon salt and 1 teaspoon ground black pepper.
Add one cup of beef broth then add 1-2 12oz bags of frozen peas and carrots, stir and cook through until the veggies are thawed and hot. Adding a second bag of frozen vegetables is a fabulous way to extend the recipe – you can serve more people.
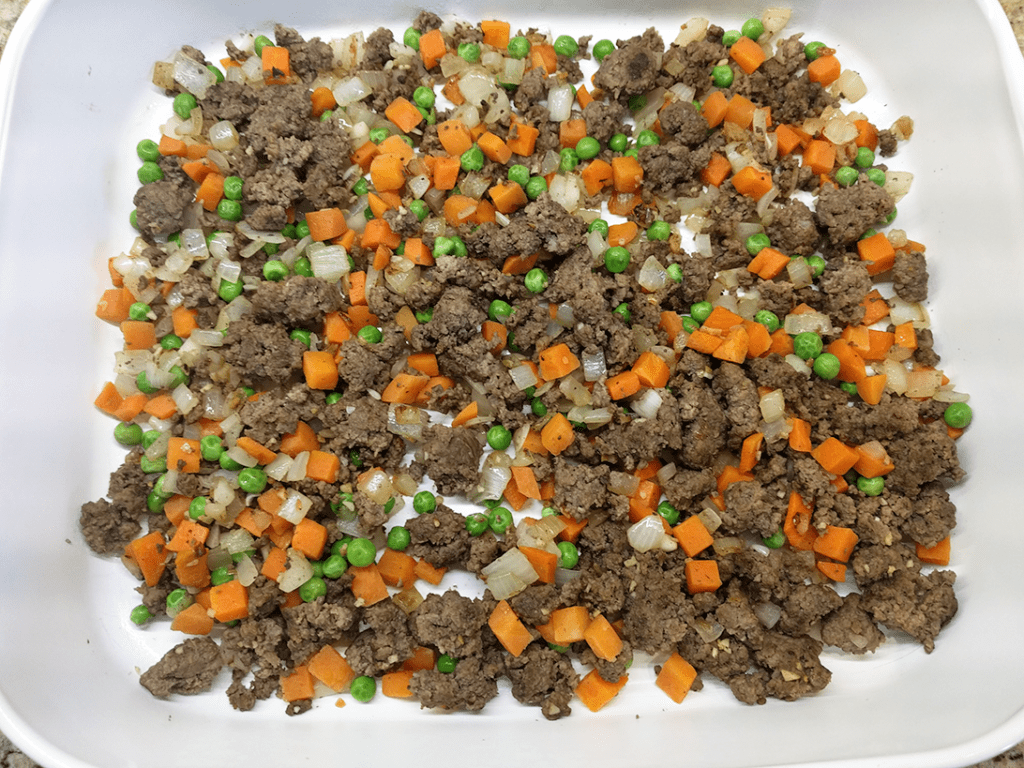
Assemble the first layer
Distribute cooked meat layer in the bottom of a 9×13″ baking dish.
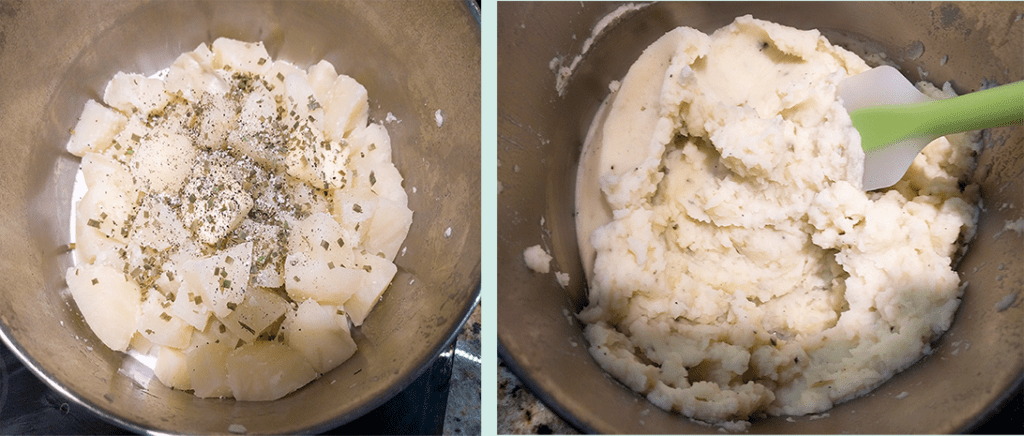
Drain and mash potatoes
I rarely measure the milk/half ‘n half I use. Usually, I just pour maybe 1/2 cup and mash with 1/4 stick of butter. If the potatoes are too dry, I add a little more milk/half ‘n half and mash again until I get the right consistency. For this recipe, it’s OK if the potatoes are a little wet – they’ll spread easier and liquid will evaporate as the casserole bakes. I added 1 teaspoon of dried chives to this batch. And I either use milk or half ‘n half or a mixture of both depending on my mood. If I want really rich tasting mashed potatoes, like for the holidays, I’ll use only half ‘n half.
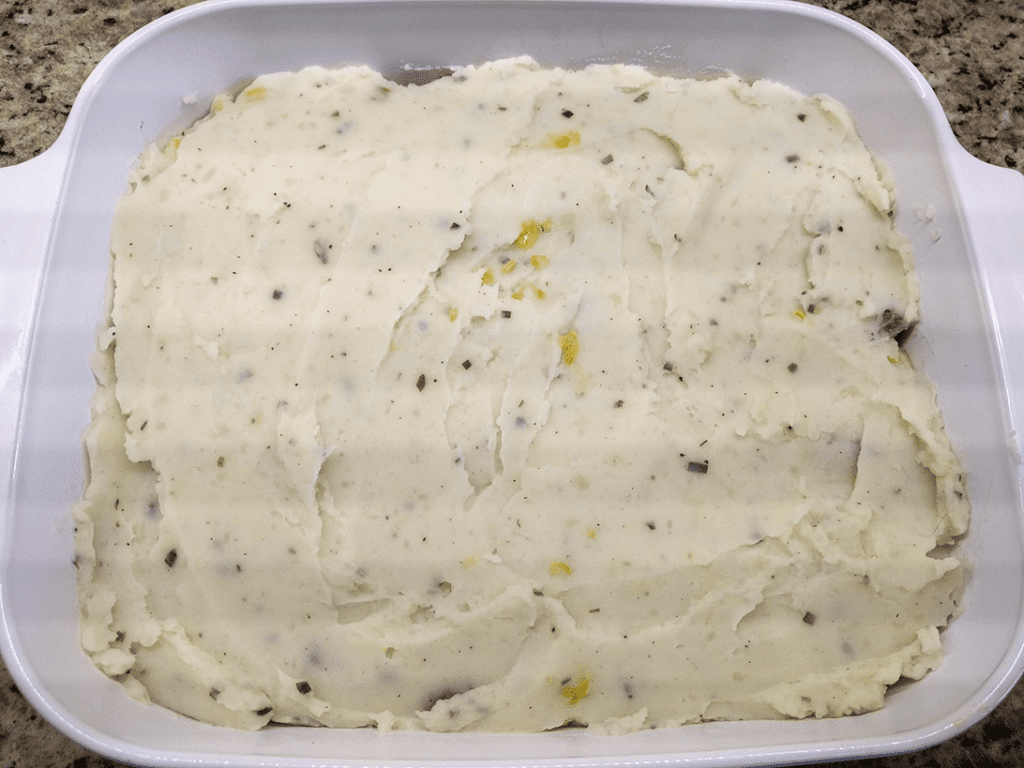
Then slather the mashed potatoes evenly over the meat mixture. Proper Shepherd’s Pie has lots of mashed potatoes.
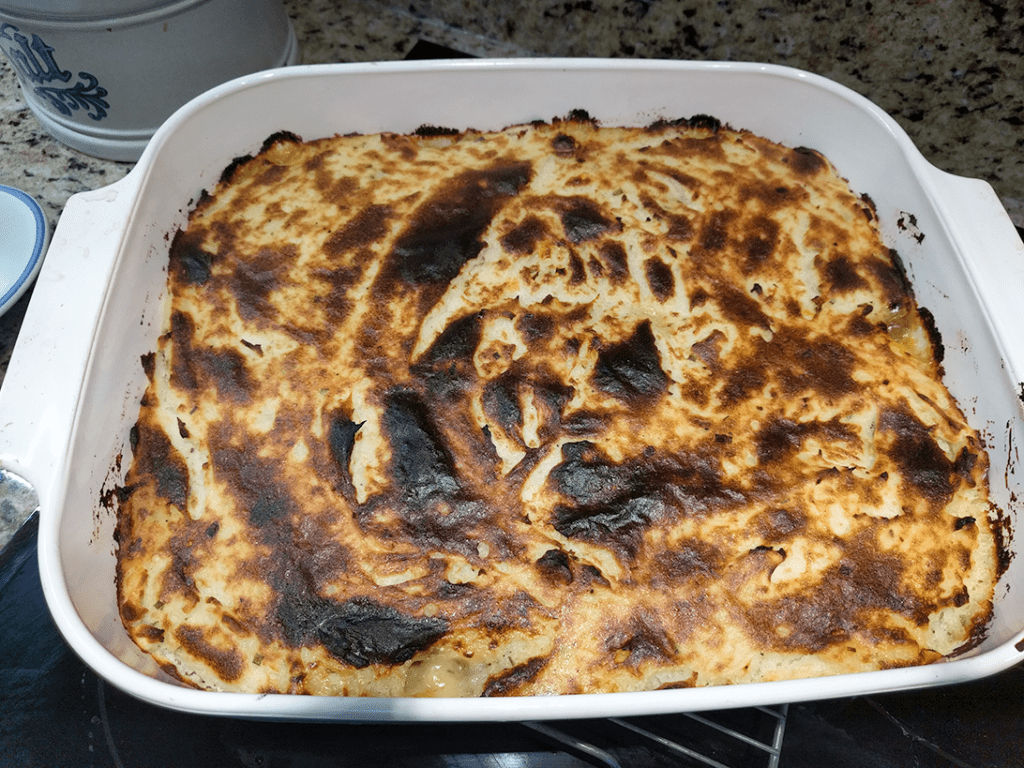
Pop into a 350°F oven for 20-25 minutes. Everything is cooked, so you’re basically heating the casserole through. Flip on the broiler and let the mashed potato layer get nicely browned.
I like to serve my Shepherd’s Pie in bowls, like pasta bowls. And serve with warmed, crusty bread with butter. Or serve with a nice green salad.
Yield: 6-8
Mimi's Shepherd Pie
Here's another comfort food "oldie-but-goodie." Hot and bubbly from the oven ground meat and vegetable casserole topped with a classic whipped potato crust that forms a nicely browned top layer. Mimi's Shepherd's Pie is made special by adding a can of creamed corn on top of the meat and vegetables and before the potato layer is slathered on. Warm and satisfying, indeed. YUM!
Prep Time30 minutes
Cook Time30 minutes
Total Time1 hour
Ingredients
1-2 lbs lean ground beef, ground turkey, or ground lamb
1 large onion, diced
1-2 cloves garlic, minced
1-2 12oz bags frozen mixed vegetables without diced potatoes
1 15oz can creamed corn
2-3 pounds potatoes, any combination of russets and sweet potatoes, peeled and cut into cubes
1/2 - 3/4 cup whole milk
1/4 cup unsalted butter
1 teaspoon dried chives
Instructions
Heat oven to 350F degrees.
In a large skillet over medium-high heat, brown ground meat. If you're using very lean meat, add 1-2 Tablespoons olive oil to promote browning.
Add diced onion and minced garlic. Stir and sautee for 3-5 minutes until the onions become translucent.
Add frozen vegetables and stir until heated through.
While the meat is browning, prepare the potatoes. Put cubed potatoes in a large pan, cover with water, add 2 teaspoons salt, and bring to a boil. Reduce heat a bit and allow potatoes to gently boil for 10 minutes. Turn off heat, put on the pan lid, and allow potatoes to steep in the hot water for 10 minutes. Drain. Return potatoes to the heat. Add milk or half 'n half and butter, and mash. Add chives and stir to combine. Taste and season with salt and pepper, if needed.
Once the meat/vegetable mixture is done, spread evenly in the bottom of a 9x13" baking dish. Add one cup beef broth or reconstituted beef bullion. Evenly spread creamed corn over the meat/vegetable mixture.
Slather the top of the casserole with warm mashed potatoes, and spread evenly. Bake uncovered in the oven for 20-25 minutes or until the casserole is heated through.
Turn on the broiler and let the mashed potato layer evenly brown. About 5-10 minutes.
Serve in wide pasta-type bowls with warm crusty bread and butter, or with a nice green salad.
Notes
Mimi's Shepherd's Pie is an excellent recipe for anyone learning to cook. It's simple and straightforward.
Use any lean meat - beef, turkey or lamb. If using lamb, I'd crank up the garlic. And use russet potatoes or a combination of white and sweet potatoes for the mashed layer.
If you love squash and chili, you’re going to love this recipe from the Half Baked Harvest blog. Tieghan Gerard has done it again!
Cincinnati Chili Stuffed Spaghetti Squash is best served on a beautiful fall or winter day, whether it’s cool, downright cold, rainy, or snowy, Tieghan’s dish is only one of her phenomenal comfort food offerings. Sweet and stringy spaghetti squash topped with a mild chili flavored with cinnamon and allspice is a yummy pairing of flavors. Tieghan has several recipes where she uses cooked spaghetti squash as the vessel for a wide variety of cheesy and meaty toppings. Like this one for Spanakopita Stuffed Spaghetti Squash. You must check out her blog.
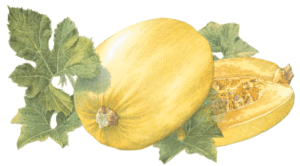
I started cooking spaghetti squash several years ago. I like that it’s not pasta. It has a slightly sweet flavor with a stringy bite. Most times I baked it, scraped the beautiful flesh into a serving bowl, tossed with butter, salt, pepper, and a little Parmesan cheese, and served it as a side dish. But I like the idea of serving the squash strands in their skins, little boats, topped with great stuff. I’m serving this more and more as I’m looking for lower-calorie meals. Yeah, there’s meat and cheese and stuff, but count the squash as a low-calorie alternative to pasta, and you won’t feel guilty at all about the calorie-filled toppings. And think about carbs – there are practically no carbs! Spaghetti squash is gluten-free! Hail, hail to the lovely spaghetti squash!
Spaghetti squash is the perfect side or main for children and grandchildren. (Heck, I think it’s fun!) Wouldn’t you love to watch them drag their forks across the flesh and watch the magic happen? It’s fun! Besides, spaghetti squash is filled with vitamin C, vitamin B6, niacin, potassium, manganese, and even some calcium. There are only 42 calories per cup. Seriously, spaghetti squash is a nutritional no-brainer!
Spaghetti squash is also very easy to grow. I planted a couple of plants in my Billings garden one year and had wheelbarrows full to share with neighbors. If you have garden space and enthusiastic friends, be sure to include a plant in the spring.
Are you curious? Are you hopeful? Are you HUNGRY??
Make Cincinnati Chili – OH, Yes!
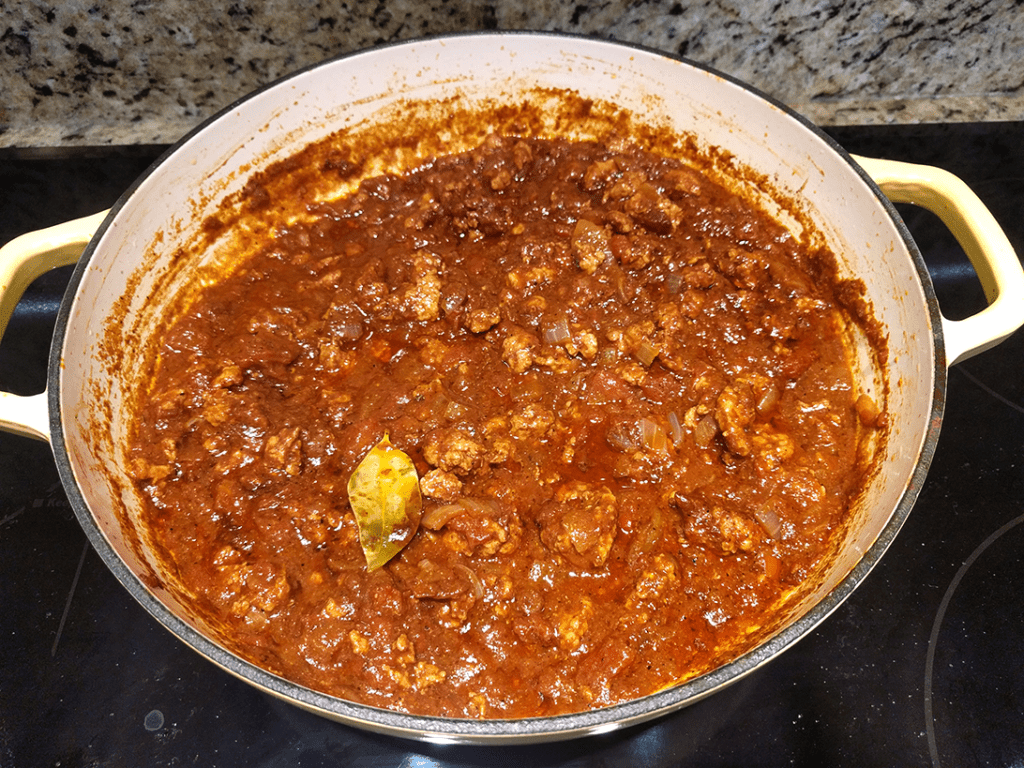
Put together ingredients for Cincinnati chili. Skyline Chili in Cincinnati is a food icon and this chili recipe pays homage to that recipe, perfectly done. Yes, it should simmer for 3 hours, stovetop or CrockPot. I made the full chili recipe, served half, and froze the other half for Coney dogs or traditionally served over spaghetti with lots of cheese on top. I’ve visited Skyline Chili in Cincinnati. Eaten their Coney’s – two of the cutest little hot dogs in buns topped with lots of chili, chopped onion, and tons of finely shredded cheddar cheese. I’ve ordered their chili over spaghetti topped with lots of cheddar cheese. This stuff is addicting. Tieghan’s mother’s recipe is spot on!
Make the chili with ground turkey or ground chicken instead of ground beef. Add a can of drained and rinsed pinto beans or light kidney beans in place of or along with the ground meat, if that’s the way you roll.
When I pick spaghetti squash, I go big or go home. I made this recipe with one large squash. Richard & I ate half for dinner and had leftovers the next night. It’s the perfect dish served for 2 people with enthusiastic appetites.
Bake Your Spaghetti Squash
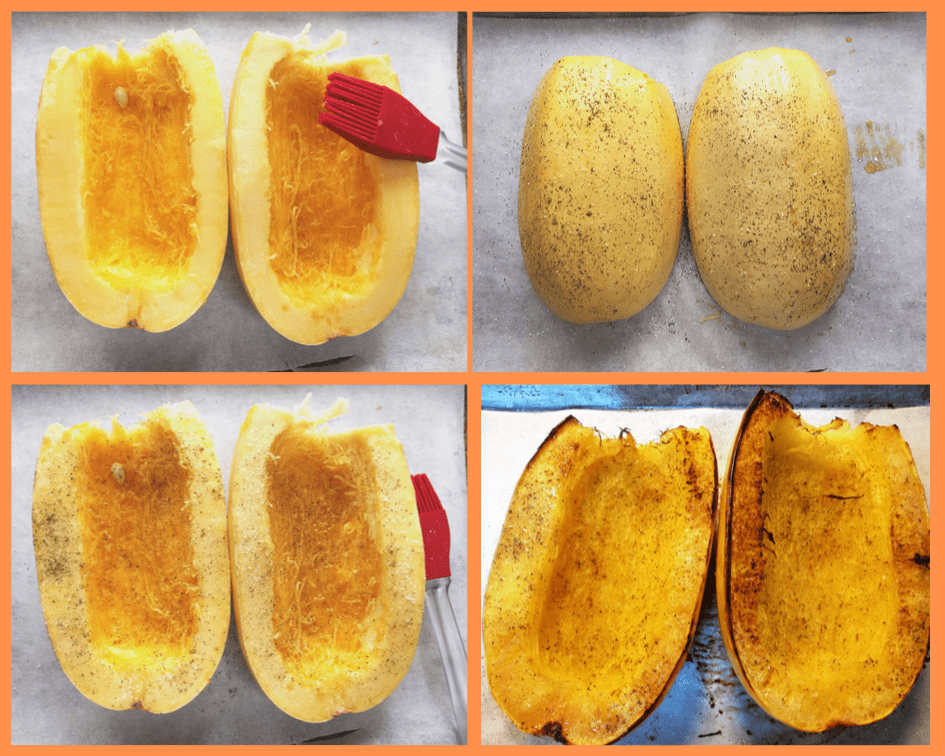
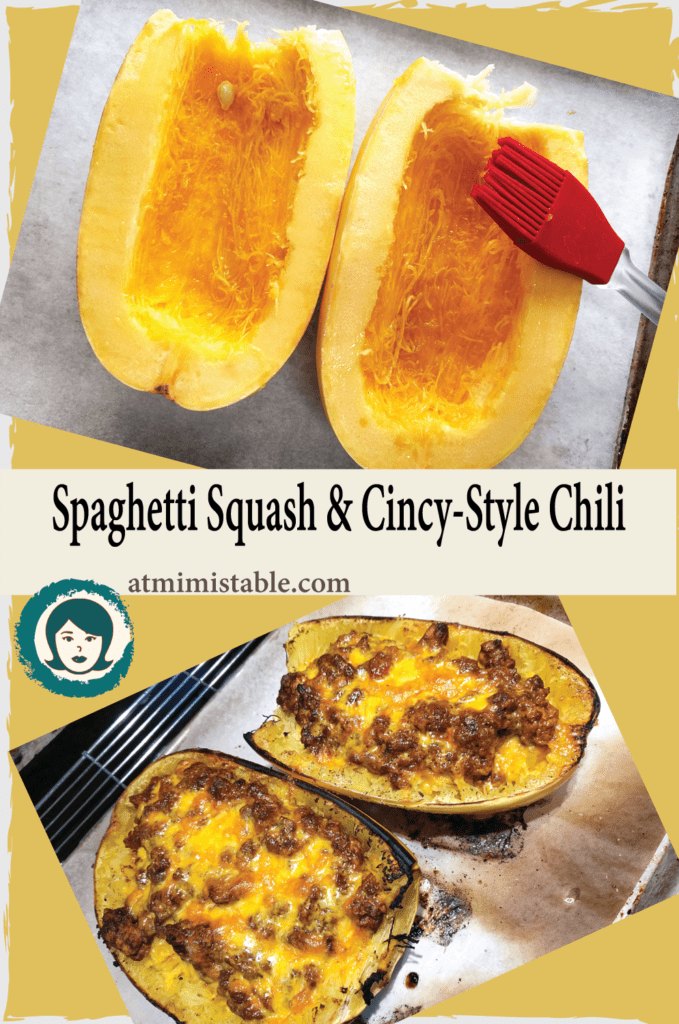
Cut the squash in half and remove seeds. Place the halves on a parchment-lined baking sheet. Brush the inside lightly with olive and sprinkle salt and pepper. Turn the halves over and repeat. Bake skin side up in a 350°F oven for 45-50 minutes. Remove and allow to slightly cool.
OK – I hear you. “Mimi, 3 hours for chili and 1 hour to bake the squash? Are you nuts?” Yes, I am but it’s so worth it!
Return to oven/broiler to melt the cheese. I chose the broiler.
I need to pay more attention to showing my dishes at serving. I’m just so excited about eating that I don’t pay too much attention to photography once dinner is ready and I’m hungry! HA! You can serve with sour cream, extra cheese, mashed avocado, salsa.
Cincinnati Chili Stuffed Spaghetti Squash is best served on a beautiful fall or winter day, whether it's cool, downright cold, rainy, or snowy, Tieghan's dish is only one of her phenomenal comfort food offerings. Sweet and stringy spaghetti squash topped with a mild chili flavored with cinnamon is a yummy pairing of flavors. Tieghan has several recipes where she uses cooked spaghetti squash as the vessel for a wide variety of cheesy and meaty toppings. Like this one for Spanakopita Stuffed Spaghetti Squash. You must check out her blog.
1 Tablespoon unsweetened cocoa powder, dark or regular
2 teaspoons cumin
1½ teaspoon allspice
1½ teaspoon Kosher salt
1½ teaspoon cinnamon
1 teaspoon cayenne
½ teaspoon garlic powder, not garlic salt
2 cups chicken broth
1-28oz can crushed tomatoes
2-8oz cans tomato paste
1½ teaspoons vinegar (I used cider vinegar)
1 Tablespoon Worchestershire sauce
2 bay leaves
2 small or 4 large spaghetti squash
Olive Oil
Salt & Pepper
2-3 cups shredded sharp cheddar cheese
Instructions
Set a large heavy bottom soup pot over medium heat. Add olive oil then onion and cook for 5 minutes.
Add the ground meat to the pot, breaking it up with a spatula as it browns.
Add the next nine ingredients. Stir and briefly cook until the spices become fragrant.
Add chicken broth, tomatoes, tomato paste, vinegar, Worchestershire sauce and bay leaves.
Stir and simmer over low heat or in a CrockPot for at least 3 hours.
About an hour before you're ready to eat, heat the oven to 350F.
Cut the squash in half, remove the seeds, and set the ovals flesh side up on a parchment lined baking sheet.
Brush the inside with olive oil. Sprinkle with salt and pepper.
Turn the halves over, skin side up, and repeat.
Bake for 45-50 minutes. If your squash is small, 30-40 minutes.
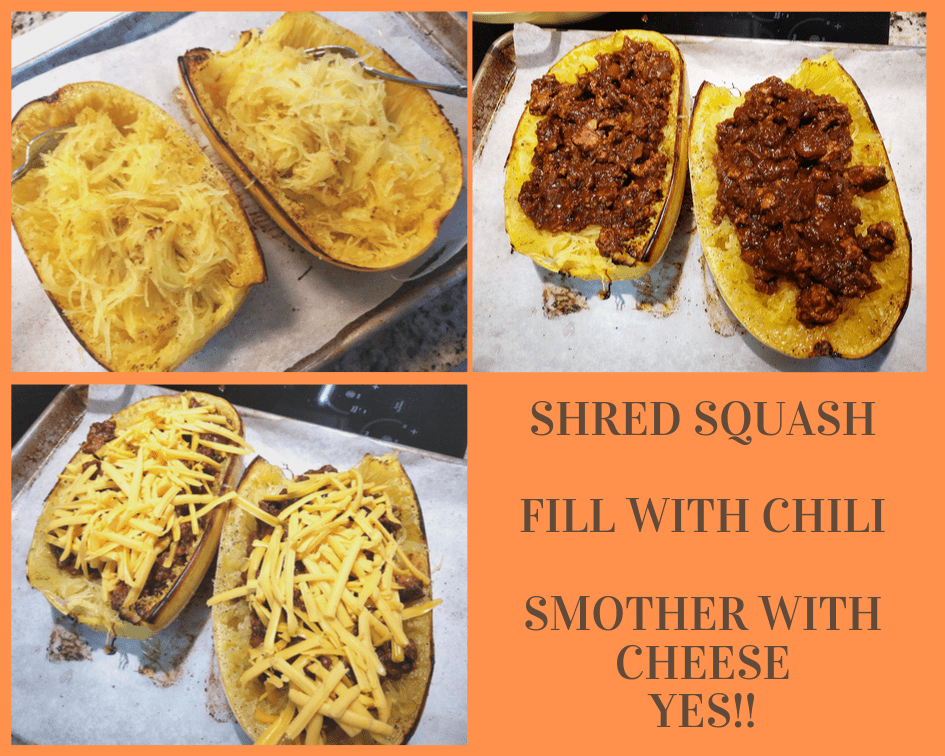
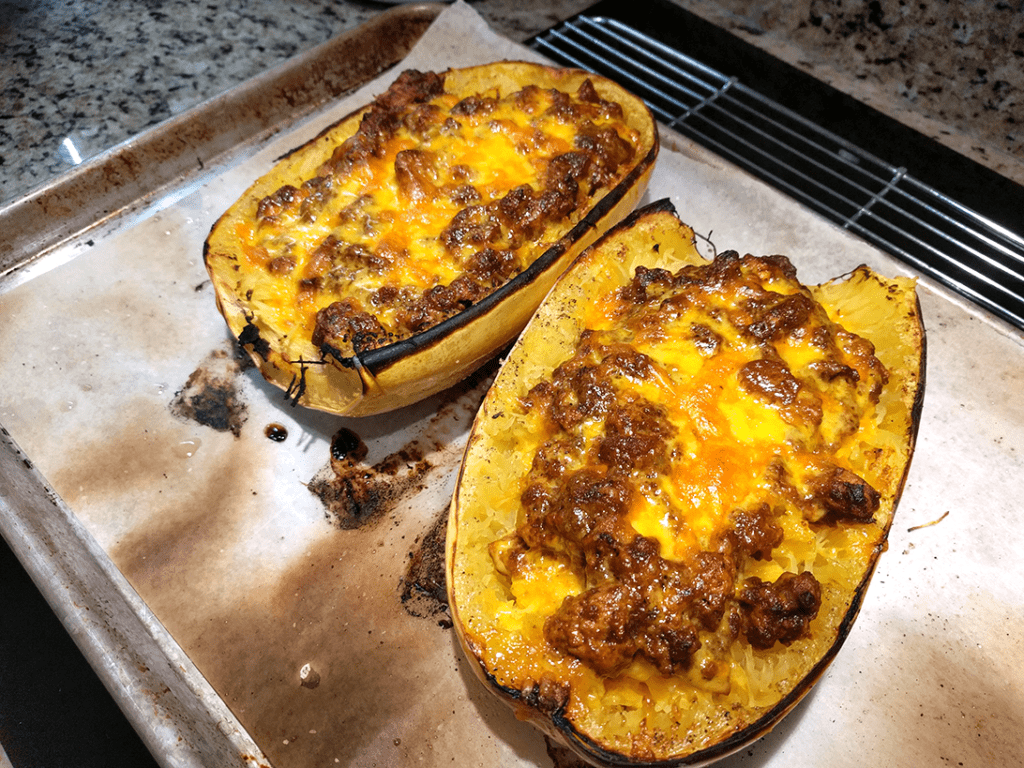
When done, flip the squash over into a shallow bowl and begin to scrap the insides with a fork to reveal the lovely squash strands.
Ladle chili over the squash inside the cavity. Liberally sprinkle with shredded cheddar cheese.
Place under the broiler for 5-7 minutes until the cheese is melted and slightly browned.
Notes
Cincinnati-Style chili is mild and has a slightly sweet flavor from the cinnamon and allspice in the recipe. Feel free to serve with your favorite chili toppings - sour cream, mashed avocado, extra cheese, crackers, hot sauce. You can use cans of drained and rinsed pinto or light red kidney beans in addition to or to replace part or all the ground meat.
We all need a quick and easy meal like this one in our arsenal. And everyone likely has a pantry and freezer with the ingredient staples on hand. Easy Crustless Taco Pie is not only delicious but gluten-free, low carb and keto-friendly. And did I mention this taco pie is kid-friendly, too? A win-win in my book of tricks.
There’s nothing special that you need. Ground beef or ground turkey, eggs, cheddar cheese, taco seasoning are the staples here.
Serve with a dollop of full-fat sour cream (keto-friendly), guacamole, spicy salsa and a simple shredded lettuce salad on the side with diced tomatoes.
Here’s a tip! I like to buy ground beef in multi-pound packages from a big box store. The meat is usually leaner, 85-15% fat and I find it is cheaper per pound than buying ground meat in the grocery. When you make this recipe, why not brown 2-3 pounds at a time. Then separate the cooked meat into equal portions, load a freezer bag or two and store in the freezer. You’ll have cooked ground meat at the ready for another recipe Sloppy Joe’s or quick meat spaghetti sauce or tacos. Looking for even leaner meat? Use ground turkey instead. I’ve found ground turkey may be substituted for ground beef in most recipes.
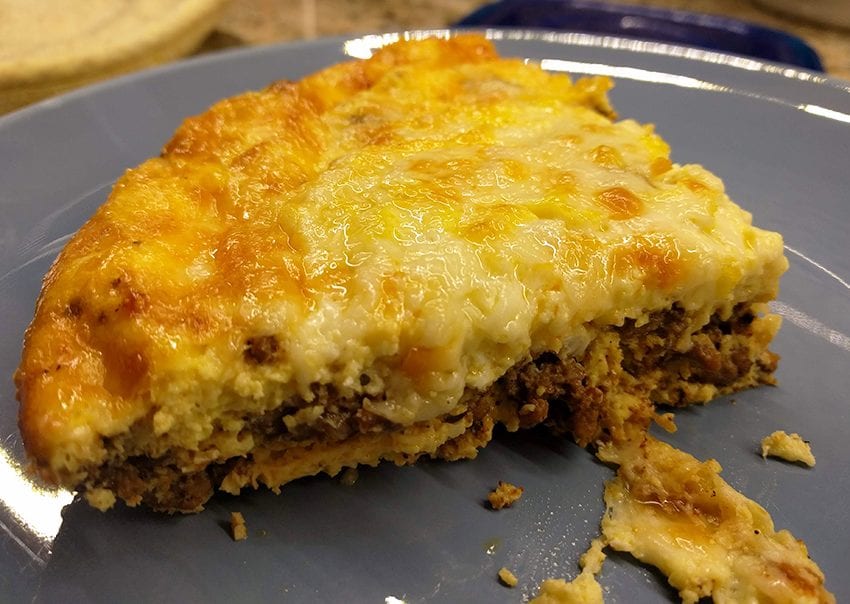
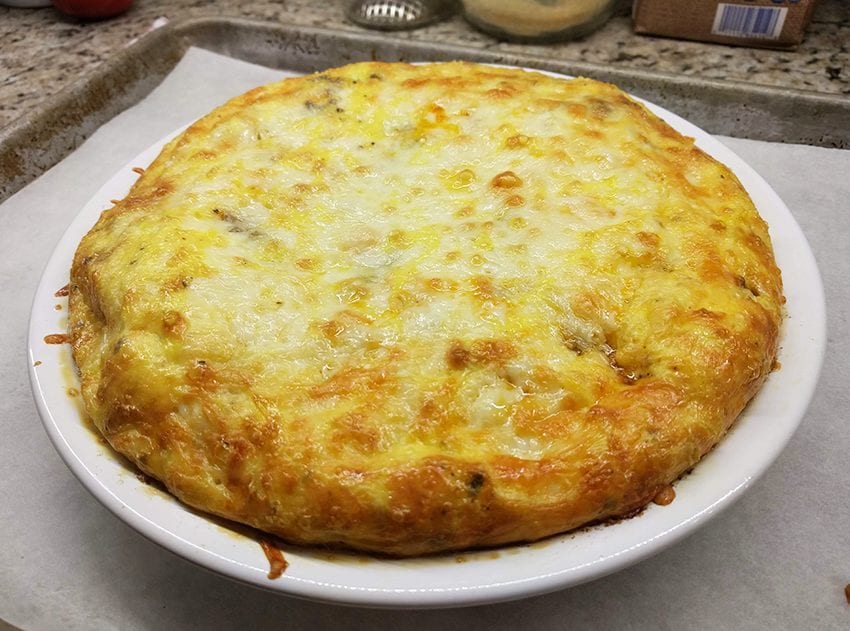
I had to share this recipe if only to show the beautiful rise from the eggs. Yes, the dish deflates a little while it cools. But look! Isn’t it pretty out of the oven?
You’re happy! Your kids are happy! Everyone’s happy!
Yield: 4
Quick and Easy, Crustless Taco Pie - Gluten Free & Low Carb!
We all need a quick, simple, and easy meal like this one in our arsenal. And everyone likely has a pantry and freezer with the ingredient staples on hand. Quick and Easy Crustless Taco Pie is not only delicious but gluten-free and low carb. And did I mention kid friendly? A win-win in my book of tricks.
Prep Time20 minutes
Cook Time35 minutes
Total Time55 minutes
Ingredients
In a small bowl combine:
2 Tablespoons chili powder
1 Tablespoon paprika
1 Tablespoon kosher salt
1 Tablespoon ground black pepper
2 teaspoons ground cumin
1 teaspoon garlic powder
1 teaspoon onion powder
1 Mexican oregano
1/4 - 1/2 cayenne pepper, if desired
For Meat Filling
1 pound ground beef or turkey
1 medium onion, diced
2 cloves garlic, minced
3 Tablespoons taco seasoning, above
6 large eggs
1 cup heavy cream or half-n-half
4-6 oz shredded cheddar cheese, or Monterey Jack, or Monterey Pepper Jack depending on your pepper heat
Instructions
Taco Pie Assembly
Preheat oven to 350F degrees.
Spray 9" pie dish with cooking spray. Set aside.
In a 12" skillet, brown ground meat over medium-high heat until cooked through and no pink is showing.
Add diced onion and minced garlic. Saute for 1 minute.
Add 3 Tablespoons (or one package) of taco seasoning to the browned meat. Continue to cook for 2 minutes until the mix becomes fragrant.
Spread the meat filling into the prepared pie dish.
In a large bowl, whisk the eggs, cream or half-n-half. Pour slowly over meat mixture in the pie pan.
Sprinkle with shredded cheese. Bake for 30 minutes or until the center has nicely risen and begins to brown. 30-40 minutes.
Remove taco pie to a cooling rack for 5 minutes. Cut into wedges and serve with accompaniments, if desired.
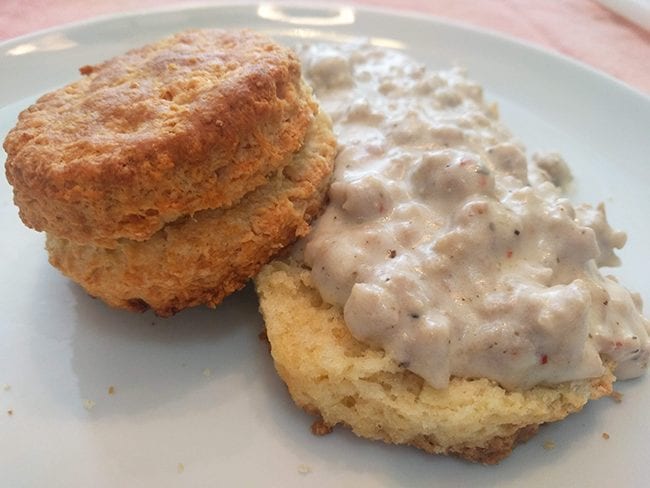
The cure for wet, wintery blues: Buttery Buttermilk Biscuits and Creamy Sausage Gravy!
We’re still having some lingering wet winter weather here in central-Indiana even after Punxsutawney Phil did not see his shadow this year which forecasts an early Spring. Officially, Spring is just 11 days off and 10 days until the official vernal equinox on March 20th. FYI: Did you know that the Vernal Equinox always falls on March 19, 20, and 21? I did not – thanks Old Farmer’s Almanac.
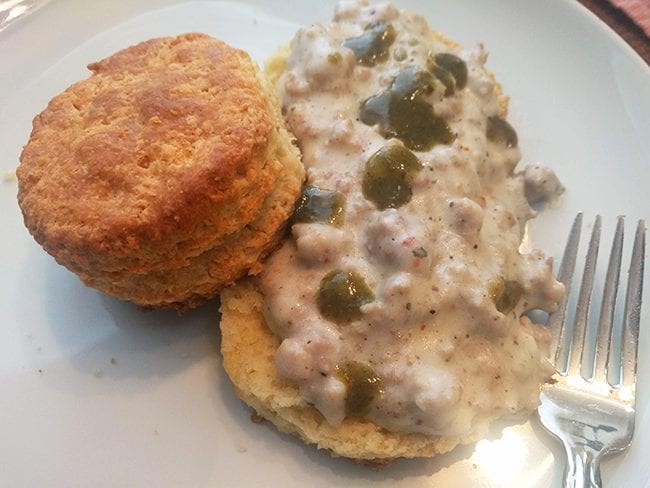
This is a roundabout way of saying that I enjoy making and eating biscuits and sausage gravy when it’s chilly outside. There’s nothing like the smell of freshly baked biscuits coming out of the oven on a cold morning just waiting to be smothered with creamy sausage gravy. It’s a fabulous way to start a wintery day. Or any other day, for that matter. Biscuits and sausage gravy is also a great hangover food. Served with crispy hash brown potatoes and/or fried or scrambled eggs, you’ll have your mojo back in a hurry. And don’t forget the hot sauce. I like the Tobasco® brand’s green jalapeno sauce. It’s milder than their other sauces and I enjoy its flavor on this dish, an omelet, or plain old scrambled eggs with cheese.
Recently on Pinterest, I noticed several posts for Joanna Gaines’ biscuit recipe from her new cookbook “Magnolia Table, A Collection of Recipes for Gathering.” One blogger testified that these were the highest rising, tenderest, fluffiest, and buttery biscuits she’s ever made. No wonder – the recipe calls for self-rising flour, and baking powder, and baking soda. And eggs – have not seen that before. Ever in search of a biscuit that rivals my tried-and-true Fannie Farmer’s recipe, I just had to try it out.
The Result
Right off the bat, I halved the recipe. The original makes 20 or so. Breakfast was just the two of us and I figured we could wolf down six and nibble on the rest throughout the day. Auggie, our beloved four-legged biscuit eater, loves the leftovers, too.
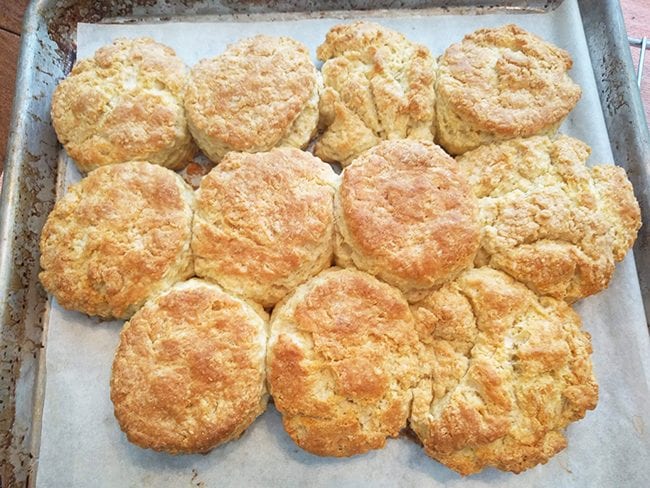
My biscuits didn’t rise evenly. I had one that towered above the rest. I figured this was the anticipated rise. They are large biscuits. I cut them with a 2 3/4″ biscuit cutter. I’ll probably use a smaller one in the future. (Hint: If you need to stretch the recipe to serve one or two more guests, a smaller cutter will add 2-4 more biscuits to the yield.)
Instructions said to place the unbaked rounds next to each other. I think if I’d spread them apart they would have risen better. Other than that, the finished product was as promised. Joanna’s biscuits sported a crispy outside crust and a lovely fluffy inside and a rich buttery flavor. Richard and I were very happy biscuit eaters! Made full-sized, these would be fabulous made into a breakfast sandwich.
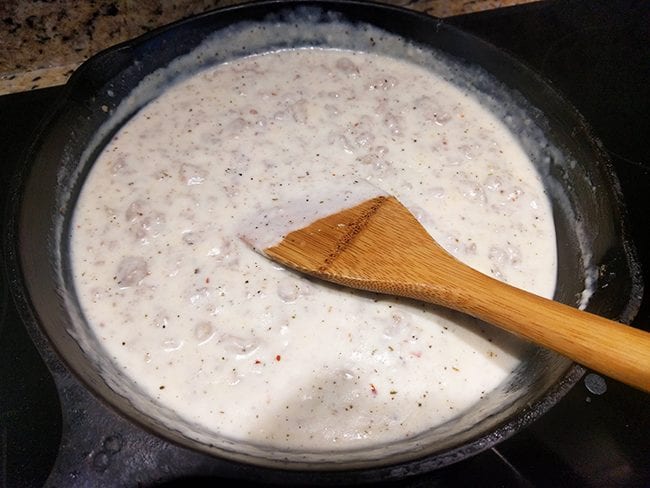
Creamy Sausage Gravy
There are two recipes for sausage gravy on my blog. This one and my first one simply titled simply “Buttermilk Biscuits and Gravy.” Another family favorite but the gravy turned out a little thin. So, this time I bulked up the mixture with one pound of sage seasoned breakfast pork sausage, 1/4 cup flour, and 2 cups whole milk – I halved the gravy recipe. Ah, that’s better. I browned off the sausage, made the biscuits, and finished the sausage gravy while they were baking.
Looks fabulous – RIGHT! Let’s make up a batch, shall we?
Buttery Buttermilk Biscuits and Creamy Sausage Gravy
Biscuit and Gravy fans, gear up for one of the best buttery biscuit and creamy gravy recipes out there. Large buttermilk biscuits hot from the oven perfectly crunchy on the outside and steamy and fluffy on the inside begging to be smothered with perfectly seasoned sausage gravy.
Prep Time50 minutes
Cook Time20 minutes
Total Time1 hour10 minutes
Ingredients
For the Biscuits
4 cups self-rising flour (or make your own with 1 1/2 teaspoon baking powder and 1/2 teaspoon salt per cup)
2 Tablespoons baking powder
1 teaspoon baking soda
2-3 Tablespoons granulated sugar, optional
1 teaspoon salt
3./4 pound (3 sticks) unsalted butter cut into 1/2 inch cubes
2 large eggs, beaten
1 1/2 cups buttermilk (or make your own with 1 Tablespoon vinegar or lemon juice in 1 cup milk-let stand 5 minutes or one cup plain yogurt)
Remember: This recipe a whole lot of breakfast! Don't be afraid to half it for manageable servings. Unless you're feeding an army, then make it all!
Preheat oven to 400F degrees.
In a heavy skillet over medium-high heat, brown sausage until there is no longer any trace of pink. Tilt the pan and spoon off most of the accumulated fat leaving 1-2 Tablespoons. Set aside.
In a large mixing bowl, whisk together self-rising flour, baking powder, sugar, if using, and salt.
Add cubed cold butter to the bowl. Using a pastry blender, incorporate the butter into the flour mix until it is crumbly or resembles small peas. (Or use a food processor - put flour mix into work bowl, add cold butter, and pulse until the butter is incorporated. You should be able to see chunks of butter throughout. Pour into a large bowl and continue with the recipe.)
Measure buttermilk in a 2-cup measure. Add eggs and beat with a fork.
Make a well in the center of the flour in the bowl and add buttermilk/egg mix. Using a fork or a wooden spoon, lightly toss the flour into the liquid scrapping the sides until everything's mixed together.
If the dough is a little dry, add more buttermilk 1 Tablespoon at a time. If the dough is wet, add more flour 1/4 cup at a time.
Cover the bowl with plastic wrap and refrigerate for 30 minutes.
Dump the dough onto a floured work surface. Bring the dough together and knead up to 10 times. A bench scrapper comes in handy!
Pat the dough into a rectangle. Using a bench scrapper, lift and fold 1/3 of the dough onto itself from the short end. Repeat with the other short end. Gently pat or roll the dough into a rectangle and repeat the folding process 2 more times.
Flour a rolling pin and roll into 1/2 inch thickness.
Cut the dough into 2 3/4 inch rounds and place on a half-sheet pan lined with parchment paper 1/4 inch apart - not touching.. (To get a higher yield, use a smaller biscuit cutter.)
Beat an egg with 1 Tablespoon buttermilk and brush over tops.
Bake 15-20 minutes or until the tops are nicely browned.
While the Biscuits are Baking
Return skillet with sausage to the stovetop. Warm sausage over medium-high heat until it begins to sizzle. Sprinkle flour over the sausage and stir until no white is showing.
Lower heat to medium. Slowly add whole milk to the sausage and stir with a wooden spoon or flat whisk. The gravy will thicken as it cooks. If the gravy becomes too thick for your liking, add more milk 1/2 cup at a time until you reach desired consistency.
Notes
This recipe makes a lot of large biscuits - 20 or more. I would half the recipe if serving 4-6. You can also use a smaller biscuit cutter for a bigger yield.
This makes a lot of creamy sausage gravy. Feel free to half it, too!
Serve with alone, with a few shakes of jalapeno hot sauce, scrambled or fried eggs, or golden hash brown potatoes. Enjoy!!

 Are Split Peas and Split Pea Soup Healthy to Eat?


 Spaghetti squash is the perfect side or main for children and grandchildren. (Heck, I think it’s fun!) Wouldn’t you love to watch them drag their forks across the flesh and watch the magic happen? It’s fun! Besides, spaghetti squash is filled with